
Tools
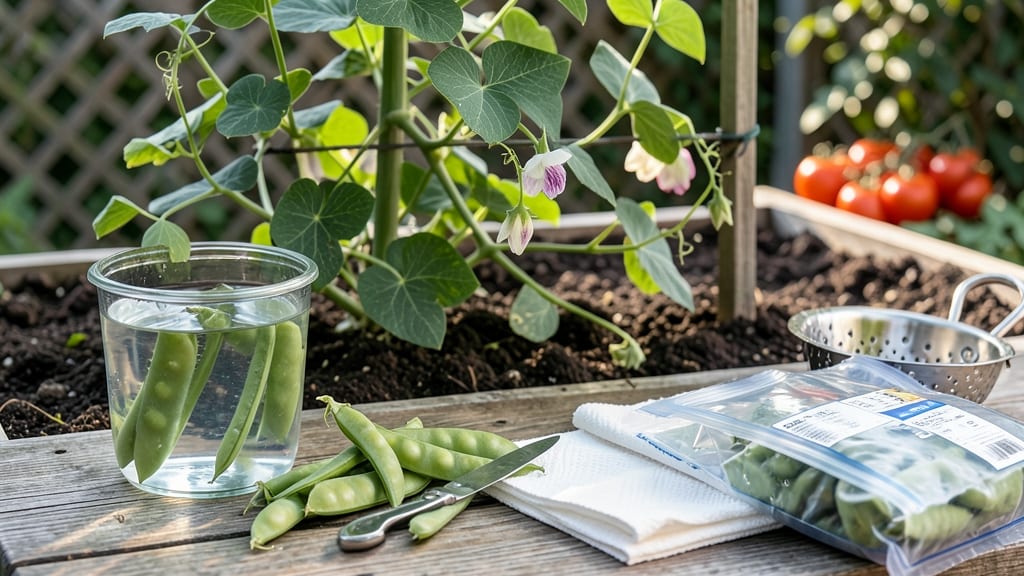
Freezing snow peas at their peak keeps that garden-fresh crunch all winter long. ✨ I learned the hard way that waiting too long turns them mushy—so timing is everything.
The secret lies in blanching just right, then flash-freezing to lock in flavor and texture before they even touch the freezer shelf.
You'll need fresh pods, ice water, a steamer basket, and airtight containers or freezer bags. The process takes about 45 minutes from garden to freezer, and the results?
Peas that taste like summer even in February. Most people skip blanching, but that's what preserves that satisfying snap when you bite into them later.
After blanching, spread the peas on a tray to freeze solid before transferring to bags. This prevents clumping, so you can grab just what you need without thawing everything.
Properly stored, they'll keep their quality for up to 12 months, though I recommend using them within 6 for best texture.
This method works for both in-pod and shelled peas, and it's perfect for extending your harvest when the garden's still producing but your freezer is full of other summer goodies. The key is speed—get them from garden to freezer within 24 hours of picking for peak quality.
📚 In This Guide
- What you need
- Instructions
- Tips and common mistakes
- Wrapping up and next steps
What you need
- ● Fresh snow peas: 1–2 lbs (harvested at peak ripeness—pods should be bright green and crisp)
- ● Water: 1–2 gallons (for blanching)
- ● Ice: Enough to fill a large bowl (for quick cooling)
- ● Freezer-safe bags or containers: Option 1: Quart-sized ziplock freezer bags (3–5 bags, depending on yield)
- ● Option 2: Vacuum-sealed bags (for longer shelf life)
- ● Option 3: Rigid plastic containers (with airtight lids, like Tupperware)
- ● Cutting board & sharp knife (for trimming)
- ● Large pot or blanching basket (deep enough to submerge peas)
- ● Slotted spoon or tongs (for easy transfer)
- ● Paper towels or clean kitchen towel (for drying)
- ● Permanent marker (to label bags with date)
- ● Vacuum sealer (extends shelf life to 12+ months)
- ● Glove or tongs (to protect hands from ice-cold water)
- ● Timer (to track blanching time precisely)
- ● Food-safe labels (for a polished touch)
Step-by-step instructions for freezing snow peas from the garden
Here’s the foolproof method I use to preserve garden-fresh snow peas with perfect texture and flavor.
🌱 Step 1: Harvest and Prepare Peas for Freezing
Pick snow peas when pods are flat, crisp, and 3-4 inches long—they’ll still be tender when frozen. Snap off stems and rinse pods in cool water to remove dirt and debris. I like to spread them on a clean kitchen towel to air-dry for 5-10 minutes—this prevents ice crystals from forming on the surface during freezing.
Don’t skip the drying step. Even a little moisture on the pods leads to soggy, mushy peas after thawing. If you’re short on time, pat them dry with a paper towel instead, but avoid pressing too hard—you want to preserve their delicate structure.
💧 Step 2: Blanch Peas for Optimal Texture
Fill a large pot with 2-3 inches of water and bring to a rolling boil. While waiting, prepare an ice bath by filling a bowl with equal parts ice and cold water. Once boiling, add peas in single layers—overcrowding steams them instead of blanching. Blanch for 2-3 minutes until pods turn bright green but remain crisp.
Use a slotted spoon to transfer blanched peas immediately to the ice bath. This stops the cooking process instantly and locks in color and texture. Let them cool for 2-3 minutes, then drain well. The goal is to remove as much moisture as possible before freezing—this keeps peas from clumping together in the freezer bag.
⏰ Step 3: Package Peas for Long-Term Storage
Lay blanched, drained peas in a single layer on a baking sheet lined with parchment paper. Place the tray in the freezer for 30-60 minutes until peas are solid but not rock-hard. This step, called flash freezing, prevents peas from sticking together when you transfer them to storage bags.
Once frozen solid, transfer peas to airtight freezer bags or containers. Squeeze out as much air as possible before sealing—oxygen causes freezer burn and dulls flavor. Label each bag with the date (peas stay best for 8-12 months). I like to use quart-sized bags for 4 servings—perfect for stir-fries or soups later.
☀️ Step 4: Freeze and Store Properly
Place sealed bags flat in the freezer to maximize space and prevent crushing. For best results, store peas at 0°F or below. If your freezer fluctuates, consider adding a thermometer to monitor temperature—peas thawed in a warmer freezer lose crispness faster.
When ready to use, thaw peas directly in the freezer overnight or cook from frozen in dishes like stir-fries or pasta. Avoid refreezing thawed peas—they’ll turn mushy. You’ll know your peas are frozen perfectly when they retain their bright green color and crisp texture after thawing.
Tips & tricks for perfectly crisp frozen snow peas
Took me years to perfect this method after ruining batches of soggy peas—here’s what I learned the hard way.
Harvesting Matters: Pick snow peas at their peak when pods are 3-4 inches long and still flat. Overripe peas with bulging seeds won’t freeze well—they’ll turn mushy when thawed. I harvest mine in the early morning when they’re coolest and most crisp.
Blanching Precision: That 2-3 minute blanch is critical—any longer and peas get limp, any shorter and they won’t be fully cooked before freezing. Test one pod by biting into it after blanching: it should be bright green but still offer slight resistance. The ice bath step is non-negotiable for stopping the cooking process instantly.
Flash Freezing Secret: The 30-60 minute flash freeze on the baking sheet might seem long, but it’s worth it. This prevents peas from sticking into one solid block when you transfer them to bags. If you’re short on time, use the 30-minute mark as your minimum—just don’t skip it entirely.
Storage Wisdom: Always squeeze out excess air before sealing bags—this prevents freezer burn that dulls flavor. I like to use vacuum-seal bags if I have them, but even regular quart-sized freezer bags work perfectly when you press out all the air. Label with the date and store flat to save space.
Pro Tips for Freeze Snow Peas From The Garden
- Took me years to perfect this method after ruining batches of soggy peas—here’s what I learned the hard way.
- Harvesting Matters: Pick snow peas at their peak when pods are 3-4 inches long and still flat. Overripe peas with bul...
- Blanching Precision: That 2-3 minute blanch is critical—any longer and peas get limp, any shorter and they won’t be f...
Frequently asked questions
Got questions about freezing snow peas? You’re not alone! Here are some of the most common concerns—and their answers—to help you freeze your garden harvest like a pro.
Can I freeze snow peas with their pods still attached?
Freezing snow peas whole (pods and all) is a great way to preserve their texture and nutrients. Just blanch them for 2 minutes before freezing. If you prefer shelled peas, freeze them separately—they’ll keep their sweetness but may soften slightly over time.
How long can I store frozen snow peas in the freezer?
Frozen snow peas stay fresh for up to 12 months if stored properly in airtight containers or freezer bags. For best quality, label them with the date and aim to use them within 6–9 months. Quality may decline after that, but they’ll still be safe to eat.
Do I need to blanch snow peas before freezing?
Yes! Blanching (dipping in boiling water, then ice bath) is critical to halt enzyme activity and preserve color, texture, and flavor. Skip this step, and your peas may turn mushy or develop off-flavors. For snow peas, 2 minutes in boiling water followed by an ice bath works perfectly.
Can I freeze snow peas without a blanch water bath?
While possible, it’s not recommended for long-term storage. Without blanching, peas may develop freezer burn or lose texture. If you’re short on time, try the microwave blanching method: Microwave peas with 1 tbsp water for 2 minutes, then cool in ice water. Still, traditional blanching yields better results!
What’s the best way to thaw frozen snow peas for cooking?
Thaw snow peas overnight in the fridge for even cooking. For quick use, plunge the sealed bag into cold water for 5–10 minutes. Never thaw at room temperature—this can promote bacterial growth. Once thawed, use them in stir-fries, soups, or salads within 1–2 days.
Pro Tip:
Label your freezer bags with the date and contents (e.g., “Snow Peas – 5/2024”). This saves time later and helps you rotate your stash so the oldest peas get used first!
Wrapping up and next steps
Freezing snow peas from your garden is a simple way to lock in their crisp texture and vibrant flavor for months to come!
With just a few tools—like a blanching pot, ice bath, and freezer-safe bags—you can preserve your harvest with minimal effort. Now that you’re ready to freeze, why not try a delicious recipe? Whip up a batch of snow pea stir-fry or crunchy garden salads this winter—your future self will thank you! 🌱❄️