
Planting
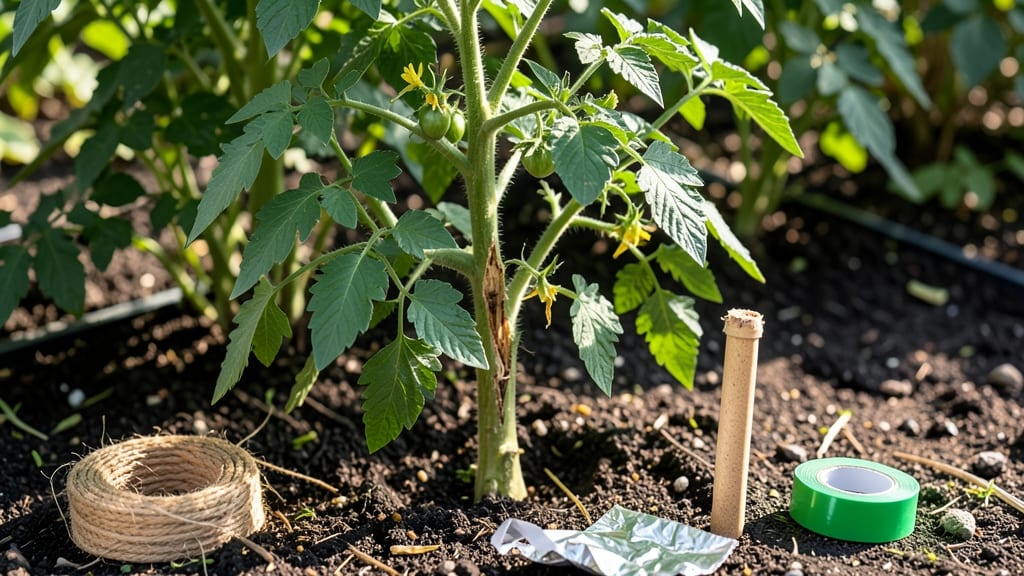
How to fix a broken plant stem doesn’t mean game over. ✂️ I’ve nursed back broken plants into full recovery with just a few simple techniques—no green thumb required. The key is acting fast, assessing the damage, and choosing the right repair method for your plant type.
Most breaks happen from wind, pests, or clumsy handling, but the real damage comes from waiting too long. Within hours, stems can dry out or rot if not stabilized.
You’ll need basic supplies: clean pruners, a small wooden splint (or even a popsicle stick), plant tape or rubber bands, and rooting hormone if propagating.
For woody plants like shrubs, splinting the break with a supportive wrap keeps it stable while new growth forms. Herbaceous stems often regrow from nodes below the break—just prune cleanly and watch for fresh shoots in 2-4 weeks.
Some plants, like succulents, can even root from broken pieces if you propagate them immediately.
Humidity and indirect light are your best friends during recovery. Mist the area daily and avoid direct sun until new growth appears. With the right approach, your plant won’t just survive—it’ll bounce back stronger than before.
📚 In This Guide
- What you need
- Instructions
- Tips and common mistakes
- Wrapping up and next steps
What you need
- ● Clean, sharp pruning shears or scissors – sterilized with rubbing alcohol (70% or higher) to prevent disease.
- ● Rubbing alcohol (70% isopropyl) – 1 small bottle (4 oz) for sterilizing tools.
- ○ Rooting hormone (optional but helpful) – powder or gel form (e.g., Clonex or Dip 'N Grow).
- ● Small pots or containers – 3-4 inch diameter for cuttings (1-2 pots needed).
- ● Well-draining potting mix – 1 bag (5-10 quarts) of perlite, vermiculite, or a cactus/succulent mix.
- ● Plastic wrap or a humidity dome – clear plastic bag or propagation dome to retain moisture.
- ● Spray bottle with water – 8 oz size for misting cuttings.
- ● Hydrogen peroxide (3%) – for cleaning wounds on the stem (1 tsp in 1 cup water).
- ● Charcoal granules – 1 small bag (for adding to soil to prevent rot).
- ● Plant labels & marker – to track which plant each cutting came from.
- ○ Heat mat or warm spot – optional for faster rooting (e.g., near a sunny window).
Step-by-Step instructions for repairing a broken plant stem
Here's how to save your plant by pruning and propagating—no green thumb required.
🌱 Step 1: Assess the Damage and Gather Supplies
First, examine the break carefully. If the stem is cleanly snapped but still has a small section of bark or pith intact, it can be saved. If it's completely crushed or mushy, propagation might not work—but don't toss it yet. You'll need sharp scissors or pruning shears (sterilized with rubbing alcohol), rooting hormone (optional but helpful), and a clean container with water or moist potting mix.
I always work in a clean space—wipe down your tools and surface with a disinfectant wipe to prevent introducing bacteria or fungi. The cleaner your setup, the better the plant's chances of recovering. If the break is near a joint or leaf node, that's ideal for propagation. If it's in the middle of a bare stem, focus on pruning back to a healthy node instead.
✂️ Step 2: Prune the Damaged Stem Properly
Using your sterilized shears, make a clean cut about ½ inch below the break at a 45-degree angle. This angled cut helps water run off instead of pooling at the wound. If the break is near a leaf node, cut just above it to encourage new growth from that spot. Avoid tearing the stem—this creates jagged edges that slow healing and invite disease.
For larger stems, you can also make a second cut ¼ inch above the break to remove the damaged section entirely. This creates a fresh, healthy surface for the plant to seal. Once pruned, discard the broken section in the trash—not your compost bin—since damaged plant material can spread pathogens.
🌿 Step 3: Propagate the Healthy Section (If Possible)
If the broken piece still has a leaf node or a small section of stem with buds, it can often root and grow into a new plant. Dip the cut end in rooting hormone (if using) to encourage faster root development. Place the cutting in a container with 2-3 inches of water, ensuring only the bottom 1-2 inches of the stem are submerged—any more and the stem will rot.
I like to cover the cutting with a clear plastic bag to create a humid environment, which speeds up root growth. Set it in a spot with bright, indirect light—no direct sun yet. Change the water every 2-3 days to prevent bacterial growth. Roots should appear in 2-4 weeks, depending on the plant type. Watch for tiny white or brown tendrils at the stem's base.
💧 Step 4: Care for the Pruned Plant and New Cutting
The original plant will likely go through shock after the pruning, so give it extra care. Water it lightly at the base (avoid wetting the leaves) and place it in a spot with bright, indirect light for 1-2 weeks. Avoid fertilizing during this time—new growth is more important than feeding. You'll see new leaves emerging from the node where you pruned within 2-3 weeks if conditions are right.
For the cutting, once roots reach about 1 inch long, transplant it into a small pot with well-draining potting mix. Keep the soil moist but not soggy, and place it under a grow light or in bright indirect light. After 4-6 weeks, when the cutting has a few new leaves, you can treat it like a mature plant. This is how I've turned broken stems into thriving new plants—sometimes even better than the original!
☀️ Step 5: Monitor and Encourage New Growth
Both the pruned plant and the new cutting will need consistent care to thrive. The pruned plant may produce new shoots from lower nodes or the base—thin these out to 2-3 strong stems to avoid overcrowding. For the cutting, gradually introduce it to more light over 1-2 weeks to prevent sunburn. You'll know it's adapting well when the leaves stay vibrant and firm, not wilting or yellowing.
Here's the thing—some plants recover faster than others. Succulents and herbs like mint or basil often bounce back quickly, while woody plants like roses or fruit trees may take longer. Patience is key. If you notice yellowing leaves or soft stems, it's a sign of overwatering or poor light—adjust immediately. With the right care, your plant will not only survive but could even thrive with its new growth!
Tips & tricks for reviving broken plant stems
Real talk: I've saved dozens of plants using these simple tricks—don't let a broken stem be the end of your green friend.
Cleanliness is Everything: The instructions mention sterilizing tools, but here's what nobody tells you—your workspace matters just as much. Wipe down not just your shears but your entire cutting surface with rubbing alcohol. I've seen fungal infections spread from contaminated workspaces that looked clean. Trust me on this: a little extra effort here prevents weeks of frustration later.
The 45-Degree Angle Secret: That angled cut in Step 2 isn't just about looks—it's about survival. The sloped surface prevents water from pooling at the wound, which is how most infections start. For thicker stems, make sure your cut is deep enough to expose fresh tissue. I've had better success with a slightly longer cut (up to ¾ inch) on woody plants like roses—the extra fresh surface helps the plant seal faster.
Water Level Watch: When propagating in water, the instructions say to submerge only 1-2 inches—but here's the thing: different plants have different needs. Succulents and cacti only need about ½ inch submerged, while tropical plants like pothos can handle up to 3 inches. Watch your cutting after 24 hours: if the submerged part turns mushy, it's getting too much water. Adjust accordingly.
Humidity Hack: The plastic bag trick in Step 3 works wonders, but I've found that adding a few drops of water to the bag's interior creates an even more ideal environment. This prevents the plastic from sticking to leaves while maintaining that crucial humidity. For plants with large leaves (like monstera), I also mist the leaves lightly before sealing—this gives them a head start on hydration.
Pro Tips for Fix Broken Plant Stem
- Real talk: I've saved dozens of plants using these simple tricks—don't let a broken stem be the end of your green fri...
- Cleanliness is Everything: The instructions mention sterilizing tools, but here's what nobody tells you—your workspac...
- The 45-Degree Angle Secret: That angled cut in Step 2 isn't just about looks—it's about survival. The sloped surface ...
Frequently asked questions
Got questions about saving your broken plant stems? Here are some common ones—and their solutions—to help you revive your green friend!
Can I fix a broken stem without pruning?
If the break is small and clean, you can sometimes leave it alone, but it’s risky. Broken stems are prone to rot or pests. For best results, prune the damaged section and propagate the healthy part. If the stem is severely broken, pruning is your best bet to prevent further damage.
How long does it take for a broken stem to heal or regrow?
Healing time varies! If you’ve pruned and propagated, roots may form in 2–6 weeks (depending on the plant type and conditions). For example, succulents and herbs regrow faster than woody plants. Keep the environment consistent—warmth, humidity, and indirect light speed up recovery.
What if my plant stem is mushy or rotting after a break?
Mushy or rotting stems are a red flag for infection. Act fast: Trim the damaged area above the rot with sterilized scissors, dust with cinnamon or fungicide, and let it dry for a day before repotting. Avoid overwatering until new growth appears—dampness worsens rot.
Can I propagate a broken stem that’s already flowering?
Yes, but timing matters! If the flower is small or budding, snip the stem just above a leaf node and propagate it. If the flower is large or blooming, the plant may prioritize energy for the bloom over rooting. For best results, propagate before or after the flowering stage.
What if my propagated stem doesn’t root?
Don’t panic! Common reasons include low humidity, poor lighting, or overwatering. Try these fixes:
- Move to bright, indirect light (no direct sun).
- Increase humidity with a plastic bag or pebble tray.
- Wait 2–3 weeks before adding water again.
- Use a rooting hormone for stubborn stems.
Wrapping up and next steps
Fixing a broken plant stem isn’t just about saving your green friend—it’s an opportunity to revive and expand your plant family! With the right tools and techniques, you can prune damaged stems, propagate healthy cuttings, and encourage lush new growth.
Whether you’re working with woody perennials or delicate houseplants, confidence and patience will guide you to success.
Now that you’re armed with knowledge, grab those shears and get growing! Start with one stem, follow the steps, and soon you’ll be sharing your green thumb magic with friends—or even starting a mini plant collection. Happy gardening! 🌱