
How To
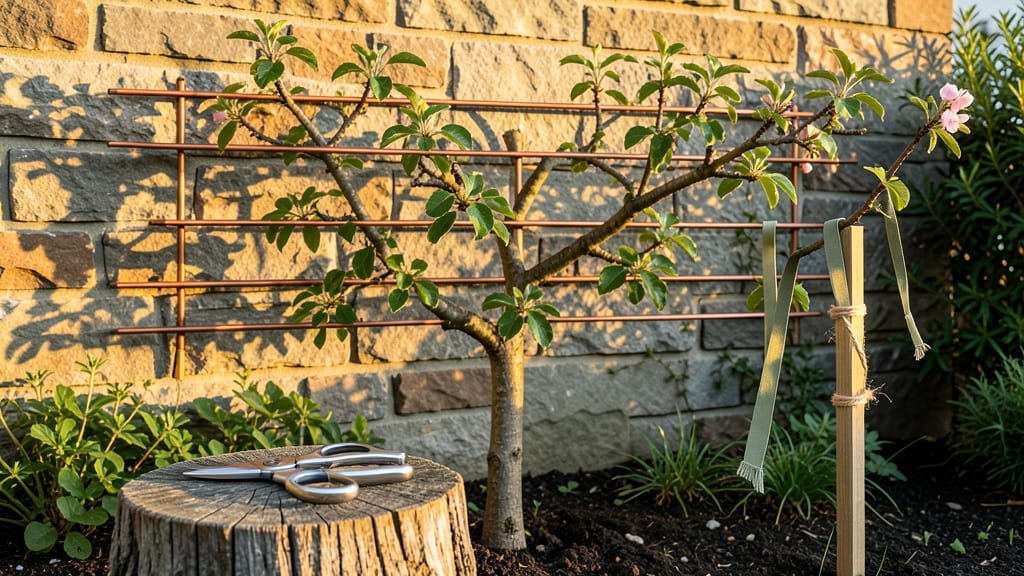
Espaliered apple trees look like living art—and they produce fruit too. 🍏 I spent years watching my small yard struggle with full-size trees until I discovered this space-saving technique that turns walls into orchards. The best part? You don’t need a green thumb to make it work.
You’ll need basic tools—a pruning saw, sharp pruners, and some sturdy trellis wire—and a sunny spot against a fence or wall. Start with a young tree (or a bare-root whip) and train it along horizontal branches.
Within a few years, you’ll have a tidy, fruit-laden display that fits in even the tiniest backyard.
Imagine reaching out to pluck ripe apples from branches just a few feet off the ground. The fruit stays accessible, the tree stays compact, and you avoid the mess of fallen apples. Plus, espaliered trees bloom spectacularly in spring—like a floral masterpiece you can eat.
Perfect for urban gardeners, small spaces, or anyone who wants to grow apples without sacrificing yard space. The key is patience—it takes a season or two to get the shape right, but the payoff is worth it. Let’s get started with your own mini orchard!
📚 In This Guide
- What you need
- Instructions
- Tips and common mistakes
- Wrapping up and next steps
What you need
- ● Apple tree varieties: Dwarf or semi-dwarf rootstock (e.g., M.9 or MM.106) for easier training. Choose 2–4 disease-resistant varieties like Honeycrisp, Fuji, or Granny Smith.
- ○ Espalier trellis: A sturdy frame made of wood (2x4s or cedar), metal, or PVC pipes. Height: 6–8 feet; width: 3–4 feet. Optional: Pre-made espalier panels for quick setup.
- ● Pruning tools: Bypass pruners (for clean cuts on branches <½ inch thick)
- ● Loppers (for thicker branches, ¾–2 inches)
- ● Hand saw (for stubborn branches >2 inches)
- ● Tying supplies: Soft tree ties or rubber bands (to secure branches without damaging bark)
- ● Twine or horticultural tape (for temporary support)
- ● Support stakes: 4–6 wooden or metal stakes (1–2 inches thick, 4–6 feet long) to anchor the trellis.
- ● Potting soil & containers (if grafting): Well-draining soil mix and 5-gallon pots for young grafts.
- ● Fertilizer: Slow-release organic fertilizer (e.g., 10-10-10) to boost growth during training.
- ● Mulch: Wood chips or straw to retain moisture and suppress weeds.
- ● Plant growth regulator: (e.g., paclobutrazol) to control vigorous growth in young trees.
- ● Watering system: Drip irrigation or a soaker hose for consistent moisture.
- ● Pest control: Neem oil or copper spray to deter aphids, mites, or borers.
Tips & tricks for perfect espaliered apple trees
Between us, these small details make all the difference between a struggling espalier and a thriving orchard wall.
Tree Selection Wisdom: When choosing your dwarf apple tree, look for one with a strong central leader and well-distributed branches—this gives you the best starting framework. I've learned the hard way that trees with weak leaders often require more aggressive pruning later. Also, opt for disease-resistant varieties like 'Liberty' or 'Enterprise' if you're in a region prone to apple scab. These varieties handle the close spacing of espaliering better than traditional types.
Pruning Precision: In Step 2, when you're pruning those scaffold branches at 45-60 degree angles, think of it like creating a fan structure. The wider the angle, the more sunlight reaches the inner branches. I always make my cuts just outside the branch collar—this is where the tree's natural healing begins. For the first year, focus on establishing 3-4 main branches spaced 12-18 inches apart; this gives you room for future fruiting spurs while keeping the tree manageable.
Trellis Installation Tip: Before attaching your branches to the wire in Step 3, make sure the trellis is perfectly level. I use a 4-foot level to check both horizontally and vertically—uneven wire will cause branches to grow at odd angles. Also, leave about 6 inches of slack in your ties so the branches can grow without restriction. The wire should be taut but not cutting into the bark as the tree expands.
Watering Strategy: That "once a week" watering guideline in Step 3 assumes average summer conditions. In my experience, newly planted espaliers need about 1-1.5 inches of water per week, especially during the first growing season. I water deeply in the morning to allow foliage to dry before evening, which helps prevent fungal diseases. Mulching around the base (keeping it 3 inches from the trunk) retains moisture and regulates soil temperature—just don't let it pile up against the trunk.
Pro Tips for Espalier Apples
- Between us, these small details make all the difference between a struggling espalier and a thriving orchard wall.
- Tree Selection Wisdom: When choosing your dwarf apple tree, look for one with a strong central leader and well-distributed branches—this gives you the best starting framework.
- Pruning Precision: In Step 2, when you're pruning those scaffold branches at 45-60 degree angles, think of it like creating a fan structure.
Frequently asked questions
Got questions about espaliering apple trees? You’re not alone! Here are answers to the most common concerns—from timing to troubleshooting—to help you grow a stunning, space-saving orchard with confidence.
When is the best time to start espaliering an apple tree?
The ideal time is late winter or early spring (before buds swell) when the tree is dormant but sap is starting to rise. For established trees, you can also prune in summer after harvest to shape growth. Avoid heavy pruning in fall—it can stress the tree and invite disease.
How long does it take to see fruit on an espaliered apple tree?
Patience is key! Most espaliered apple trees take 3–5 years to bear fruit, depending on the variety and care. Dwarf or semi-dwarf rootstocks (like M.9 or MM.106) fruit faster than standard trees. Keep pruning and fertilizing consistently to speed up the process!
Can I espalier any apple tree variety?
Not all apples thrive as espaliers. Look for dwarf or semi-dwarf varieties like ‘Gala,’ ‘Fuji,’ ‘Honeycrisp,’ or ‘Granny Smith’—they’re bred for compact growth. Avoid large, vigorous varieties like ‘Granny Smith’ on standard rootstocks; they’ll outgrow your trellis. Check your local nursery for espalier-friendly recommendations!
What should I do if my espaliered apple tree’s branches start dying back?
Dying branches are often caused by over-pruning, disease (like fire blight), or poor circulation. First, inspect for blackened, oozy spots (fire blight) or powdery mildew. Prune affected areas 6 inches below the damage with sterilized tools. Improve airflow by spacing branches 6–12 inches apart and avoid wetting foliage when watering.
Can I convert an existing apple tree into an espalier?
Yes, but it’s a multi-year project! Start by pruning back the center branches to open the canopy, then train the remaining limbs along your trellis over 2–3 seasons. Be patient—older trees may need thinning cuts to redirect energy. If the tree is large, consider gradual reduction to avoid shock.
What’s the easiest espalier style for beginners?
Start with a horizontal cordon (1–2 main branches trained along a trellis) or a fan shape (branches spread like fingers). These styles are forgiving and produce fruit quickly. Avoid complex designs like obelisk or palmette until you’re comfortable with basic pruning techniques!
Wrapping up and next steps
Espaliering apple trees is a rewarding way to transform your garden into a functional, artistic, and productive space—whether you’re a seasoned gardener or just starting out. By mastering these techniques, you’ll enjoy bountiful harvests, easier maintenance, and a stunning visual display that turns heads.
Now that you’re armed with the know-how, roll up your sleeves and get growing! 🌱
Ready to take the next step? Start by selecting your favorite apple variety, sketching a simple trellis design, and planning your first espalier tree—your future orchard awaits!