
Propagation
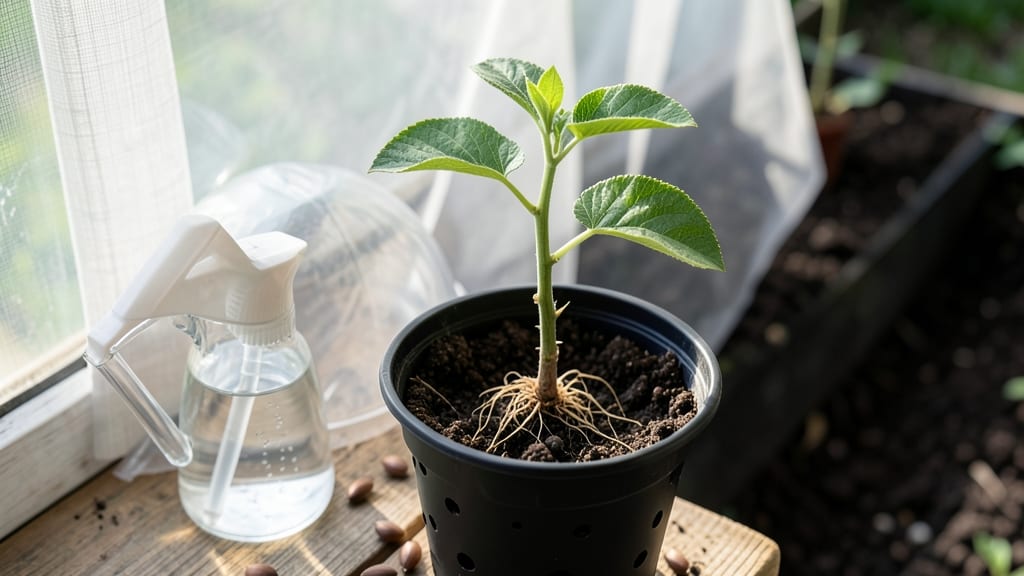
How to grow apple from seeds at home feels like playing horticultural roulette—you never know what you'll get. 🌱 That first tiny sprout after months of waiting is pure magic, though, and the process teaches patience that pays off in unexpected ways. The apples you grow won't match store-bought varieties (genetics are wild), but the journey of nurturing a tree from a single seed is unforgettable.
Start with seeds from organic apples—wash, dry, and refrigerate them for 6-8 weeks to mimic winter. Plant them ½-inch deep in moist potting mix, and keep them warm (70°F) until sprouts appear in 3-6 weeks.
The real test begins when you transplant seedlings into individual pots—they'll grow slowly but steadily, with their first true leaves signaling real progress.
By year three, you might see tiny blossoms (if lucky), but don't expect fruit for 5-8 years. The trees will be small, delicate, and prone to pests—so protect them like they're your firstborn.
The reward? A tree with its own unique character, quirks, and maybe even a few edible surprises if you're patient enough.
This isn't a shortcut to orchard-quality fruit, but it's a rewarding way to connect with nature's unpredictability. Perfect for kids, curious beginners, or anyone who loves a good long-term project. Here's how to start right—no green thumb required, just time and curiosity.
📚 In This Guide
- What you need
- Instructions
- Tips and common mistakes
- Wrapping up and next steps
What you need
- ● Apple seeds: 5–10 fresh, viable seeds (from a ripe, organic apple—avoid store-bought seeds treated to prevent sprouting).
- ● Small pots or seed trays: 3–5 biodegradable pots (3–4 inches wide) or a seed-starting tray with drainage holes.
- ● Well-draining potting mix: 2–3 cups of seed-starting soil (lightweight, sterile, and peat-based or coconut coir blend).
- ● Plastic wrap or humidity dome: To create a mini greenhouse effect while seeds germinate.
- ● Spray bottle: For gently misting soil (avoid overwatering!).
- ● Sunlight or grow lights: A sunny windowsill (6+ hours of light) or a LED grow light (12–16 hours/day).
- ● Watering can or cup: With a narrow spout for precision.
- ● Patience (and a notebook!): Track seed progress, soil moisture, and growth milestones.
- ○ Seedling heat mat (optional): Speeds up germination (70–75°F ideal).
- ● Fertilizer (diluted): Balanced liquid fertilizer (5-5-5 or 10-10-10) for young seedlings (use after sprouting).
- ● Pruning shears: For trimming leggy seedlings later.
- ● Larger pots (6–8 inches): For transplanting seedlings after 4–6 weeks.
- ● Mulch or compost: To enrich soil when repotting outdoors.
- ● Apple variety reference: Note the apple type (e.g., Fuji, Granny Smith) for future cross-pollination tips!
Step-by-Step instructions for growing apples from seeds at home
Here's how I turn store-bought apple seeds into tiny trees—it takes time, but the process is simple.
🌱 Step 1: Extract and Prepare the Seeds
Save seeds from organic apples (conventional ones may be treated to prevent sprouting). Cut the apple in half, scoop out the core, and rinse the seeds under cool water to remove any fruit residue. I like to spread them on a paper towel to dry for 24 hours—this prevents mold when you store them.
Once dry, place the seeds in a sealed plastic bag with a damp paper towel. Store them in the fridge for 6-8 weeks to simulate winter's cold period. This stratification mimics nature's way of breaking seed dormancy. You'll know they're ready when the seeds feel slightly softened and the towel stays moist but not soggy.
💧 Step 2: Plant the Stratified Seeds
Fill small pots (about 3-4 inches deep) with a mix of 50% potting soil and 50% perlite. This blend drains well but holds enough moisture for tender roots. Plant each seed ½ inch deep, spacing them 1 inch apart—they'll need room to grow their first leaves.
Water gently until the soil looks damp but not wet. Cover the pots with clear plastic wrap to create a mini greenhouse effect. Place them in a warm spot (around 65-75°F) away from direct sunlight. Germination can take 3-6 weeks, so patience is key—you'll see tiny sprouts when the seed coat splits open.
☀️ Step 3: Care for Seedlings After Germination
Once the first true leaves appear (not the initial seed leaves), remove the plastic wrap and move the pots to a bright, indirect light spot. Apple seedlings need 6-8 hours of light daily, but avoid harsh midday sun that can scorch tender leaves. You'll notice healthy growth when the stems stay sturdy and leaves remain a vibrant green.
Water when the top inch of soil feels dry to the touch. Overwatering is the biggest mistake here—it causes root rot. I use a spray bottle to mist the soil lightly, keeping it consistently moist but never soggy. After 4-6 weeks, when seedlings have 3-4 sets of leaves, you can transplant them into slightly larger pots.
🪴 Step 4: Transplant and Encourage Strong Growth
Choose pots that are 6-8 inches deep with drainage holes. Fill them with fresh potting mix and dig a hole deep enough to bury the seedling up to its first set of true leaves. This encourages a sturdy stem. Gently firm the soil around the base and water thoroughly to help it settle.
Apple trees need plenty of space, so place them in a sunny window or under grow lights for 12-14 hours daily. You'll see stronger growth when the leaves are dark green and the stems thicken. Pinch off any flowers that form in the first year—they'll drain the young tree's energy. Instead, focus on helping the tree grow a strong root system and trunk.
⏰ Step 5: Prepare for Outdoors (After 2 Years)
Once your seedling is 2-3 feet tall with a trunk about ½ inch thick, it's ready for outdoor planting. Choose a spot with full sun and well-draining soil. Dig a hole twice as wide as the pot but no deeper. Gently remove the seedling, loosen the roots, and place it in the hole at the same depth it was in the pot.
Water deeply after planting to help the roots settle. Mulch around the base with 2-3 inches of organic mulch to retain moisture and protect the roots. Remember, trees grown from seed may not produce fruit true to the parent apple—this is a project for patience and curiosity, not necessarily harvests.
Tips & tricks for growing apples from seeds at home
This rewarding process rewards patience—here's how to maximize your chances of success at every stage.
Seed Selection: Choose seeds from heirloom or organic apples whenever possible. Conventional apples often have seeds treated to prevent germination, so organic varieties give you the best starting point. I've found that seeds from red or yellow apples tend to sprout more reliably than those from green varieties—worth testing a few types if you're curious!
Stratification Success: During the 6-8 week cold stratification in Step 1, check your seeds weekly. The damp paper towel should stay consistently moist but never soggy—think of it like wringing out a sponge. If the towel dries out, mist it lightly with water. This mimics nature's winter cycle and is absolutely critical for breaking dormancy. I've seen seeds that didn't get proper stratification fail to sprout even after planting.
Germination Environment: In Step 2, maintain that warm (65-75°F) environment consistently—fluctuations can delay or prevent germination. If your home runs cooler, place the pots on top of your fridge or near a sunny window during the day. The clear plastic wrap creates humidity, but remove it immediately if you see condensation forming inside—this prevents mold from taking hold before your seeds even sprout.
Light Transition: When moving seedlings to bright indirect light in Step 3, do it gradually over 3-4 days. Sudden exposure to strong light can shock tender leaves. I start by placing them in the brightest spot I have for just 2 hours the first day, then gradually increase their light exposure. This helps prevent sunburn on those delicate young leaves while they acclimate.
Pro Tips for Grow Apple From Seeds At Home
- This rewarding process rewards patience—here's how to maximize your chances of success at every stage.
- Seed Selection: Choose seeds from heirloom or organic apples whenever possible.
- Stratification Success: During the 6-8 week cold stratification in Step 1, check your seeds weekly.
Frequently asked questions
Got questions about growing apples from seeds? You’re not alone—this process is full of surprises! Here are some of the most common queries to help you navigate the journey with confidence.
How long does it take for an apple seed to sprout?
Apple seeds typically sprout in 2–4 weeks if kept moist and warm (around 70°F). Some seeds may take longer, especially if they’re stored improperly. Patience is key—don’t give up if germination is slow! If nothing happens after 6 weeks, the seed might not be viable.
Will my homegrown apple tree produce fruit like the parent?
Probably not! Seeds grow into wild, unpredictable trees with different flavors, sizes, and growing habits. For consistent fruit, graft apples onto rootstock or buy certified trees. If you love the adventure, enjoy the surprise—your tree might yield something totally unique!
Can I speed up germination?
Yes! Try these tricks:
- Stratification: Chill seeds in damp paper towels in the fridge for 4–6 weeks to mimic winter.
- Warmth: Place seeds in a warm spot (like near a heater) to encourage faster sprouting.
- Soak: Soak seeds in water for 24 hours before planting to soften the outer shell.
What’s the best soil mix for young apple seedlings?
Use a light, well-draining mix like:
- 50% potting soil
- 30% perlite or sand
- 20% compost
Why did my seedling turn yellow or wilt?
Yellowing or wilting often signals:
- Overwatering: Check soil moisture—roots need air too!
- Underwatering: Let the top inch dry out between waterings.
- Pests: Inspect for aphids or spider mites (spray with soapy water if needed).
- Fungal issues: Reduce humidity and ensure good airflow.
Wrapping up and next steps
Growing apples from seeds at home is a rewarding journey that blends patience with the joy of nurturing life from scratch.
While the process may take years to bear fruit, every step—from planting to pruning—teaches you the magic of nature’s cycle. Celebrate your progress! Once your seedling thrives, consider transplanting it to a sunny spot in your garden or sharing your newfound knowledge with fellow plant enthusiasts.
🌱 Next step: Keep an eye on your young tree, and who knows? You might just grow the next heirloom apple variety—one seed at a time!