
Pruning
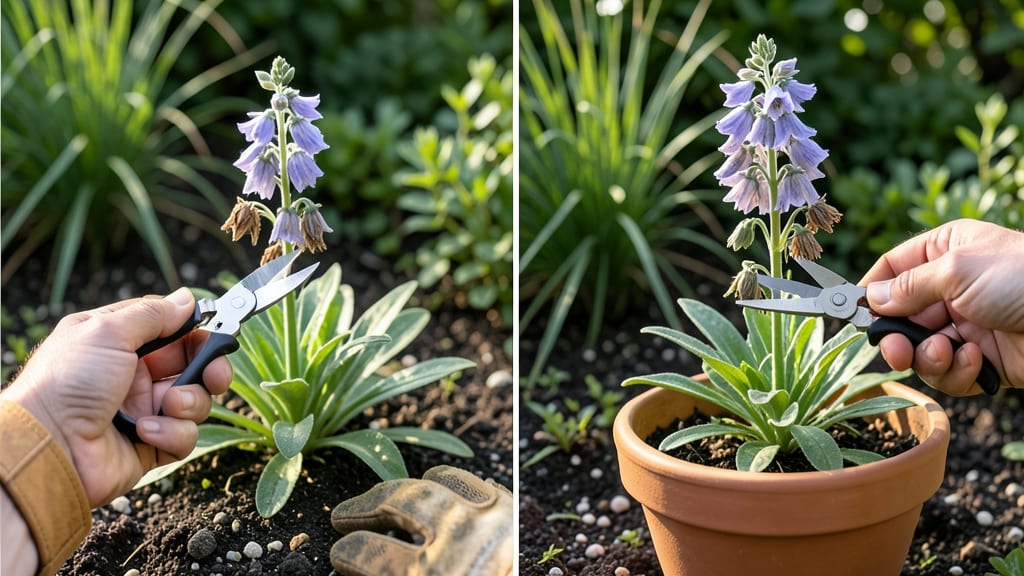
Deadheading campanula isn’t just about tidying up—it’s the secret to nonstop blooms all season. 🌿 I’ve watched my bellflowers go from sporadic blooms to three months of color simply by mastering this one technique. The twist-and-pull method takes seconds per flower but saves hours of pruning later.
You’ll need just two things: sharp pruners (or clean fingers) and a sunny morning when blooms are dry. The goal is to remove spent flowers at the base—no need for fancy cuts.
Start in early summer when the first blooms fade, and repeat every 3-5 days during peak flowering. This redirects energy to new buds instead of seed production.
What you’ll notice is denser clusters and flowers that last 2-3 weeks longer than untreated plants. The plant’s energy shifts from seed-making to producing more blooms, and you’ll avoid the leggy, sparse look that plagues neglected campanula. Even the most stubborn varieties respond well with this approach.
Fair warning: timing matters. Deadhead too early, and you’ll cut off fresh buds; too late, and the plant wastes energy on seeds. The before/after difference is dramatic—think 50% more flowers with minimal effort. Here’s how to do it without a single snip gone wrong.
📚 In This Guide
- What you need
- Instructions
- Tips and common mistakes
- Wrapping up and next steps
What you need
- ● Clean, sharp pruning shears or hand pruners – Opt for bypass pruners (not anvil-type) to avoid crushing stems. Size: Small to medium (2.5–4 inches) for precision.
- ○ Gloves (optional but recommended) – Lightweight gardening gloves to protect your hands from thorns or rough stems.
- ● Disinfectant (rubbing alcohol or 10% bleach solution) – A small spray bottle or wipe to sterilize tools between cuts and prevent disease spread.
- ● Trash bag or bucket – For collecting spent blooms and debris. A 5-gallon bucket works great!
- ○ Water spray bottle (optional) – To mist plants after deadheading, especially in dry climates.
- ● Knee pad or small stool – If your Campanula is ground-covering or tall, these make deadheading more comfortable.
- ● Garden twine or rubber bands – To bundle stems for easier disposal if you’re working in bulk.
- ● Compost bin or pile – If you’re eco-conscious, skip the trash bag and compost the spent blooms instead!
Step-by-Step instructions for deadheading campanula
Extend your campanula's bloom time effortlessly with this simple twist-and-pull technique.
🌿 Step 1: Identify Blooms Ready for Deadheading
Wait until individual flowers begin wilting but haven't yet turned brown—this is the perfect moment to act. Healthy campanula blooms will have fully opened petals with a slight droop at the edges, signaling they've completed their natural cycle. I always work in the morning when dew has evaporated but temperatures are still mild, giving flowers the full day to recover.
Check stems for seed pods beginning to form—these indicate the flower has already set seed and is ready for removal. The twist-and-pull method works best when you remove the entire spent bloom plus about ½ inch of stem below it. This prevents energy from being wasted on seed production and encourages new growth from lower buds.
✂️ Step 2: Use the Twist-and-Pull Technique
Grasp the stem just below the spent bloom between your thumb and forefinger, using a gentle but firm grip. Twist counterclockwise while pulling upward with steady pressure—this breaks the stem cleanly without tearing surrounding tissue. You'll hear a faint pop when it releases, which means you've done it correctly. I've found that using my fingers works better than pruners for campanula because the stems are delicate and often grow in tight clusters.
Remove only the spent blooms—never cut healthy foliage or new buds. The plant's energy goes toward producing new flowers from the lower buds, so preserving these is key. If you accidentally snip a bud by mistake, don't panic—just trim the cut stem at a 45-degree angle to prevent water from pooling and rotting.
🌱 Step 3: Encourage New Growth with Post-Deadheading Care
After deadheading, give your campanula a light watering to help it recover. Focus on the base of the plant rather than overhead spraying, which can spread fungal spores. I like to water in the early morning so foliage has time to dry before evening, reducing disease risk. Campanula thrives in well-draining soil, so avoid soggy conditions—this is when most problems like powdery mildew start.
Watch for new buds forming within 7-10 days—these will appear as small green bumps along the stems. If you see leggy growth developing between blooms, your plant needs more light. Move it to a sunnier spot (though campanula tolerates partial shade) or thin out crowded stems to improve air circulation. The goal is to maintain a compact, bushy shape that keeps producing flowers.
⏰ Step 4: Maintain a Regular Deadheading Schedule
Set a reminder to deadhead every 2-3 weeks during the peak blooming season. I schedule it for the same day each month so it becomes a habit—this consistency is what keeps campanula flowering continuously from early summer through fall. The twist-and-pull method is gentle enough that you can do it weekly if needed, especially for prolific varieties like Campanula persicifolia.
As seasons change, reduce deadheading frequency in late summer. By September, most campanula varieties begin their natural decline, and removing spent blooms won't stimulate new growth. Instead, focus on clearing away any browned or diseased foliage to keep the plant looking tidy. Mulch around the base with 1-2 inches of organic material to protect roots through winter.
Tips & tricks for perfect campanula deadheading
Here's what nobody tells you about keeping campanula blooming beautifully—these tricks save time and prevent common mistakes.
Timing is Everything: The morning after a light dew is ideal for deadheading because the stems are slightly pliable from moisture, making the twist-and-pull technique effortless. Avoid working when flowers are wet from heavy dew or rain—they'll tear rather than cleanly separate. I've learned this the hard way after struggling with stubborn stems on damp mornings.
The Half-Inch Rule: When removing spent blooms in Step 1, that ½ inch of stem below the flower is crucial. It contains dormant buds that will develop into new flowers. If you cut too close, you risk removing potential blooms. Think of it as pruning at the right node—just like with tomatoes, but on a smaller scale.
Tool-Free Technique: While pruners might seem helpful, your fingers work better for campanula's delicate stems. The twist-and-pull method in Step 2 creates a clean break without crushing the stem, which can happen with sharp tools. For tight clusters, I use my thumb and forefinger like a gentle vice grip—this gives me the precision I need without damaging surrounding growth.
Seasonal Adjustments: During peak bloom (late spring to early fall), stick to the 2-3 week schedule in Step 4. But by late summer, campanula's natural cycle slows—reduce deadheading to every 4-6 weeks. The plant conserves energy for winter survival, and forcing new blooms can stress it. I mark my calendar with seasonal reminders to adjust my routine accordingly.
Pro Tips for Deadhead Campanula
- Here's what nobody tells you about keeping campanula blooming beautifully—these tricks save time and prevent common mistakes.
- Timing is Everything: The morning after a light dew is ideal for deadheading because the stems are slightly pliable from moisture, making the twist-and-pull technique effortless.
- The Half-Inch Rule: When removing spent blooms in Step 1, that ½ inch of stem below the flower is crucial.
Frequently asked questions
Got questions about deadheading Campanula? You’re not alone! Here are answers to the most common concerns—so you can keep your bellflowers blooming beautifully all season.
When is the best time to deadhead campanula?
Deadhead Campanula as soon as blooms fade but before seed pods form. For spring-blooming varieties, aim for late spring to early summer. For perennial types that rebloom (like Campanula persicifolia), deadhead throughout the growing season to encourage more flowers. Just avoid pruning in fall—let spent blooms stay for winter interest!
Do I need special tools to deadhead campanula?
Nope! While sharp pruners work for thick stems, the twist-and-pull method (covered in the article) requires zero tools. Use clean fingers or small pruning shears if stems are woody. Just skip gloves—you’ll need a good grip to twist off faded blooms easily. A small bucket or bag for clippings keeps your workspace tidy.
What if my campanula doesn’t rebloom after deadheading?
Don’t panic! Some Campanula varieties (like Campanula carpatica) bloom once per season. For these, deadheading extends the current display but won’t trigger new flowers. Others (like Campanula glomerata) may need a light trim after flowering to promote fresh growth. Check your variety’s habits—or fertilize lightly in early spring to boost vigor.
How often should I deadhead campanula?
Check your plants weekly during peak bloom. For prolific bloomers (like Campanula portenschlagiana), you might deadhead every 3–5 days. The key is consistency—removing faded flowers immediately prevents seed production and redirects energy to new buds. Overcast days are ideal; avoid midday heat to reduce plant stress.
Can I use the twist-and-pull method on all campanula types?
Yes, but with a caveat! The method works best on non-woody stems (like Campanula trachelium or Campanula rapunculoides). For mature perennials with thick stems, snip just above a leaf node instead. Always angle cuts 45 degrees to prevent water pooling. Avoid deadheading Campanula isophylla (peppermint bellflower)—it’s a tender annual and doesn’t respond well to pruning.
Wrapping up and next steps
Deadheading your campanula is a simple yet powerful way to keep those stunning blue and purple blooms coming all season long! With just a few twists and pulls, you’ll encourage healthier growth and more vibrant flowers—no fancy tools required. 🌸
Now that you’re ready to give it a try, grab your garden gloves and head outside! Start with one plant at a time, and soon, your campanula will be bursting with color like never before. Happy gardening! 🌿✨