
Pruning
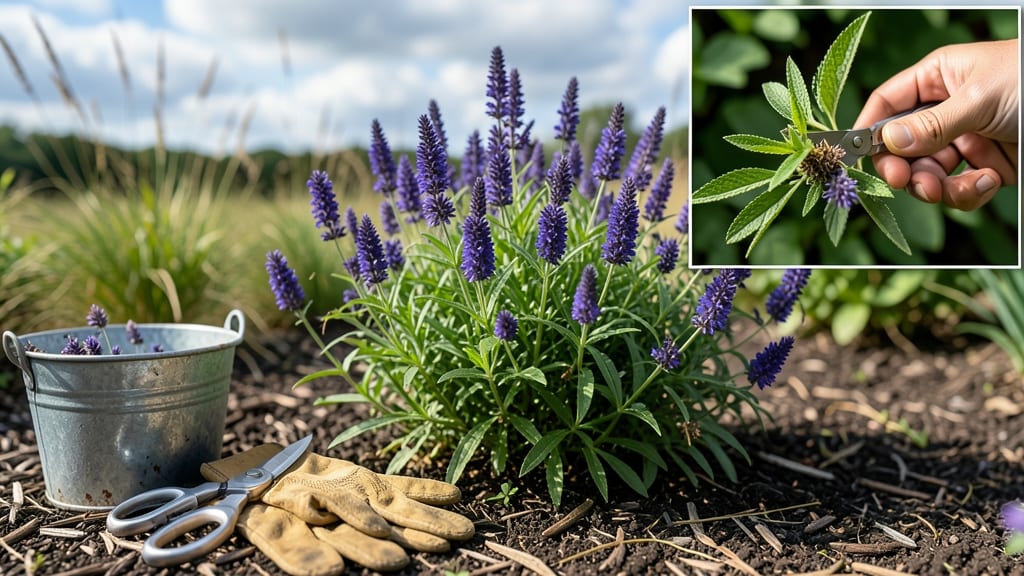
Deadheading agastache transforms a single burst of purple into months of blooms. ✨ My first attempt left me frustrated—until I learned the exact technique that keeps my hyssop flowering until frost. The secret isn’t just snipping flowers; it’s timing and knowing what to cut (and what to leave).
You’ll need sharp pruners, a sunny morning, and 15 minutes of focused attention. Start by identifying spent blooms—they’re the dried, brown flower spikes that look like they’ve given up. These are your targets, but leave the fresh purple blooms and the new growth below them untouched.
The plant rewards precision with more flowers, not less. What you’ll end up with is a bush that looks like it’s in peak bloom all summer long. My agastache now produces three times more flowers than it did before deadheading, and the color stays vibrant until the first hard frost.
The plant also stays healthier, with fewer pests and stronger stems. This method works for all agastache varieties, from ‘Black Adder’ to ‘Blue Fortune.’ The key is consistency—check your plants every 7-10 days during peak bloom season. Here’s how to do it right the first time.
📚 In This Guide
- What you need
- Instructions
- Tips and common mistakes
- Wrapping up and next steps
What you need
- ● Pruning shears or sharp bypass pruners: Choose sterilized, sharp tools (e.g., Felco F-2 or similar) to avoid damaging stems or spreading disease. Size: 5–7 inches for precision.
- ○ Gloves (optional but recommended): Lightweight gardening gloves (e.g., Cruelty-Free Cotton Gloves) to protect hands from thorns or sap.
- ● Bucket or trash bag: A 5-gallon bucket or sturdy bag for spent blooms (avoid composting diseased flowers).
- ● Water spray bottle (16 oz): For rinsing tools between cuts if working with multiple plants.
- ● Rubbing alcohol (70% isopropyl) or bleach solution: 1 part bleach to 9 parts water to sterilize tools between plants.
- ● Handheld magnifying glass: For spotting pests or inspecting stems up close.
- ● Knee pad or stool: If your Agastache is tall (2–4 feet), a small stool helps avoid strain.
- ● Garden kneeler with seat: For comfort during larger pruning sessions.
- ● Plant food (balanced 10-10-10 or compost): To nourish roots post-deadheading (apply 2–3 weeks later).
Step-by-Step instructions for deadheading agastache
Here's how I keep my agastache blooming all season—no fancy tools, just a few simple steps.
✂️ Step 1: Wait for the Right Time
Deadhead when 25-30% of the flower spikes have faded but still have one or two fresh blooms remaining. The best time is early morning when dew is present—this keeps the plant hydrated and reduces stress. I always check the bottom third of each spike first; if those flowers are brown and papery, it's time to act.
Don't wait until the whole spike is completely dead. Cutting back too late removes potential new blooms that might still form. Agastache blooms from the bottom up, so always leave at least 1-2 inches of fresh growth above any browned sections.
✂️ Step 2: Use Clean, Sharp Pruners
Use bypass pruners (not anhedora or dull scissors) to make a clean cut just above a set of leaf nodes—the small bumps where leaves grow. This encourages new growth from that point. I like to hold the stem at a 45-degree angle about ¼ inch above the node to prevent water from pooling and rotting.
Wipe your pruners with rubbing alcohol between cuts to prevent spreading disease. If you don't have pruners, clean nail scissors work in a pinch, but be extra careful to make straight cuts. Never tear stems—this damages the plant and invites pests.
🌿 Step 3: Remove Only the Spent Blooms
Snip off only the faded flower spikes, leaving the green foliage and new buds intact. This prevents over-pruning, which can stress the plant. I like to look for the transition point where fresh purple blooms meet dried brown ones—this is your cutting line. Leave at least 3-4 inches of healthy stem below each cut.
Don't remove more than one-third of the plant's blooms at once. Agastache is a heavy producer, and aggressive pruning can shock it. If you're unsure, err on the side of leaving too much rather than too little—you can always deadhead again in a week.
💧 Step 4: Water and Fertilize Lightly
After deadheading, give your agastache a deep watering to help it recover. Focus on the base of the plant, not the foliage, to avoid fungal issues. Water in the early morning so leaves have time to dry before evening. You'll see fresh growth within 3-5 days if conditions are right.
Add a balanced liquid fertilizer (10-10-10) diluted to half strength to encourage new blooms. I mix it with water and apply it to the soil, not the leaves. Avoid high-nitrogen fertilizers—they promote leafy growth at the expense of flowers. Watch for new buds forming within 7-10 days as a sign it's working.
☀️ Step 5: Monitor for New Growth
Keep an eye on your agastache for new shoots emerging from the leaf nodes. These will develop into fresh flower spikes in 2-3 weeks. If you notice yellowing leaves, it could mean over-pruning or underwatering—adjust your care accordingly.
Repeat the deadheading process every 2-3 weeks throughout the blooming season. With regular maintenance, your agastache will produce nonstop blooms from early summer until fall frost. The key is consistency—don't let more than half the spikes fade before cutting back again.
Tips & tricks for perfect agastache deadheading
These simple strategies will help you extend your agastache's blooming season with minimal effort—and keep your plants looking their best.
Timing is Everything: The 25-30% fade rule in Step 1 is your golden window. I learned this the hard way after letting too many spikes go completely brown—those dried blooms don't come back. If you're unsure, check the bottom third of each spike first. The moment you see brown and papery petals at the base, it's time to act. Early morning deadheading also prevents stress from afternoon heat and keeps your plants hydrated.
Precision Cutting Technique: Step 2's 45-degree angle above the leaf node is crucial for healthy regrowth. I've found that making clean cuts prevents water from pooling and rotting the stem. For those without pruners, clean nail scissors work—just be extra careful to make straight cuts. Never tear stems, as this damages the plant tissue and can invite pests. A quick wipe with rubbing alcohol between cuts keeps your tools sterile and prevents disease spread.
The One-Third Rule: When removing spent blooms in Step 3, remember that agastache is a heavy producer. Removing more than one-third of the blooms at once can shock the plant. I always leave at least 3-4 inches of healthy stem below each cut, which gives the plant plenty of energy to produce new growth. If you're unsure, it's better to leave too much than too little—you can always deadhead again in a week.
Post-Deadheading Care: After you've done the work, don't forget the follow-up in Step 4. That deep watering at the base helps the plant recover, and the early morning timing prevents fungal issues. I've seen new shoots emerge within just 3-5 days when conditions are right. The diluted 10-10-10 fertilizer (half strength) gives a gentle boost without promoting too much leafy growth. Watch for new buds forming within 7-10 days as your reward for the effort.
Pro Tips for Deadhead Agastache
- These simple strategies will help you extend your agastache's blooming season with minimal effort—and keep your plants looking their best.
- Timing is Everything: The 25-30% fade rule in Step 1 is your golden window.
- Precision Cutting Technique: Step 2's 45-degree angle above the leaf node is crucial for healthy regrowth.
Frequently asked questions
about deadheading Agastache—your quick guide to solving common dilemmas and keeping those vibrant blooms coming!When is the best time to deadhead Agastache?
Deadhead Agastache as soon as you notice spent blooms—typically after flowering peaks in late spring to early summer. For continuous blooms, repeat every 2–4 weeks. Pro tip: Morning deadheading prevents pests from hiding in damp flowers!
How often should I deadhead Agastache for maximum blooms?
Check your plants weekly during peak bloom (spring/summer). If flowers fade quickly, deadhead every 3–5 days. Over-deadheading (removing too much) can stress the plant—aim to leave 2–3 healthy stems per clump.
What if I skip deadheading—will my Agastache still bloom?
Yes! Agastache is forgiving—it may still produce flowers, but they’ll focus on seed production instead of vibrant blooms. Without deadheading, expect fewer, smaller flowers and potential self-seeding (which can spread aggressively in some varieties).
Can I deadhead Agastache in fall or winter?
No—wait until spring (after the last frost) to prune back Agastache. Fall/winter deadheading removes next year’s flower buds! Instead, trim brown, damaged stems in late winter to encourage fresh growth.
What if my Agastache looks leggy after deadheading?
Leggy growth happens if you cut too aggressively. Fix it: Prune back only spent blooms, not the entire stem. For woody stems, do a light spring trim (1/3 of height max) to encourage bushier regrowth. Fertilize lightly with balanced 10-10-10 post-pruning.
Do I need to deadhead Agastache if I want seeds?
Skip deadheading if you’re saving seeds! Let 2–3 flower spikes mature fully—seeds form in the dried blooms. Harvest seeds when they turn brown and papery, then store them in a cool, dry place for planting next season.
Wrapping up and next steps
Deadheading your Agastache is a simple yet powerful way to keep those stunning purple blooms coming all season long! 🌸 By removing spent flowers regularly, you encourage fresh growth, prevent self-seeding, and give your plants the energy to thrive.
Whether you’re a gardening pro or just starting out, this easy task will reward you with vibrant, long-lasting color—and maybe even a few extra blooms for your trouble.
Now that you’re armed with the know-how, grab those shears and get pruning! 🌿 For even better results, keep an eye on your Agastache throughout the season and repeat the process as needed. Happy gardening—your future purple paradise awaits! Ready to tackle more garden tasks?