
Pruning
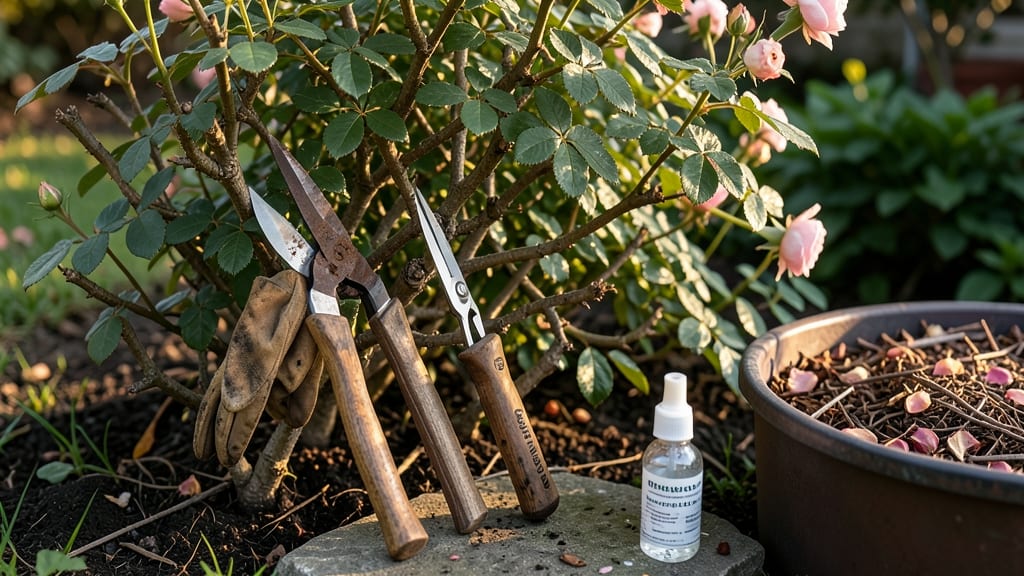
Your overgrown rose bush looks like a tangled mess—but this is your chance to turn it into a blooming powerhouse with how to cut back overgrown rose bushes. ✂️ The right cuts now mean 100+ more flowers by summer, not just a few straggly stems.
I’ve revived bushes that looked hopeless with these exact techniques, and you can too.
Timing matters most: prune in late winter or early spring before new growth starts. Grab sharp bypass pruners (never dull ones—they crush stems), a clean saw for thick canes, and rubbing alcohol to sterilize tools between cuts.
The goal? Open the center for airflow and sunlight, while shaping the bush into an outward-growing vase shape.
Start by removing dead, diseased, or crossing branches first—they’re stealing energy from potential blooms. Then cut back one-third of the oldest canes to the ground, and trim remaining stems to an outward-facing bud.
The plant will reward you with fresh red shoots within 2 weeks and a second wave of blooms by midseason.
After pruning, mulch heavily to protect roots and water deeply. Avoid over-fertilizing right away—let the plant focus on regrowth first. With this method, even my most neglected roses bounce back like they’re brand new. Ready to transform that jungle into a showstopper?
📚 In This Guide
- What you need
- Instructions
- Tips and common mistakes
- Wrapping up and next steps
What you need
- ● Pruning shears (bypass pruners): Sharp, high-quality shears with bypass blades (avoid anvil pruners—they crush stems). Choose 5-inch blades for thick stems.
- ● Loppers: For thicker branches (up to 2 inches in diameter). Opt for long-handled loppers for reach.
- ● Pruning saw: For stubborn, woody stems too thick for loppers (2+ inches). A curved-tooth blade prevents tearing.
- ● Rubbing alcohol (70% or higher): A small bottle to sterilize tools between cuts and prevent disease spread.
- ● Garden gloves: Heavy-duty, cut-resistant gloves (e.g., mechanized or thorn-proof) to protect hands from thorns and scratches.
- ● Disposable pruning bags or bucket: For collecting debris and keeping your workspace tidy.
- ● Permanent marker or tape: To mark branches for removal if needed.
- ● Hose or water spray bottle: To rinse tools and stems after pruning.
- ● Knee pads or stool: For comfort if your roses are tall or ground-pruning is needed.
- ● Rake or leaf blower: To clear away fallen leaves/debris post-pruning.
- ○ Pruning sealant (optional): For sealing large cuts (though most roses don’t need it—focus on clean cuts instead!).
Step-by-step instructions for reviving overgrown rose bushes
Here’s the method I’ve used to transform tangled, overgrown roses into healthy, blooming shrubs—no guesswork involved.
✂️ Step 1: Assess the Bush and Identify Dead or Weak Growth
Start by examining the rose bush in bright daylight to spot dead, diseased, or crossing branches. Dead stems snap when bent and have no green bark, while weak growth is thin and pale. I grab a handful of stems and twist gently—healthy wood resists, while dead wood crumbles easily. Mark these with a piece of twine or flagging tape so you don’t miss them later.
Look for branches rubbing against each other or growing inward. These compete for energy and often develop wounds. Your goal is to open the center of the bush to improve airflow and sunlight penetration. This is where the real transformation begins—removing just 20% of the bush can make a dramatic difference in its health and bloom production.
✂️ Step 2: Sterilize Tools and Make Clean Cuts
Before you make a single cut, sharpen your pruning shears or loppers and wipe them with rubbing alcohol. Sterilizing tools prevents spreading disease from infected stems to healthy ones. I always use clean tools because I’ve seen rose bushes decline rapidly after a single infected cut.
Make cuts at a 45-degree angle, about ¼ inch above an outward-facing bud or node. This angle helps water run off the cut and prevents rot. Never leave stubs—this invites pests and disease. For thicker branches over ½ inch, use loppers and cut just outside the branch collar (the swollen area where the branch meets the stem).
✂️ Step 3: Remove Dead Wood and Shape the Bush
Begin by cutting out all dead, diseased, or crossing branches first. These are the easiest to spot and remove. Next, thin out the center by removing one-third of the oldest canes—these are usually the thickest and least productive. Older canes produce fewer blooms, so removing them encourages new growth from younger, more vigorous stems.
Shape the bush by cutting back remaining canes to a height of 3-4 feet for climbing roses or 2-3 feet for shrub roses. This height ensures sunlight reaches the center and encourages strong, upright growth. Avoid cutting into old wood (brown, woody stems)—new growth only comes from green or slightly brown canes. You’ll know you’re pruning correctly when you see fresh, green stems emerging within weeks.
🌿 Step 4: Encourage New Growth with Strategic Cuts
For canes that still have some life but are overgrown, cut them back to a strong outward-facing bud just above a leaf joint. This encourages the bush to grow outward rather than inward, creating a fuller, more open shape. I like to step back every few cuts to visualize the bush’s new structure—this helps avoid over-pruning or leaving awkward gaps.
Leave 3-5 of the strongest, healthiest canes per bush. These will produce the most blooms next season. If you’re unsure which canes to keep, choose the ones with the thickest diameter and most vibrant green color. After pruning, the bush might look bare, but this is normal—new growth will fill it out beautifully within a few weeks.
⏰ Step 5: Clean Up and Apply Post-Pruning Care
Remove all pruned branches and debris from the area immediately. Leaving old wood and leaves around the bush invites pests and disease. I always rake up fallen leaves and dispose of them in the trash, not the compost bin—rose debris can harbor fungal spores that survive composting.
After pruning, water the base of the bush deeply to help it recover. Apply a balanced rose fertilizer (10-10-10) or compost around the drip line (the edge of the bush’s canopy) to provide nutrients for new growth. Avoid fertilizing immediately after severe pruning—wait until you see fresh green shoots emerging, usually within 2-3 weeks. This ensures the bush focuses on regrowing rather than producing blooms too soon.
Tips & tricks for perfect rose bush pruning
Transforming an overgrown rose bush into a thriving specimen takes more than just cutting branches—it's about strategic pruning that promotes health and blooms. Here's what I've learned after years of trial and error in my own garden.
Visualize First: Before making a single cut, step back and study the bush's overall shape. Imagine the ideal structure you want to create—this mental map prevents impulsive cuts. I like to sketch a rough outline on paper first, marking where I'll remove branches to open up the center. This approach ensures you don't accidentally remove too much or leave awkward gaps that disrupt the bush's natural form.
Tool Prep Matters: The difference between clean cuts and ragged wounds comes down to preparation. Beyond just sharpening your shears, test them on a scrap piece of wood first to ensure they cut cleanly. I also recommend having two pairs of tools ready: one for thin branches and another for thicker ones over ½ inch. This prevents struggling with the wrong tool mid-pruning, which can lead to uneven cuts or even breaking branches. Remember, the 45-degree angle in Step 2 should be consistent—practice on a spare branch if needed to get comfortable.
Seasonal Timing: While the instructions don't specify timing, I've found late winter or early spring (just before new growth begins) is ideal for most roses. For climbers, you can prune after flowering. The key is to time your cuts so the bush has several weeks of warm weather to recover before summer heat arrives. This gives the plant time to establish new growth before facing stress from hotter temperatures or drought conditions.
Post-Pruning Inspection: After completing all cuts, do a final walkthrough of your work. Look for any remaining crossing branches, stubs, or areas where you might have cut too close to a bud. I use a small hand mirror to check hard-to-see spots. This final inspection catches mistakes that could lead to disease or poor regrowth. It's also when you'll notice if you've accidentally removed too much—if the bush looks skeletal, you might need to leave some weaker but still-healthy canes to help it recover.
Pro Tips for Cut Back Overgrown Rose Bushes
- Transforming an overgrown rose bush into a thriving specimen takes more than just cutting branches—it's about strateg...
- Visualize First: Before making a single cut, step back and study the bush's overall shape. Imagine the ideal structur...
- Tool Prep Matters: The difference between clean cuts and ragged wounds comes down to preparation. Beyond just sharpen...
Frequently asked questions
Got questions about tackling your overgrown rose bushes? You’re not alone! Here are some of the most common concerns—and straightforward answers to help you prune like a pro.
When is the best time to prune overgrown rose bushes?
The ideal time depends on your rose type. For spring-blooming varieties (like hybrid teas), prune in late winter or early spring before new growth starts. Repeat-blooming roses (like floribundas) can be pruned in both early spring and after the first bloom. Avoid heavy pruning in fall—it can stimulate tender growth that won’t survive winter.
What if I cut too much off by mistake?
Don’t panic! If you’ve over-pruned, your rose bush will likely bounce back—just give it time. Focus on healthy canes (thick, green stems) and avoid cutting into old wood (brown, brittle stems). Water deeply and fertilize lightly to support regrowth. Over time, new shoots will emerge from the base or remaining canes.
Can I shape my roses into a specific form, like a tree or hedge?
Roses are incredibly adaptable. For a rose tree, select 1–3 strong canes and prune the rest to the ground. Train the remaining canes vertically, removing side branches until they’re 12–18 inches tall, then shape the top like a crown. For a hedge, prune evenly on all sides, leaving 12–18 inches of height, and thin out crowded canes for airflow.
Should I worry about pests or disease after pruning?
Pruning opens your roses to potential threats, so act fast! Sterilize tools with rubbing alcohol between cuts, and remove all debris from the area. Watch for black spot (dark spots on leaves) or aphids (tiny green bugs). Apply a fungicide or insecticidal soap if needed, and ensure your roses get 6+ hours of sunlight daily to prevent future issues.
What if my roses still look sparse after pruning?
Sparse growth could mean a few things: underwatering, poor soil, or lack of nutrients. Amend the soil with compost, water deeply 1–2 times a week, and feed with a balanced rose fertilizer (like 10-10-10) in spring and summer. If canes are thin or weak, they may need staking for support until they strengthen.
Still unsure? Snap a photo of your roses and compare them to pruning guides—you’ll spot the differences faster than you think!
Wrapping up and next steps
Reviving your overgrown rose bushes is totally doable—just remember: timing, tools, and technique are your best friends! 🌹 With patience and the right cuts, you’ll soon have lush, blooming bushes that’ll be the envy of the neighborhood. Now that you’re armed with the know-how, grab those shears and get pruning!
Next up? Feed and nurture your roses with proper care—think mulch, water, and maybe even some fertilizer—to help them bounce back stronger than ever. Happy gardening!