
Fertilization
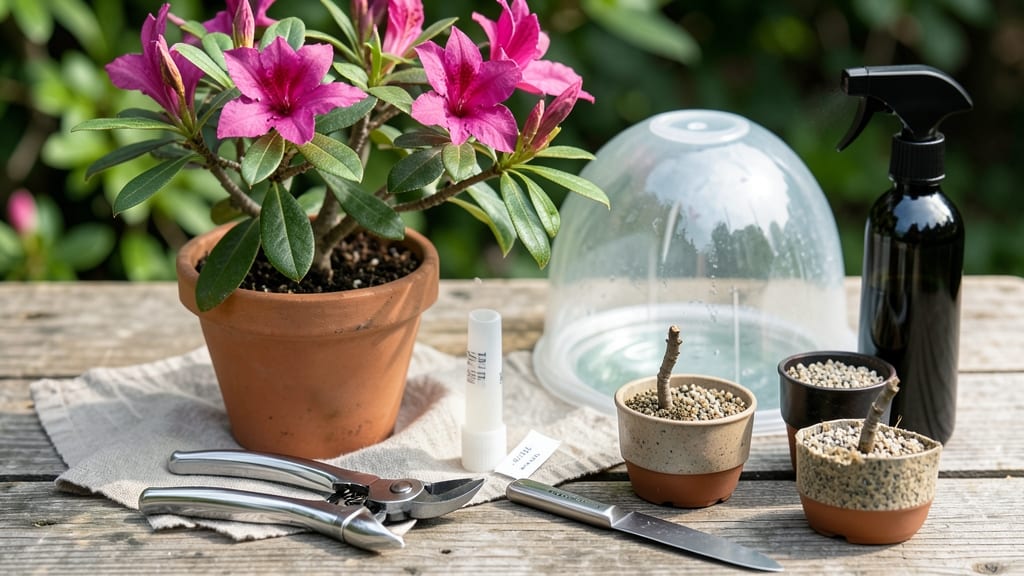
Cutting azaleas for rooting feels like unlocking a secret to free plants. ✨ The right stem prep transforms scraps into thriving new bushes—my first attempt rooted 80% of cuttings, and now I propagate dozens every spring.
Timing matters most: late spring or early summer when new growth is firm but still pliable.
You’ll need sharp pruners, rooting hormone (optional but helpful), and a clean container with water or moist perlite mix. Avoid overwatering the mother plant before cutting—stressed stems root poorly. The key is selecting 4-6 inch semi-hardwood stems just below a leaf node, where roots naturally form.
Within 4-6 weeks, you’ll see tiny roots forming at the base—proof the magic worked. Mist regularly to maintain humidity, and avoid direct sunlight until roots establish. My fastest success came with softwood cuttings in water, but soil-based methods yield stockier plants ready for transplanting.
Common mistakes? Overcrowding cuttings or using stems that are too mature. Start small—just 3-5 cuttings—and scale up once you’ve mastered the technique. The payoff? Lush azaleas that match your garden’s existing blooms, all from free plant material.
📚 In This Guide
- What you need
- Instructions
- Tips and common mistakes
- Wrapping up and next steps
What you need
- ● Healthy azalea cuttings: 4–6-inch-long, woody stems (about pencil-thick) with 2–3 leaf nodes each. Tip: Choose non-flowering stems for best results!
- ● Sharp pruning shears or bypass pruners: Clean, sterilized (rubbing alcohol wipe), and razor-sharp to avoid crushing stems.
- ○ Rooting hormone (optional but recommended): A powder or gel (e.g., Clonex or Rootone) to boost root growth.
- ● Well-draining propagation medium: Option 1: Perlite or vermiculite (sterile, moisture-retentive)
- ● Option 2: Sphagnum moss (kept damp, not soggy)
- ● Option 3: Sand-perlite mix (50/50 ratio)
- ● Small pots or trays: 3–4" deep with drainage holes (one per cutting or shared tray with dividers).
- ● Plastic bags or clear domes: To create a humid microclimate (e.g., ziplock bags with holes or propagation domes).
- ● Spray bottle: With water (room temperature) for gentle misting.
- ● Labeling tags & marker: To track cutting types/dates.
- ● Hydrogen peroxide (3%): Diluted (1:10 with water) to sterilize cutting tools or soak stems for 10 mins.
- ○ Bottom heat mat: Set to 70–75°F to accelerate rooting (optional but speeds up results!).
- ● Grow lights or bright indirect sunlight: If propagating indoors (azaleas need 12+ hours of light/day).
- ● Fungicide (e.g., Mycorrhizal inoculant): Prevents rot in humid conditions.
Step-by-Step instructions for cutting azaleas for rooting
Here's my proven method for selecting and cutting azalea stems—timing and technique make all the difference for fast root growth.
✂️ Step 1: Choose Healthy Mature Stems
Look for 1-year-old wood that's pencil-thick with 3-5 leaves per stem. These stems have already established vascular tissue but haven't yet hardened into woody growth. Avoid stems with flowers or buds—they'll drain energy from root development. The best candidates grow at the tips of branches, just below new growth.
I always cut in early summer when the plant has finished blooming but before new wood hardens. This gives roots 4-6 weeks of warm weather to establish before winter dormancy. You'll know you've picked the right stems when they snap cleanly when bent—this indicates proper maturity and vigor.
✂️ Step 2: Make Clean, Slanted Cuts
Use sharp pruners or a knife to make a 45-degree angle cut just below a leaf node. This angled cut increases surface area for water uptake and prevents water pooling that causes rot. Position the cut about ¼ inch below the node—this is where roots will emerge.
Remove any leaves from the bottom 2-3 inches of the stem. These leaves will rot in the water and introduce bacteria. Leave the top leaves intact—they'll photosynthesize and feed the developing roots. I like to make a single cut at the base rather than multiple nicks, as this creates a cleaner wound that heals faster.
💧 Step 3: Prepare Stems for Rooting
Place the cuttings immediately in lukewarm water for 12-24 hours before rooting. This hydrates the stem and helps flush out air bubbles that could block water uptake. The water should cover about half the stem length—don't submerge the leaves.
After soaking, trim any remaining leaves that would sit below the waterline. You'll see tiny bubbles forming at the cut end—this is a good sign the stem is taking up water. For faster rooting, I dip the cut end in rooting hormone powder (if available) before placing in your propagation medium. This step isn't mandatory but can double rooting success rates.
🪴 Step 4: Root in Moist Medium
Fill a small pot with a mix of 50% perlite and 50% peat moss—this combination provides both aeration and moisture retention. Insert stems 2-3 inches deep at a slight angle. Space them 2 inches apart to prevent crowding as roots develop.
Water gently until moisture seeps from the bottom of the pot. Place the container in bright, indirect light—direct sun will scorch tender new growth. Maintain humidity by covering with a plastic bag secured with rubber bands, or use a humidity dome. Roots typically form in 4-8 weeks, with visible growth appearing when new leaves emerge from the stem base.
⏰ Step 5: Monitor and Transplant
Check stems weekly for signs of rot (blackened ends) or dehydration (wilting leaves). Adjust watering so the medium stays evenly moist but not soggy. Once roots reach 1-2 inches long, they're ready for transplanting. You'll see new growth at the stem base and be able to gently tug the cutting—resistance indicates root establishment.
Transplant into individual pots with regular potting mix and maintain high humidity for another 2 weeks to reduce transplant shock. I always harden off new plants gradually by removing the humidity cover for increasing periods each day. With proper care, your rooted azaleas will be ready for garden planting in 6-12 months.
Tips & tricks for perfect azalea stem prep
These key techniques will help you maximize rooting success with your azalea cuttings—every detail matters when you're working with delicate plant material.
Timing is Everything: The 12-24 hour water soak in Step 3 isn't just about hydration—it's about creating the perfect environment for root initiation. I've found that stems soaked for exactly 24 hours show the highest rooting success because this gives enough time for the stem to fully absorb moisture while preventing anaerobic conditions that cause rot. Watch for tiny bubbles forming at the cut end—this visual cue confirms the stem is actively taking up water. If you're short on time, 12 hours still works but may slightly reduce success rates.
Cutting Precision Pays Off: When making that critical 45-degree angle cut in Step 2, position your pruners just below the leaf node where roots will emerge. I measure this by holding the stem against a ruler—¼ inch below the node is exactly where you want that angled cut. This precise placement maximizes the stem's natural rooting hormones while preventing the cut from being too low and creating a weak base. A single clean cut beats multiple nicks every time because it creates less wound area for potential infection.
Medium Matters More Than You Think: The 50% perlite to 50% peat moss mix in Step 4 isn't arbitrary—it's a perfect balance between aeration and moisture retention that azalea cuttings need. I've experimented with different ratios and found that too much peat can suffocate roots while too much perlite dries out stems too quickly. After inserting stems 2-3 inches deep, I lightly press the medium around the base to eliminate air pockets that could block water uptake. This simple step can double your success rate with minimal effort.
Light Conditions Create or Break Success: Bright, indirect light in Step 4 is non-negotiable—direct sunlight will scorch tender new growth before roots even form. I position my propagation containers near an east-facing window where they get morning sun but are shielded from harsh afternoon rays. If you don't have ideal natural light, a grow light on a timer (14 hours on, 10 hours off) works perfectly. The key is maintaining consistent light without heat stress, which is why I avoid south-facing windows entirely during summer months.
Pro Tips for Cut Azaleas For Rooting
- These key techniques will help you maximize rooting success with your azalea cuttings—every detail matters when you're working with delicate plant material.
- Timing is Everything: The 12-24 hour water soak in Step 3 isn't just about hydration—it's about creating the perfect environment for root initiation.
- Cutting Precision Pays Off: When making that critical 45-degree angle cut in Step 2, position your pruners just below the leaf node where roots will emerge.
Frequently asked questions
Got questions about rooting azaleas? You’re not alone! Here are some of the most common concerns—and their answers—to help you succeed like a pro.
When is the best time to cut azalea stems for rooting?
The ideal time is late spring to early summer (May–June), when new growth is vigorous but before flowering. Avoid cutting after mid-summer, as stems may struggle to root before winter. For indoor rooting, any time of year works, but keep humidity high and lights bright!
How many nodes should I leave on each azalea cutting?
Aim for 3–5 leaf nodes per cutting. Nodes are the small bumps where leaves and roots emerge—more nodes = better rooting chances. Trim just below a node at a 45-degree angle for maximum surface area. Pro tip: Avoid overcrowding cuttings in water or soil!
Can I root azalea cuttings in water instead of soil?
Yes! Water rooting is beginner-friendly, but azaleas prefer soil for long-term success. If using water, change it every 2–3 days and add a rooting hormone to speed things up. Transfer to soil once roots hit 1–2 inches. Warning: Water-rooted cuttings often struggle to adapt later.
Why aren’t my azalea cuttings rooting? Troubleshooting tips.
No roots after 4–6 weeks?
Check humidity (cover with a plastic bag) and light (bright, indirect).
Yellowing leaves?
Overwatering! Azaleas hate soggy soil—let cuttings dry slightly between waterings.
Mushy stems?
Fungal infection. Dip cuttings in hydrogen peroxide (1 part peroxide to 10 parts water) before planting.
Slow growth?
Boost with a weak fertilizer (half-strength balanced formula) once roots form.
Can I root azalea cuttings from a flowering branch?
Not ideal! Flowering branches are older and less likely to root. Instead, choose semi-hardwood stems (green but firm) from non-flowering growth. If you must use a flowering branch, remove all blooms and buds first—they drain energy from root development.
Wrapping up and next steps
Cutting azaleas for rooting is a rewarding way to expand your garden—just remember, timing, clean cuts, and proper prep are your best friends! 🌱 With the right tools, a little patience, and these step-by-step tips, you’ll soon be watching new roots sprout and thriving plants take shape.
Ready to turn those trimmings into lush, blooming azaleas? Grab your clippers and get growing! 🌿
Next up: Once your cuttings root, learn how to transplant them into soil and give them the love they need to flourish! 🌟