
Succulent
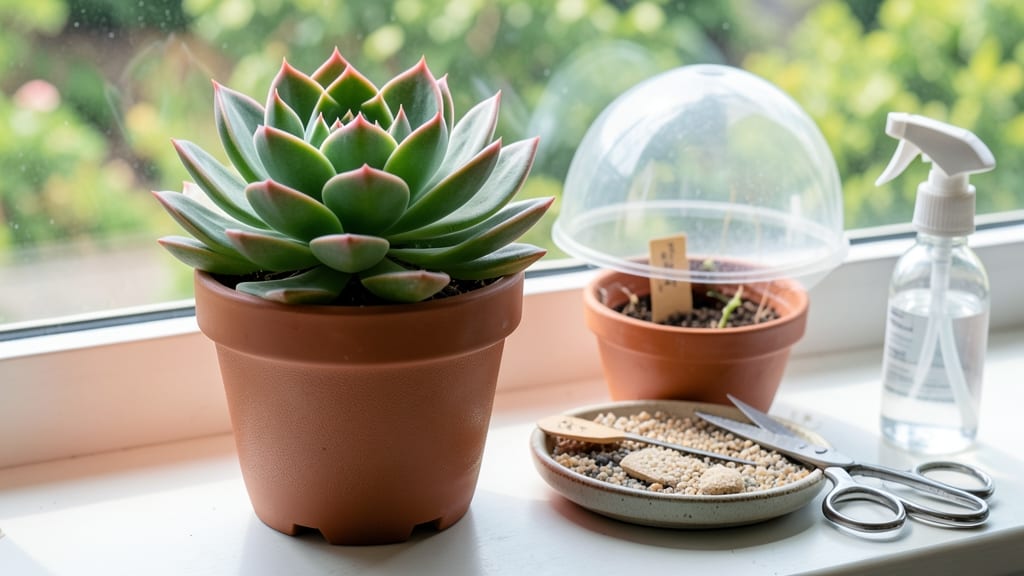
Cloning succulents from a single leaf is the fastest way to multiply your collection. 🌱 I’ve turned one prized echeveria into dozens of identical plants just by letting fallen leaves root—no expensive tools or waiting months for seeds.
The secret? Patience and the right conditions, which I’ll break down so you can skip the guesswork.
You’ll need just three things: healthy leaves, a well-draining mix (cactus soil works perfectly), and a warm, bright spot out of direct sun. No fancy greenhouse required—even a shallow tray or paper towel works for rooting.
The magic happens in 2-4 weeks, depending on the succulent type, and you’ll watch tiny roots form before new rosettes appear.
What you end up with is a whole new generation of plants that look exactly like your favorite—no genetic surprises, no waiting for seeds, and no risk of disease from soil-borne pathogens.
My first batch of cloned jade plants now fills a whole shelf, and the process gets easier every time.
This method works for almost any succulent with plump, healthy leaves, from sedums to haworthias. The key is avoiding overwatering and giving roots time to establish before transplanting. Let’s get those leaves propagating!
📚 In This Guide
- What you need
- Instructions
- Tips and common mistakes
- Wrapping up and next steps
What you need
- ● Healthy succulent leaves: Choose plump, firm leaves (avoid wrinkled or damaged ones). Quantity: 3–5 leaves per plant (more = more clones!).
- ● Well-draining soil mix: A blend of cactus/succulent soil (50%) + perlite or coarse sand (50%) for aeration. Quantity: Enough to fill small pots (2–4 inches deep).
- ● Small pots or trays: Use 2–4 inch pots (for individual leaves) or a shallow tray with drainage holes. Material: Plastic, terracotta, or biodegradable pots work.
- ○ Rooting hormone (optional but helpful): A powder or gel to speed up root growth. Brand tip: Try Clonex or Rooting Hormone #3.
- ● Clean, sharp scissors or pruning shears: Sterilize with rubbing alcohol to prevent infection.
- ● Spray bottle: For misting soil lightly (succulents hate soggy roots!).
- ● Tweezers or toothpicks: Helpful for placing tiny leaves in soil.
- ● Labeling tags & marker: Track your clones (e.g., "Echeveria ‘Lola’ Clone #1").
- ● Indirect sunlight area: A bright, warm spot (like a windowsill) with no direct midday sun for the first 2–3 weeks.
- ● 🌡️ Wait 1–3 days before planting: Let leaf cuttings callus over (dry out slightly) to prevent rot.
- ● ✨ Bottom heat helps! Place trays on a seedling mat (or near a heater) to encourage faster roots.
- ● 🔥 Avoid overwatering: Let soil dry completely between waterings (every 1–2 weeks).
Step-by-step instructions for leaf-by-leaf succulent propagation
Here's how to turn a single leaf into a thriving new plant—no waiting for mature offsets.
🌱 Step 1: Select and Prepare Healthy Leaves
Choose plump, firm leaves from a mature, disease-free succulent. The best candidates are those that detach easily with a gentle twist—no tearing. I like to work with leaves from the outer edges of the plant where they've fully matured but haven't yet begun to wither. Avoid leaves with brown spots, cracks, or signs of pest damage, as these won't propagate successfully.
Let the detached leaves sit in a dry, shaded spot for 3-5 days to form a calloused base. This callus acts as a natural barrier against rot once you plant them. You'll know they're ready when the cut end looks slightly dry and dull—no longer shiny or moist. This step is critical for preventing fungal infections that can kill your new clones before they root.
💧 Step 2: Plant Leaves in Well-Draining Soil
Fill small pots (2-3 inches deep) with a cactus/succulent mix—never regular potting soil, as it retains too much moisture. I use 2-inch pots for single leaves, as they need minimal space to root. Gently press the calloused end of each leaf just below the soil surface, leaving the flat part exposed to light. You'll see the leaf sitting at a slight angle, which helps prevent water from pooling around the base.
Space leaves 1 inch apart in the same pot if you're propagating multiple at once. Lightly mist the soil with water until it's evenly moist but not soggy. The goal is to hydrate the soil enough to support root growth without drowning the leaf. Overwatering here is the #1 killer of succulent clones—you'll know you've got it right when the soil surface looks dry to the touch within an hour.
☀️ Step 3: Provide Bright, Indirect Light and Patience
Place the pots in a location with bright, indirect light—think east-facing windows or under 50% shade cloth if outdoors. Direct sun at this stage will scorch the leaves before they root. You'll notice tiny roots forming at the calloused end in 2-4 weeks, but don't rush to check. Gently wiggle the leaf after 3 weeks to test for resistance; if it feels anchored, roots are developing.
Water every 7-10 days, allowing the top 1 inch of soil to dry completely between waterings. Succulent leaves are prone to rot if kept too moist, so it's better to underwater slightly. You'll see new growth—tiny "pups" or baby plants—emerging from the leaf base in 4-8 weeks. This is your signal that the clone is thriving and ready for the next phase.
✂️ Step 4: Separate and Transplant New Plants
Once the pups reach 1-2 inches tall (usually 8-12 weeks after planting), carefully remove them from the parent leaf using a small spoon or your fingers. I like to use sterilized tweezers for delicate clones to avoid damaging the tiny stems. Gently tease apart the roots if the pups are still connected, but don't force it—some roots will break naturally, and that's fine.
Transplant the pups into their own 3-inch pots filled with the same cactus mix. Press the soil lightly around the base to secure the plant, but don't compact it. Water lightly immediately after transplanting, then resume the every 7-10 days schedule. Keep them in bright, indirect light for another 2-3 weeks to help them adjust before introducing them to full sun.
🪴 Step 5: Gradually Acclimate to Full Sun and Care
After 4-6 weeks of stable growth in their new pots, your clones are ready for full sun exposure. Harden them off by moving them outdoors for 1-2 hours daily, gradually increasing their time in the sun over 7-10 days. You'll know they're ready for full sun when their leaves look vibrant and firm—not pale or wrinkled.
Once established, care for your cloned succulents like mature plants: water deeply but infrequently (let soil dry completely between waterings), fertilize once in spring with a diluted succulent fertilizer, and repot every 2 years or when roots outgrow the container. The best part? Your clones will now produce their own leaves for future propagation—creating a self-sustaining cycle of new plants.
Tips & tricks for perfect succulent leaf propagation
Took me years of trial-and-error to master these key steps—here's how to avoid the most common pitfalls while maximizing success.
Leaf Selection: The outer leaves from the bottom third of mature plants are your best bet. These leaves have stored enough nutrients to support new growth, while younger leaves still need to feed the mother plant. Look for leaves that detach cleanly with a gentle twist—if you hear a tearing sound, it's not ready yet. I've found that leaves from the Haworthia and Sempervivum varieties tend to propagate most reliably with this method.
Callusing Check: Don't rush this 3-5 day drying period—it's non-negotiable for preventing rot. The callus should look like fine sandpaper when you run your finger along the cut end. I've ruined batches by planting too soon, so trust the process. Place leaves on a paper towel in a shaded spot to avoid any accidental moisture that could trigger mold.
Soil Science: The cactus/succulent mix isn't just about drainage—it's about aeration too. I've had the most success with a blend that's 70% mineral grit (like perlite or pumice) and 30% organic matter (like coconut coir). This ratio prevents the classic "wet sock" syndrome that kills so many clones. Pro tip: Add a handful of charcoal granules to each pot to further prevent bacterial growth.
Light Strategy: That bright indirect light requirement is crucial during the rooting phase. I use a simple grow light on a timer for 12 hours daily when natural light is insufficient. Watch for leaves that look pale or stretched—they're begging for more light. Once you see those first roots at 2-4 weeks, you can gradually introduce more direct sun over 2 weeks to harden them off.
Pro Tips for Clone Succulents
- Took me years of trial-and-error to master these key steps—here's how to avoid the most common pitfalls while maximiz...
- Leaf Selection: The outer leaves from the bottom third of mature plants are your best bet. These leaves have stored e...
- Callusing Check: Don't rush this 3-5 day drying period—it's non-negotiable for preventing rot. The callus should look...
Frequently asked questions
Got questions about cloning succulents? You’re not alone—propagation can feel tricky at first! Below, we’ve rounded up the most common queries to help you clone like a pro.
Can I clone any succulent using leaves?
Most succulents (like Echeveria, Sedum, or Haworthia) thrive with leaf propagation, but some—like Aloe or Agave—need offsets or cuttings. Check your plant’s type first! If unsure, try leaf propagation—it’s low-risk and often works. Pro tip: Avoid jelly-like leaves (like Kalanchoe), which root better from cuttings.
How long does it take for succulent leaves to root?
Patience is key! Most leaves root in 2–6 weeks, depending on light, humidity, and temperature. Keep them in bright, indirect light (no direct sun) and mist lightly every few days. If no roots form after 8 weeks, gently check—sometimes they’re hiding! Troubleshooting: Yellowing leaves? Too much moisture. Wrinkled? Needs water.
What’s the best time of year to clone succulents?
Spring and early summer (March–June) are ideal—warmth and longer daylight boost rooting success. Avoid winter (slow growth) and extreme heat (stress). Exception: If your climate is mild year-round, you can propagate anytime! Just mimic natural conditions: bright light, moderate temps (65–75°F), and minimal water.
Why are my cloned leaves rotting instead of rooting?
Overwatering is the #1 killer! Succulent leaves rot when sitting in damp soil or air. Fix it:
- Use a well-draining mix (cactus soil + perlite).
- Water only when the soil is completely dry (bottom-watering helps!).
- Ensure the leaf has a dry callus (1–2 days of air-drying) before planting.
- Move to a warmer, brighter spot (avoid cold drafts).
Can I clone succulents without soil?
Try water propagation (place leaves in a jar of water, change weekly) or perlite/sand for faster rooting. For extra speed, use a rooting hormone (optional but helpful). Just avoid soil if you’re impatient—roots form 2x faster in water!
Wrapping up and next steps
Cloning succulents through leaf propagation is a rewarding way to expand your collection without the wait—and now you’ve got all the tools to succeed! 🌱 Whether you’re a beginner or a seasoned plant parent, this method is simple, cost-effective, and perfect for multiplying your favorite varieties.
The key? Patience and consistency—let those roots grow, and soon you’ll be gifting (or trading!) thriving new plants.
Ready to put your new skills to the test? Start with just one leaf today—your future succulent garden (or office desk jungle 🌿) is waiting! For extra inspiration, check out our guide on caring for cloned succulents next.