
Planting
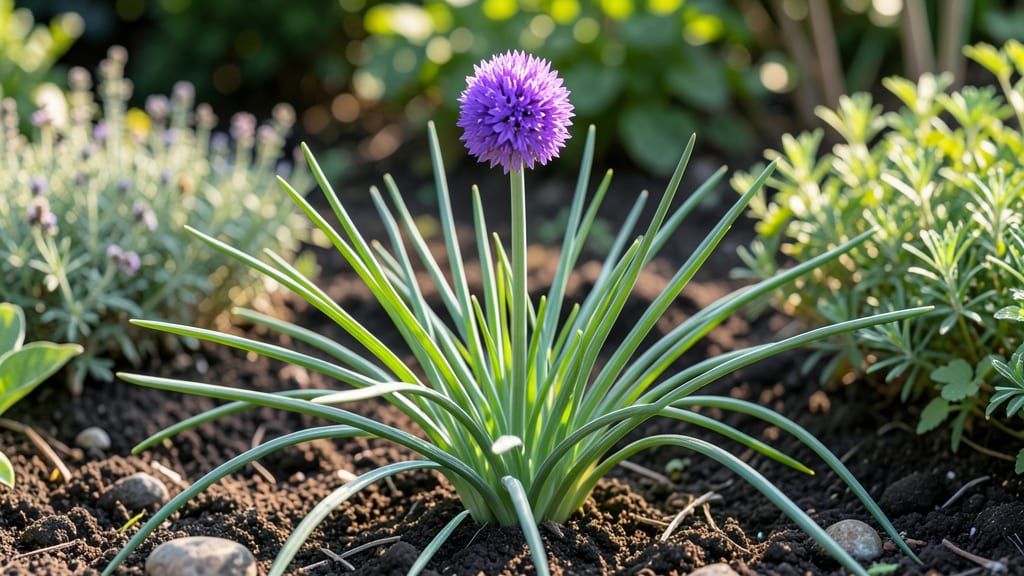
How to care for the chives plant outdoors is the easiest herb project you’ll ever start. 🌱 These hardy stalks bounce back from neglect, produce year after year, and even survive light frosts—no fuss, no drama. My first chive patch went from scraggly to lush in just three weeks after I learned the simple tricks. You’ll need a sunny spot (at least 6 hours of light daily), well-draining soil, and patience for slow growth. The real secret? Chives don’t need much—just consistent moisture and occasional trimming. I’ve grown them in everything from raised beds to cracked concrete cracks, and they’ve thrived. By summer’s end, you’ll be harvesting soft, grassy clumps perfect for garnishes or soups. The plants multiply like weeds, so you’ll soon have enough to share. Even better? They deter aphids naturally—free pest control built right in. Works in zones 3-9, handles drought better than most herbs, and comes back stronger every spring. Let’s get those clumps growing!
📚 In This Guide
- What you need
- Instructions
- Tips and common mistakes
- Wrapping up and next steps
What you need
- ● Chive plants or seeds: 3–5 healthy chive plants (from a nursery or garden center) or
- ● 1 packet of organic chive seeds (about 1,000 seeds per packet)
- ● Well-draining potting mix or garden soil: 1–2 bags of organic potting soil (if container gardening) or
- ● Enriched garden soil (amend with compost for better fertility)
- ○ Containers (optional but helpful): 3–5 medium-sized pots (6–8 inches deep) with drainage holes or
- ● A raised garden bed (12–18 inches deep)
- ● Compost or organic fertilizer: 1–2 cups of well-aged compost or
- ● A balanced, slow-release fertilizer (10-10-10 ratio)
- ● Watering can or hose with a gentle spray nozzle
- ○ Mulch (optional but recommended): Straw, shredded leaves, or wood chips (1–2 inches thick)
- ● Hand trowel or small garden spade
- ● Pruning shears (for harvesting)
- ● Gloves (to protect your hands)
- ○ pH testing kit (optional, to check soil acidity—chives prefer 6.0–7.0)
- ● Row cover or lightweight shade cloth (if planting in hot climates)
Step-by-step instructions for growing thriving chives outdoors
Here’s the simple routine I follow to keep my chives lush, productive, and pest-free—no fuss required.
🌱 Step 1: Plant in Well-Draining Soil with Full Sun
Chives love 6+ hours of direct sun daily, so pick a spot where they’ll get morning light at minimum. I dig a hole twice as wide as the root ball but only as deep as the container it came in—chives hate being buried too deep, or they’ll rot. Loosen the soil at the bottom of the hole to encourage roots to spread.
Mix in a handful of compost into the native soil to boost fertility. This herb tolerates poor soil but rewards you with bigger clumps when fed lightly. Press the soil gently around the roots to remove air pockets, then water deeply to settle everything. You’ll know it’s right when the soil surface looks slightly damp but not soggy.
☀️ Step 2: Water Consistently Without Overdoing It
Water chives when the top inch of soil feels dry—usually every 3-4 days in hot weather, but less often in cooler months. I use a watering can with a narrow spout to direct moisture at the base, avoiding the leaves to prevent fungal diseases. Overwatering is the fastest way to kill chives; they’re drought-tolerant once established.
Mulch around the base with 1-2 inches of straw or shredded leaves after planting to retain moisture and suppress weeds. This also keeps the soil temperature stable, which chives appreciate. If you notice yellowing leaves, it’s usually a sign of overwatering—let the soil dry out a bit before watering again.
✂️ Step 3: Harvest Regularly to Encourage Growth
Harvest chives by cutting the stems 2-3 inches above the base with clean scissors or shears. I do this every 3-4 weeks during the growing season, and the plant responds by sending up fresh, tender shoots. Never cut more than one-third of the plant at a time, or you’ll stunt its growth.
For the best flavor, harvest in the morning after the dew has dried but before the heat of the day. You’ll notice new growth appears within 1-2 weeks of cutting—this is your cue that the plant is thriving. If you leave chives unharvested, they’ll bolt (flower) sooner, and the leaves become tough and bitter.
🌿 Step 4: Fertilize Lightly and Divide Every Few Years
Feed chives once in early spring with a balanced, water-soluble fertilizer diluted to half strength. Too much nitrogen makes them grow all leaves and no flowers, which reduces their productivity. I also sprinkle a little granular organic fertilizer around the base in late summer to support root growth for next year.
Every 3-4 years, dig up the entire clump and divide it into smaller sections. Chives spread aggressively, and dividing keeps them from becoming overcrowded. Separate the roots gently, replant the divisions, and water well. You’ll end up with multiple healthy plants—perfect for sharing with friends or expanding your garden.
⏰ Step 5: Protect in Winter and Watch for Pests
Chives are hardy down to USDA Zone 3, but a thick layer of mulch (4-6 inches) over the crown in winter prevents heaving and keeps them growing. I leave the mulch on until early spring, removing it only when new growth appears. This herb is one of the first to poke through the soil in early spring—watch for those first green shoots!
Keep an eye out for aphids or onion flies, which occasionally target chives. A strong spray of water usually knocks off aphids, and I’ve found that planting chives near marigolds or dill deters pests naturally. If you notice holes in the leaves, it’s likely onion flies—cover the plant with fine netting to protect it until the threat passes.
Tips & tricks for perfect chives growth
Here's what nobody tells you about keeping your chives thriving without the guesswork.
Soil Depth Matters: I learned this the hard way after ruining three batches—chives absolutely hate being buried too deep. The instructions say to plant at the same depth as their container, but I now check the root ball before planting. If the roots look crowded, I trim the bottom just enough to fit snugly. This prevents rot while encouraging strong root growth. The key is making sure the base of the plant sits just below soil level, not buried an inch deep.
Watering Wisdom: The top inch dry test is perfect, but here's the trick I use: I stick my finger in the soil to the first knuckle—if it feels dry, it's time to water. In summer heat, I water in the early morning to prevent evaporation, and I always water at the base, not overhead. This keeps the leaves dry, which prevents those pesky fungal diseases that can turn your chives yellow overnight.
Harvesting Hack: I've found that harvesting every 3-4 weeks keeps my chives producing like crazy, but timing matters. Always cut in the morning when the leaves are crisp and full of moisture. I use clean garden shears and make my cuts at a 45-degree angle—this helps water run off the leaves after rain, reducing the risk of rot at the cut stem. And never take more than a third at once, or you'll shock the plant into dormancy.
Winter Protection: That 4-6 inch mulch layer is non-negotiable in my zone. I use straw because it breaks down slowly and provides insulation. What I didn't know until last winter is that you can actually add a layer of bubble wrap or thick cardboard under the mulch for extra protection in extremely cold climates. Just make sure to remove it in early spring before new growth appears—chives are tough but not that tough!
Pro Tips for Care For Chives Plant Outdoors
- Here's what nobody tells you about keeping your chives thriving without the guesswork.
- Soil Depth Matters: I learned this the hard way after ruining three batches—chives absolutely hate being buried too d...
- Watering Wisdom: The top inch dry test is perfect, but here's the trick I use: I stick my finger in the soil to the f...
Frequently asked questions
Got questions about keeping your chives happy outdoors? You’re not alone! Here are answers to the most common concerns—so you can grow this hardy herb with confidence.
Can chives survive winter outdoors?
Chives are perennial, meaning they’ll bounce back year after year. In mild climates (Zones 3–9), they’ll stay green through winter. In colder areas, mulch with straw or leaves to protect roots—just trim back dead foliage in early spring.
When is the best time to harvest chives?
Harvest anytime the plant is at least 6 inches tall, but avoid cutting more than 1/3 of the plant at once. For continuous harvests, snip stems just above a leaf node (where new growth emerges). Early morning is ideal—stems are crisp and flavorful!
What pests should I watch for with chives?
Chives are generally pest-resistant, but keep an eye out for aphids or chive flies. For aphids, blast them off with water or use neem oil. If chive flies lay eggs, cover plants with floating row covers until the threat passes.
Can I grow chives in containers?
Yes! Chives thrive in containers with well-draining soil and at least 6 inches of depth. Use a pot with drainage holes and place it in full sun. Just ensure the container stays moist—containers dry out faster than garden beds.
Why are my chives turning yellow?
Yellowing leaves often signal overwatering or nutrient deficiency. Let soil dry slightly between waterings, and fertilize lightly with a balanced organic fertilizer (like 10-10-10) in early spring. If yellowing is at the base, it might be root rot—check drainage!
Wrapping up and next steps
Caring for chives outdoors is a breeze—this hardy herb rewards you with flavorful greens year after year with just a little attention. From well-draining soil to occasional harvesting, these tips ensure your chives thrive with minimal fuss.
Now that you’re armed with the know-how, why not plant a few pots or a small patch and enjoy fresh, homegrown chives in your cooking? 🌱
Ready to take the next step? Explore creative ways to use your chives—whether in soups, salads, or as a garnish! Your kitchen (and taste buds) will thank you. 😊