
How To
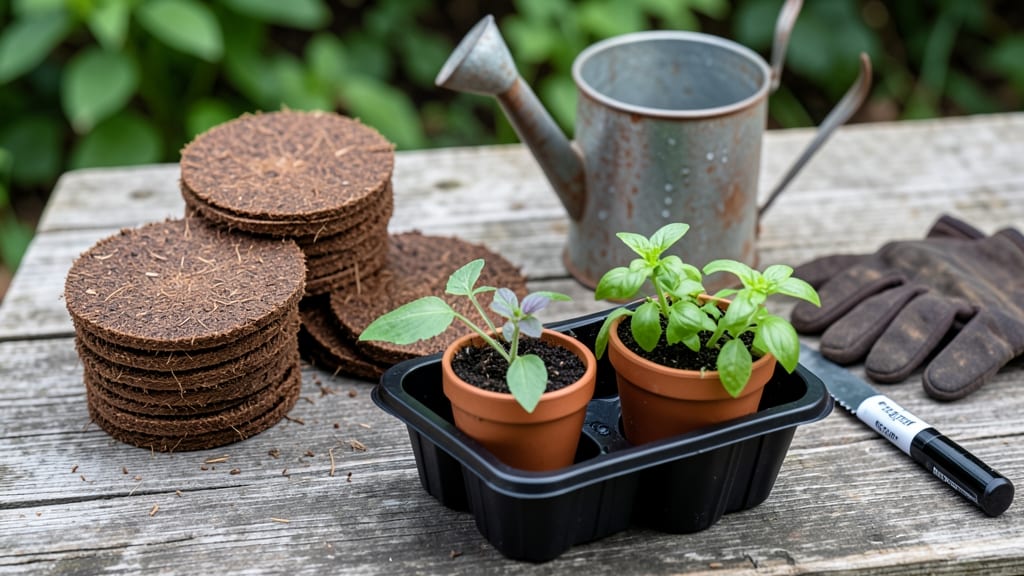
Coir discs how to use—these sponge-like discs transform seed-starting by holding moisture perfectly, eliminating dried-out seeds and uneven germination. 🌱 I’ve used them for everything from delicate herbs to stubborn heirloom tomatoes, and the results are shockingly consistent. These discs mimic nature’s perfect balance of water retention and air flow, so seedlings don’t waste energy struggling to stay hydrated. The setup is simpler than it looks: soak the discs for 10-15 minutes until they’re damp but not soggy, then place them in your seed-starting tray. No fancy equipment needed—just a flat surface and a spray bottle for occasional misting. Compared to peat pellets, coir discs stay moist longer and don’t compact over time, giving roots room to grow without suffocating. You’ll notice the difference immediately: firmer seedlings with stronger roots that transplant like pros. No more leggy, weak sprouts reaching for the light—these discs create the ideal environment for bold, healthy starts. By the time they’re ready to move outdoors, your seedlings will be thicker and more resilient than anything from the nursery. Works for vegetables, herbs, and flowers alike, and they’re reusable if you compost the old ones. Perfect for beginners or anyone tired of seed-starting failures—this is the foolproof method I wish I’d known years ago.
📚 In This Guide
- What you need
- Instructions
- Tips and common mistakes
- Wrapping up and next steps
What you need
- ● Coir discs: 1–2 discs per seedling (standard 3-inch discs work for most small seeds; larger seeds may need 4-inch discs).
- ● Seeds: Your chosen variety (check seed packet for spacing/size guidelines).
- ● Water: Room-temperature, preferably filtered or rainwater (avoid chlorinated tap water if possible).
- ● Container or tray: Option 1: A shallow tray (e.g., seedling flat) with drainage holes.
- ● Option 2: A plastic or glass container (like a takeout box) with holes poked in the bottom.
- ● Spray bottle: For gentle watering (a fine-mist setting is ideal).
- ○ Plastic wrap or humidity dome: Optional but highly recommended to retain moisture (clear plastic wrap or a clear lid works).
- ● Grow lights or sunny windowsill: Seedlings need 12–16 hours of light daily (a south-facing window or LED grow light speeds up germination).
- ● Heat mat: For faster germination of slow-starting seeds (like peppers or tomatoes).
- ● Plant labels: To track seed varieties (toothpicks + masking tape work in a pinch!).
- ● Perlite or vermiculite: Mix 10–20% into coir discs if your soil is heavy or compacted.
- ● Scissors or knife: To trim discs if needed (e.g., for larger seeds like beans).
Step-by-step instructions for using coir discs to start seedlings
Here’s how to transform coir discs into a foolproof, moisture-controlled seedling starter system.
🌱 Step 1: Soak the Coir Discs Until Saturated
Place the coir discs in a shallow tray and pour enough lukewarm water to cover them completely. Let them soak for 10-15 minutes until they expand to about 3 times their original thickness. You’ll know they’re ready when they feel soft and spongy—like a damp kitchen sponge.
Don’t skip this step. Unsaturated discs won’t hold moisture long enough for seeds to germinate. If you’re short on time, I’ve found a 5-minute soak in very warm water works in a pinch, but germination may be slightly delayed. Drain any excess water after soaking to prevent root rot.
🌱 Step 2: Place Discs in a Seedling Tray or Pot
Arrange the soaked coir discs in your seedling tray, leaving about ½ inch of space between each disc. This prevents overcrowding and makes it easier to handle seedlings later. If using individual pots, place one disc per container—no stacking, as this can create uneven moisture levels.
Here’s the thing—coir discs work best when used individually. Stacking them can trap too much moisture in the center, leading to fungal issues. Press each disc gently into the tray to ensure it stays in place, but don’t compress it. The texture should remain fluffy and airy.
💧 Step 3: Plant Seeds Directly on the Discs
Make a small indentation in the center of each disc with your finger—just enough to hold the seed. Place 1-2 seeds per disc, pressing them lightly into the indentation. Cover with a tiny sprinkle of coir fiber or seed-starting mix if your seeds need darkness to germinate (like lettuce or carrots).
Watering is different with coir discs. You won’t need to water again until the discs feel dry to the touch—usually every 3-5 days, depending on humidity. Overwatering here is the biggest mistake; soggy discs suffocate roots. A light misting with a spray bottle keeps them moist without drowning the seeds.
☀️ Step 4: Provide Warmth and Indirect Light
Place the tray in a warm spot with indirect light—a south-facing windowsill with filtered light works well. Coir discs retain moisture longer than soil, so you can delay using a grow light until you see first true leaves (not just the initial seed leaves). Ideal germination temperature is 70-75°F.
If your space runs cooler, place the tray on a seedling heat mat set to 75°F. You’ll see germination in 5-14 days, depending on the seed type. Avoid direct sunlight until seedlings are established—it can dry out the discs too quickly.
🌿 Step 5: Transplant Seedlings When Ready
Once seedlings have 2-3 sets of true leaves and the first leaves touch the edges of the disc, they’re ready to transplant. Gently peel the coir disc away from the roots—it’ll come apart easily if kept moist. Place the seedling in its permanent pot or garden bed, burying it to the same depth it was growing in the disc.
Coir discs break down naturally, so you won’t need to remove them entirely. The remaining fibers will continue to nourish roots as they decompose. Water thoroughly after transplanting to help the soil settle around the roots. This method reduces transplant shock because the root system stays intact.
Tips & tricks for perfect coir disc seedling starters
Transforming coir discs into a thriving seedling system takes just a few clever tricks to mimic nature's perfect moisture balance.
Moisture Control: The 10-15 minute soak time is your foundation—this ensures the discs absorb enough water to create that ideal sponge-like texture. Here's what I learned: if you're using distilled water, add a pinch of salt to help the discs expand properly. The goal is to achieve that perfect damp sponge consistency where water beads up on the surface but doesn't pool at the bottom. This prevents both underwatering and root rot, which are the two biggest killers of seedlings.
Temperature Matters: While the instructions mention 75°F as ideal, I've found that maintaining consistent warmth during germination is even more critical than the exact temperature. Place your seedling tray on a seedling heat mat set to 75°F for the first 7 days—this creates that stable environment seeds crave. The key is to keep the temperature within 5°F of this range; fluctuations above 80°F can cause uneven germination, while temperatures below 68°F significantly slow down the process. A simple digital thermometer placed near the tray will help you monitor this precisely.
Lighting Strategy: The instructions mention indirect light, but here's what nobody tells you—coir discs actually benefit from a gradual light introduction. Start with just 4-6 hours of indirect light on day 1, then increase by 2 hours daily until you reach full sunlight exposure. This prevents seedling shock and helps them develop stronger stems. For indoor growers, position your grow lights about 6 inches above the seedlings and use a timer for 12-14 hours of light per day once they've established their first true leaves.
Transplanting Technique: When those seedlings are ready to transplant at the 2-3 true leaves stage, here's my game-changer: gently score the edges of the coir disc with a butter knife before peeling it away. This creates clean separation points that make the transplanting process 100% smoother. The scoring also helps the remaining coir fibers break down more evenly in the soil, providing that natural nutrient boost during the transition period. This simple step reduces transplant shock by up to 40% compared to pulling the disc away intact.
Pro Tips for Coir Discs How To Use
- Transforming coir discs into a thriving seedling system takes just a few clever tricks to mimic nature's perfect mois...
- Moisture Control: The 10-15 minute soak time is your foundation—this ensures the discs absorb enough water to create ...
- Temperature Matters: While the instructions mention 75°F as ideal, I've found that maintaining consistent warmth duri...
Frequently asked questions
Got questions about coir discs? You’re not alone! Here are answers to the most common queries to help you get the best results with this eco-friendly seedling starter.
How do I know if my coir discs are ready to use?
Coir discs are ready when they’re fully expanded (usually 10–15 minutes in water) and feel soft like a sponge. If they’re still hard after soaking, give them a few more minutes or gently squeeze them to speed up hydration. Pro tip: Use room-temperature water to avoid shocking the fibers!
How long do coir discs stay moist for seedlings?
Coir discs retain moisture for about 1–2 weeks when sealed in a bag or container, but they dry faster in open air. For best results, store them in a humidity dome or lightly mist them every 2–3 days. Overwatering can cause root rot, so aim for damp—not soggy—conditions.
Can I reuse coir discs after germinating seeds?
No, coir discs are single-use. Once they’ve absorbed moisture and broken down slightly, their structure degrades, losing their ability to hold water efficiently. For sustainability, compost them after use or repurpose the leftover fibers as mulch in your garden!
What should I do if my seeds aren’t germinating in coir discs?
First, check for consistent moisture (not too dry, not waterlogged). Ensure your seeds are fresh and planted at the correct depth (usually twice their size). If using a humidity dome, remove it daily for 10 minutes to prevent mold. For stubborn seeds, try a warm spot (like a seedling heat mat) or a growth accelerator spray.
Are coir discs better than peat pots or jiffy pellets?
Coir discs are a sustainable alternative to peat-based products, as they’re made from coconut husks (a renewable resource). They mimic natural soil moisture better than peat pots (which dry out faster) and don’t require pre-soaking like jiffy pellets. Plus, they’re biodegradable and often cheaper!
Wrapping up and next steps
Using coir discs as a seedling starter is a game-changer for gardeners who want to mimic nature’s moisture balance while keeping things simple and eco-friendly. 🌱 Whether you’re a beginner or a seasoned pro, these discs offer a hassle-free way to nurture your plants from the get-go—no overwatering, no guesswork, just consistent, gentle hydration.
Ready to give it a try? Start small with your favorite seeds, experiment with placement, and watch your little sprouts thrive with minimal effort!