
How To
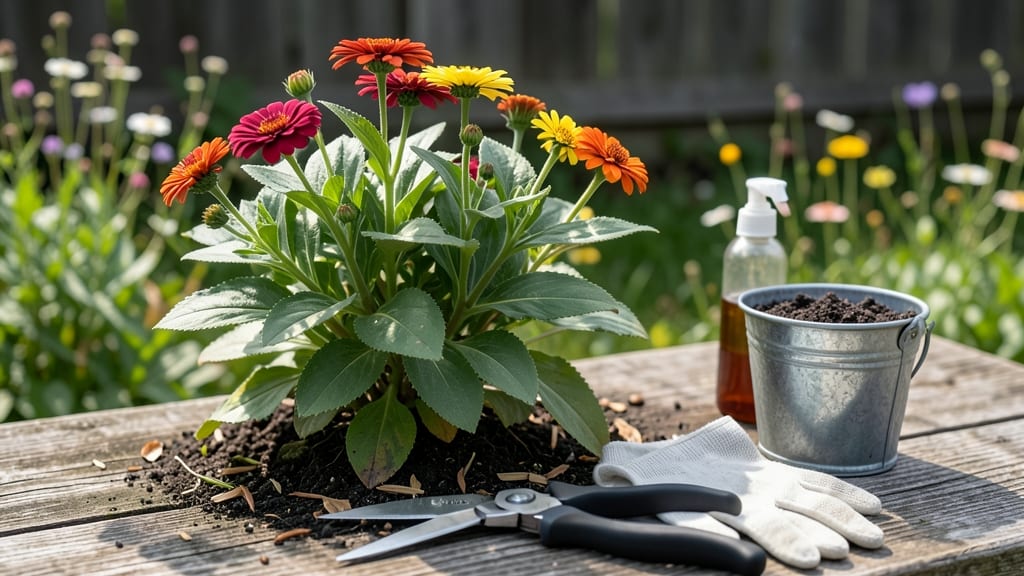
How to make zinnias bushier—skip the leggy, sparse blooms with this simple trick. ✂️ After my first zinnias grew tall and bare, I discovered the secret to bushy, flower-covered plants—pinching and pruning at the right time transforms them completely.
The key is timing and technique: pinch off the top set of leaves when plants are 4-6 inches tall, and prune back leggy stems to encourage branching.
Use a balanced organic fertilizer every 2-3 weeks to support new growth, and water at the base to keep foliage dry and prevent disease.
Within 3-4 weeks, you'll see dense new shoots forming, leading to a fuller plant with more blooms and stronger stems. The result? A zinnia bush so packed with flowers, neighbors will ask for cuttings—no fancy tools or chemicals required.
Works for all zinnia varieties, from dwarf to giant, and adapts to containers or garden beds. Even my black-thumb zinnias came back bushy after this method—here's exactly how to do it without stress.
📚 In This Guide
- What you need
- Instructions
- Tips and common mistakes
- Wrapping up and next steps
What you need
- ● Zinnia plants: Healthy, established zinnias (preferably 6–12 inches tall for best results).
- ● Pruning shears or clean scissors: Sharp, sterilized tools (small garden shears or even kitchen scissors work in a pinch!).
- ○ Gloves (optional but recommended): Protect your hands from thorns or dirt—nitrile or leather gloves are great choices.
- ○ Garden twine or plant ties (optional): For supporting leggy stems if needed (1–2 feet per plant).
- ● Balanced fertilizer (5-10-5 or 10-10-10): A slow-release granular or liquid fertilizer to boost growth (follow package instructions).
- ● Watering can or hose with a gentle nozzle: For post-pruning hydration.
- ● Compost or mulch: To retain moisture and nourish roots (2–3 inches around the base).
- ● Plant food spikes: For a slow-release nutrient boost (1–2 spikes per plant).
- ● Spray bottle with water: For misting leaves if your climate is dry.
- ● Notebook or camera: To track progress and pruning dates!
Step-by-Step instructions for pinching and pruning zinnias
Here's how I transform leggy zinnias into lush, bushy plants with abundant blooms—no fancy tools required.
🌱 Step 1: Identify the Right Time to Pinch
Wait until your zinnias reach 4-6 inches tall and have 3-5 sets of true leaves—that's when they're ready for their first pinch. I always check the stem count first: if you see just one main stem with no side branches, it's time to act. Pinching too early stunts growth, while waiting too long means you miss the best branching opportunity.
Use clean, sharp scissors or your fingers to pinch the top set of leaves just above a leaf node where side branches can form. That little cut tells the plant, "Hey, I want you to grow wider, not just taller." You'll see new growth emerging from those leaf nodes within 7-10 days. If your zinnias are already flowering, skip pinching—they won't respond well.
✂️ Step 2: Prune Strategically for Bushier Growth
After the first pinch, continue pruning every 2-3 weeks to encourage branching. Look for the strongest stems—these are your future blooming branches. Cut back one-third of the plant's height, always making cuts just above a leaf node. This might seem drastic, but trust me: those cuts trigger the plant to produce multiple side shoots instead of one long stem.
I always prune on a mild morning when the plant is hydrated. Avoid pruning in extreme heat—zinnias wilt easily, and stressed plants won't recover as well. After pruning, give the plant a light watering to help it recover. You'll notice new growth sprouting from the leaf nodes within 5-7 days, and those will become your bushy framework.
☀️ Step 3: Support and Maintain for Continuous Blooms
Once your zinnias start branching, they'll need full sun (6-8 hours daily) and consistent watering to support all that new growth. I stake my zinnias at this stage—5-6 foot stakes work best—to prevent them from flopping over as they get bushier. Tie the main stems loosely to the stake with soft plant ties, leaving room to grow. This keeps the plant upright and encourages even branching.
Deadhead spent blooms regularly to redirect the plant's energy into producing more flowers instead of seeds. I pinch off wilting blooms with my fingers—no need for scissors here. This simple habit keeps zinnias flowering all season long and prevents the plant from putting energy into seed production. Watch for new buds forming at the leaf nodes within 3-5 days of deadheading.
🌿 Step 4: Fertilize for Stronger, Bushier Growth
Feed your zinnias with a balanced liquid fertilizer (10-10-10) every 2-3 weeks after pruning to support their bushy growth. I mix 1 tablespoon of fertilizer per gallon of water and apply it in the early morning when the soil is moist. This encourages strong root development and helps the plant recover from pruning stress faster.
Zinnias are heavy feeders, so don't skimp on fertilizer. You'll see darker green leaves and sturdier stems within a week of fertilizing—this is your signal that the plant is thriving. If you notice yellowing leaves, cut back on fertilizer and focus on watering instead. Over-fertilizing can lead to weak stems and fewer blooms, so moderation is key.
Tips & tricks for fuller zinnia growth
Transforming leggy zinnias into lush, bushy plants is all about timing and technique—here's how to get it right every time.
Timing Secret: In Step 1, when you're checking for that 4-6 inch height with 3-5 sets of true leaves, look for the first true leaf node just above the soil line—this is where your first side branches will emerge. I've found that pinching just above this node, rather than higher up, gives you more robust side shoots. The 7-10 day window for new growth is your reward for precision here.
Pruning Precision: During Step 2's every 2-3 weeks pruning cycle, focus on making your cuts at a 45-degree angle just above a leaf node. This angled cut prevents water from pooling on the stem, reducing disease risk. I also recommend using sterilized scissors—dip them in rubbing alcohol between cuts if you're working with multiple plants. The 5-7 day recovery time is when your plant's true transformation happens.
Support System: When you reach Step 3 and need to stake your zinnias, I've learned that 5-foot stakes work better than 6-foot ones for most garden setups. The extra foot provides flexibility without unnecessary height. For tying, use soft plant ties that you can adjust as the plant grows—tight ties can restrict growth. The 6-8 hours of full sun becomes even more critical after staking, so position your stakes to maximize sunlight exposure.
Fertilizer Strategy: In Step 4, when you're mixing your 1 tablespoon of 10-10-10 fertilizer per gallon, consider adding a quarter teaspoon of Epsom salt to the mix for magnesium boost—zinnias love it. Apply this mixture in the early morning when you notice dew still on the leaves, as this indicates optimal moisture levels. The 2-3 week interval between fertilizations gives your plant time to absorb nutrients without overwhelming it.
Pro Tips for Make Zinnias Bushier
- Transforming leggy zinnias into lush, bushy plants is all about timing and technique—here's how to get it right every time.
- Timing Secret: In Step 1, when you're checking for that 4-6 inch height with 3-5 sets of true leaves, look for the first true leaf node just above the soil line—this is where your first side branches will emerge.
- Pruning Precision: During Step 2's every 2-3 weeks pruning cycle, focus on making your cuts at a 45-degree angle just above a leaf node.
Frequently asked questions
Got questions about growing bushier zinnias?
Here are answers to the most common ones—so you can enjoy fuller, more vibrant blooms all season!
When is the best time to pinch zinnias for bushiness?
Pinch zinnias when they’re 6-8 inches tall and have at least 4-5 sets of true leaves. This is usually 4-6 weeks after sowing seeds (or transplanting seedlings). Avoid pinching in extreme heat or cold—aim for mild spring or early summer for best results. Pro tip: Do it in the morning so plants have time to recover!
How much should I prune zinnias to encourage bushiness?
Remove 1/3 of the plant’s height when pinching or pruning. For example, if your zinnia is 8 inches tall, cut back to about 5-6 inches. Focus on removing the top set of leaves just above a leaf node (where new growth emerges). Avoid over-pruning—zinnias are resilient but won’t recover if cut back too aggressively!
What if my zinnias get leggy after pinching?
Leggy zinnias often mean they need more light or less fertilizer. Move them to a sunnier spot (6+ hours of direct sun daily) and reduce nitrogen-rich feeds (which encourage leafy growth over blooms). Instead, use a balanced or phosphorus-heavy fertilizer to promote flowering. Bonus: A light prune to remove overly stretched stems can also help!
Can I use the same pruning techniques for all zinnia varieties?
Most zinnia varieties (like Benary’s Giant, Profusion, or Crystal hybrids) respond well to pinching and pruning. However, dwarf or trail varieties (e.g., Zinnia angustifolia) may not need heavy pruning—they’re bred for compact growth. Always check the variety’s care guide, but never pinch before the first bloom if you’re growing zinnias for early flowers!
What should I do if my zinnias stop blooming after pruning?
If zinnias refuse to rebloom after pruning, they might be stressed, overcrowded, or lacking nutrients. Try these fixes:
- Deadhead spent blooms regularly to encourage new flowers.
- Space plants 12-18 inches apart for better airflow.
- Water at the base (not leaves) to prevent fungal issues.
- Add a low-nitrogen fertilizer (like 5-10-10) to boost blooms.
With patience, they’ll bounce back and reward you with even more vibrant flowers!
Wrapping up and next steps
With just a little effort, you can transform your zinnias into lush, bushier beauties that burst with color! Remember, regular pinching and strategic pruning are your best friends—along with proper spacing and sunlight.
Start small, stay consistent, and soon you’ll be rewarded with a fuller, more vibrant garden that turns heads.
Ready to take your zinnias to the next level? Grab your shears and get growing! 🌸 For even more tips, check out our guide on extending zinnia blooms or share your progress with fellow gardeners in our community forum!