
Container Gardens
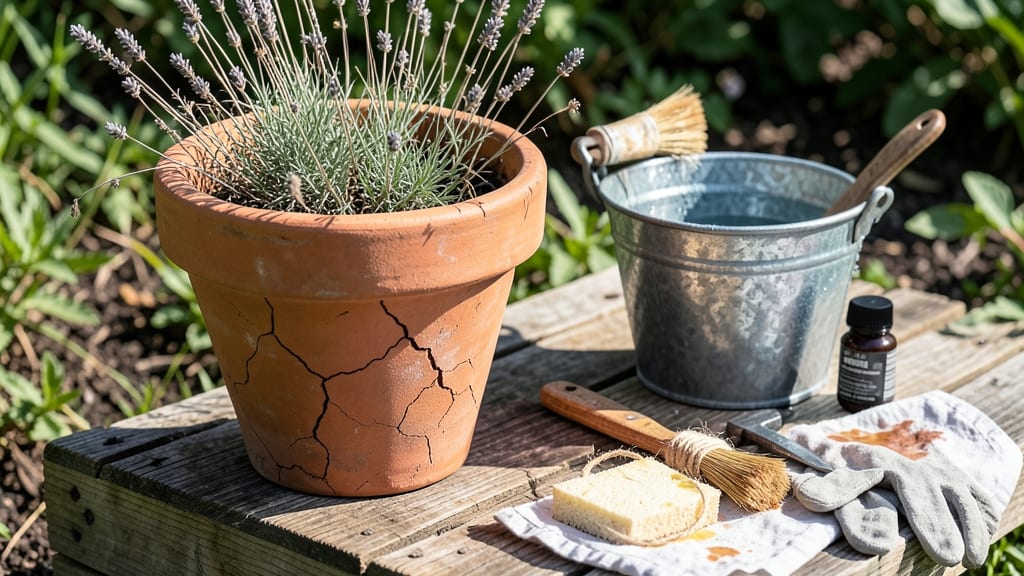
How to make terracotta pots look old straight from the store—until you distress them. 🌱 That weathered, vintage charm transforms your garden containers from store-bought to heirloom-worthy in under an hour. The secret isn’t fancy tools but simple techniques that mimic decades of sun, rain, and garden life.
You’ll need basic supplies: coarse sandpaper (80-120 grit), strong coffee or tea, white vinegar, and a soft brush. Skip the expensive kits—household items do the job just as well. The key is patience and even pressure; rushing leaves uneven wear that looks unnatural.
Start with sandpaper to rough up edges, then stain with coffee for that classic aged look. Vinegar soaks add subtle darkening, while a brush dipped in diluted tea creates streaks. The result? Pots that blend seamlessly with your garden’s rustic aesthetic while staying perfectly functional.
Works for any terracotta—hanging baskets, window boxes, or large planters. The distressed finish makes them look like they’ve been in your family for generations, not just sitting on a shelf. Ready to give your pots some character?
📚 In This Guide
- What you need
- Instructions
- Tips and common mistakes
- Wrapping up and next steps
What you need
- ● Terracotta pots – Any size or shape (clean and dry)
- ● Sandpaper – Medium-grit (120-150) for smoothing rough edges, fine-grit (220+) for delicate distressing
- ● Rust-colored paint or stain – Acrylic paint (e.g., burnt sienna, ochre) or a terracotta-specific stain for authenticity
- ● Dark brown or black paint – For aging accents (e.g., coffee stain, black acrylic)
- ● Soft-bristle brush – Small (½") for details, larger (1") for broad strokes
- ● Water & sponge – For diluting paint/stain and blending
- ● Plastic wrap or newspaper – To protect your workspace
- ○ Sealer (optional) – Waterproof sealant (matte or satin finish) to preserve your design
- ● Coffee or tea bags – Steeped and brewed for natural staining
- ● Epsom salt or vinegar – For mimicking mineral deposits (dissolve in water, dab with a sponge)
- ● Twine or jute rope – To wrap handles or edges for a rustic touch
- ● Stencils or tape – For creating crisp, aged patterns (e.g., cracks, splatters)
- ● Old toothbrush – For splattering or texturing paint
- ● Work in a well-ventilated area (paint fumes can be strong!)
- ● Cover your surface with newspaper or plastic—this gets messy!
- ● Wear gloves and old clothes (paint stains like a dream 😉)
- ● Let pots dry completely between layers (patience = pro results!)
Step-by-Step instructions for aging terracotta pots
Transform brand-new terracotta into weathered, vintage pieces with these simple techniques—no painting required.
🪴 Step 1: Clean and Prep the Pots
Start with clean, dry pots to ensure your distressing sticks properly. Scrub off any dust or factory residue with a damp cloth and mild soap, then let them dry completely. I like to rinse them first under warm water to loosen any stubborn grit—this prevents streaks later when we apply stains.
For extra texture, use a wire brush to lightly scratch the surface in random spots. Focus on the edges and bottom where wear shows naturally. The goal is subtle imperfections, not deep gouges—think of how pots develop character over years of use, not neglect.
✂️ Step 2: Apply Coffee or Tea Staining
Brew a strong batch of coffee or black tea (the darker, the better) and let it cool completely. Pour it into the pots until they’re about halfway full, then swirl gently to coat all surfaces. I use a paintbrush to dab excess liquid into crevices—this ensures even staining without puddles.
Let the pots soak for 15-30 minutes, then drain and wipe away excess with a paper towel. The longer they soak, the darker the patina. For a lighter, sun-bleached look, reduce the time to 5 minutes and rinse immediately. Pro tip: Add a splash of vinegar to the brew for extra rustic charm.
☀️ Step 3: Create Weathered Edges
Use a damp sponge to gently rub the rims and bottoms of the pots in circular motions. This mimics years of handling and outdoor exposure. For a more dramatic effect, dip a toothbrush in coffee grounds mixed with water and brush the edges—this creates a gritty, uneven texture that looks like centuries of wear.
Let the pots dry completely before handling. If you’re impatient, place them near a fan or heater (but not directly under it) to speed up drying. Avoid touching the stained areas until fully dry—fingerprints will ruin the vintage effect.
💧 Step 4: Seal for Durability (Optional)
If you want to protect your newly aged pots, apply a clear, matte sealant like polyurethane or wax. Brush it on in thin layers, letting each coat dry completely. I prefer matte finishes because they hide imperfections better than glossy ones. For an even more authentic look, lightly sand the sealed pots with fine-grit sandpaper to rough up the surface.
Let the sealant cure for 24 hours before using the pots. This step is optional but recommended if you’re distressing pots for outdoor use—it prevents stains from washing out in rain.
⏰ Step 5: Add Final Touches
For extra authenticity, use a dark brown or black acrylic paint to lightly touch up any areas that look too uniform. Dab on small streaks or spots where the stain faded unevenly. I also like to brush a tiny bit of paint into the drainage holes to mimic mineral buildup over time.
Let everything dry completely, then admire your handcrafted vintage pots. The key is subtlety—think "well-loved," not "abandoned." Now they’re ready for herbs, succulents, or flowers that’ll look even more charming in their rustic homes.
Tips & tricks for perfectly aged terracotta pots
Here's what I've learned after distressing dozens of pots—these little details make all the difference between looking like a DIY project and a well-loved antique.
Texture Tip: In Step 1, when you're creating those subtle scratches, work in the same direction as the pot's natural grooves. This mimics how pots develop uneven wear from years of use. I use a wire brush and make quick, random strokes—never circular patterns, which look too deliberate. The key is to create depth without making the surface look damaged. Think of it like sandpaper on wood: you want character, not destruction.
Staining Secret: For Step 2, don't just pour the coffee or tea into the pots—use a paintbrush to work it into every crevice, especially around the drainage holes. I like to tilt the pot and let the liquid pool in the bottom before swirling. The 15-30 minute soak time is crucial: if you're impatient, start checking at 10 minutes for a lighter effect. And here's what nobody tells you—if your coffee is weak, your stain will be too. Use the strongest brew you can stomach!
Drying Strategy: After Step 3, when you're letting the pots dry, place them on a wire rack instead of a flat surface. This allows air to circulate underneath and prevents water spots. If you're in a hurry, prop them near a fan on low heat setting—just keep them at least 6 inches away to avoid warping. The drying time varies wildly based on humidity, so don't rush it. A fully dry pot feels cool to the touch and has no damp spots when you run your finger along the edges.
Sealing Wisdom: For the optional Step 4, if you're using polyurethane, apply just two thin coats rather than one thick one. The 24-hour cure time is non-negotiable—this isn't something you can rush. I've learned the hard way that skipping this leads to sealant that's sticky to the touch. For an extra authentic look, lightly sand between coats with 220-grit sandpaper. This creates a subtle texture that makes the pots look like they've been used for decades.
Pro Tips for Make Terracotta Pots Look Old
- Here's what I've learned after distressing dozens of pots—these little details make all the difference between looking like a DIY project and a well-loved antique.
- Texture Tip: In Step 1, when you're creating those subtle scratches, work in the same direction as the pot's natural grooves.
- Staining Secret: For Step 2, don't just pour the coffee or tea into the pots—use a paintbrush to work it into every crevice, especially around the drainage holes.
Frequently asked questions
Got questions about aging your terracotta pots? You’re not alone! Here are some of the most common queries—and their easy solutions—to help you achieve that perfect rustic look without the guesswork.
Can I use these techniques on brand-new terracotta pots?
New pots are the perfect canvas for distressing. Start with a clean surface, and follow the same steps—sanding, staining, or brushing on paint—just like you would with an older pot. The key is patience: new clay absorbs stains more evenly, so let them dry fully between layers.
How long should I let the stain or paint dry between coats?
Drying times vary, but a general rule is 2–4 hours for water-based stains and 4–6 hours for acrylic paint or coffee/tea mixtures. Check the label for specific instructions, and avoid touching or moving the pot until fully dry. Humidity or thin layers may extend drying time—so plan ahead!
What if my pot looks too dark or uneven after staining?
No worries! Uneven staining is part of the charm, but you can fix it. Lightly sand the dark spots with fine-grit sandpaper (220+) to blend them, or apply a thin layer of white paint to brighten areas. For a natural look, dilute your stain with water (1:1 ratio) and reapply lightly to even out the tone.
Will aging my pot affect how well plants grow in it?
Not at all! Distressing techniques—like sanding, staining, or painting—only alter the pot’s appearance, not its functionality. Just ensure you’re using non-toxic, plant-safe materials (like acrylic paint or food-safe stains). Rinse the pot thoroughly before planting to remove any residue.
Can I reuse old paint or stain on new pots?
Yes, but with caution. Leftover acrylic paint or store-bought stains can be reused if stored properly in an airtight container. However, homemade stains (like coffee or tea) may dry out or change color—so it’s best to mix fresh batches for consistent results. Stir well before use to avoid clumping!
Pro Tip: For a super-fast aged look, skip staining and just brush on a mix of black coffee + vinegar (1:1), let it dry, then wipe off excess. The leftover residue creates a natural, uneven patina in minutes!
Wrapping up and next steps
Transforming your terracotta pots into rustic, vintage treasures is easier than you think! With just a few simple tools and techniques—like sanding, staining, or layering paint—you can achieve that distressed charm in minutes.
Whether you’re reviving old pots or giving new ones an instant antique glow, the key is patience and creativity. 🎨
Now that you’re armed with these tips, grab your supplies and get crafting! Once your pots are beautifully aged, they’ll be ready to elevate your garden or home decor—no one will guess they’re brand-new. Happy styling! 🌿✨