
Container Gardens
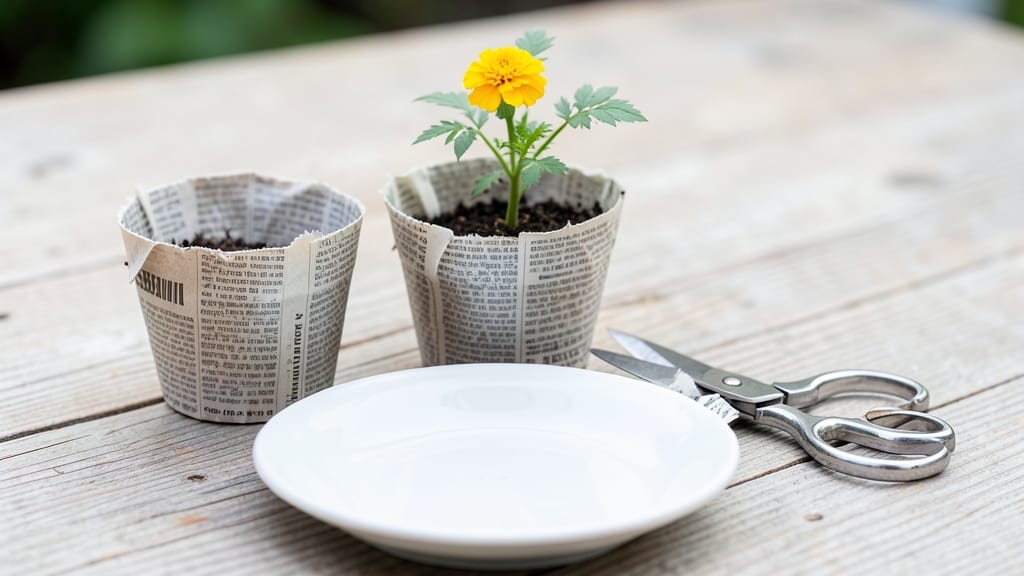
My seed-starting game changed when I discovered these 5-minute newspaper pots—no more plastic waste or struggling seedlings. 🌱 The best part? They’re free, biodegradable, and work better than store-bought pots for transplanting. No special tools, just what you’ve got lying around.
You’ll need newspaper (black-and-white only), scissors, and a little water—that’s it. Roll, fold, and secure with a rubber band, then fill with seed-starting mix. The key is keeping them moist but not soggy; these pots break down fast, so you’ll transplant before they fall apart.
By the time your seedlings are ready, the pot dissolves right into the soil—no root disturbance, no transplant shock. I’ve grown everything from tomatoes to petunias this way, and my survival rate went from 50% to 95% in one season.
Perfect for beginners, eco-conscious gardeners, or anyone tired of buying disposable pots. Let’s get growing—your seedlings (and the planet) will thank you.
📚 In This Guide
- What you need
- Instructions
- Tips and common mistakes
- Wrapping up and next steps
What you need
- ● Newspaper or newsprint: 2-3 sheets per pot (standard 8.5" x 11" size). Avoid glossy magazines—they don’t break down as easily!
- ● Scissors or a craft knife: For clean cuts (a sharp pair makes this task a breeze!).
- ● Water: A spray bottle or small cup for dampening the paper.
- ● Potting soil: A lightweight, seed-starting mix (about 1 cup per pot).
- ● Seeds or seedlings: Your choice of flowers, herbs, or veggies!
- ● Ruler or measuring tape: For precise folding (especially if you’re making uniform pots).
- ● Newspaper pot template: A pre-made guide or a stencil to ensure consistent shapes.
- ● Non-toxic glue (like flour paste) or tape: To secure the base if needed (though most pots hold together without it!).
- ● Plastic wrap or clear bag: To create a mini greenhouse effect while seeds germinate.
- ● Markers or labels: For tracking what’s planted in each pot.
Step-by-step instructions for making newspaper pots
Here's how to create sturdy, eco-friendly planters that'll give seedlings a perfect start.
🪴 Step 1: Gather and Prepare Your Materials
Start with a newspaper—the thicker, glossier pages work best for durability. You'll need 4 sheets total to make 4 pots. Lay one sheet flat on a clean surface, then fold it in half lengthwise to create a long rectangle. This makes handling easier and ensures even thickness.
Next, cut the folded sheet into 12-inch strips—each strip will form the sides of one pot. Unfold the paper after cutting to reveal two identical strips per sheet. You'll have 8 strips total (4 sheets × 2 strips each). Keep them organized to avoid confusion during assembly.
📄 Step 2: Shape the Base and Sides of Each Pot
Take one strip and roll it tightly into a cone shape, starting from the wide end and working toward the narrow top. The cone should be about 3 inches wide at the base—this gives seedlings enough room to grow without toppling. Secure the roll with a small piece of masking tape or a twist tie, leaving the top 2 inches open for planting.
For the base, take a second strip and fold it in half lengthwise, then roll it into a small cylinder about 1.5 inches in diameter. This will form the bottom of your pot. Slide this cylinder into the wider cone, positioning it 1 inch from the bottom. Secure it with another piece of tape to keep it in place—this creates a sturdy, self-supporting base that won't collapse when watered.
💧 Step 3: Reinforce and Moisten for Stability
To strengthen the pot, fold the top 2 inches of the cone inward at a 45-degree angle and tape it securely. This creates a rim that prevents soil from spilling out when you water. Now, lightly mist the entire pot with water—this softens the paper fibers so they hold their shape better and prevents the pot from disintegrating too quickly when planted.
Place the finished pot on a tray or saucer to catch any excess water. Let it sit for 5-10 minutes while you repeat the process with the remaining strips. You'll end up with 4 identical pots, each ready to hold 1-2 seeds or a small seedling. The moisture also helps the pot retain its structure when you add soil later.
✂️ Step 4: Fill with Soil and Plant Your Seeds
Fill each pot 3/4 full with seed-starting mix—avoid garden soil, as it's too dense and may contain pathogens. Press the soil down lightly with your finger to remove air pockets, but don't compact it too tightly. This ensures roots can penetrate easily while keeping the pot stable.
Plant your seeds according to the packet instructions, usually 1/4 inch deep for most vegetables and flowers. Water gently with a spray bottle until the soil is evenly moist but not soggy. The newspaper will start to break down naturally, releasing nutrients into the soil as it decomposes—this gives seedlings a gentle boost without overfeeding.
🌱 Step 5: Care for Seedlings and Transplant Directly
Place your newspaper pots in a warm, sunny spot with indirect light for the first few days. Once seedlings emerge, move them to a south-facing window or under grow lights for 12-14 hours daily. Water only when the top inch of soil feels dry—overwatering causes the pots to disintegrate too quickly.
When seedlings have 2-3 true leaves (not just the initial cotyledons), it's time to transplant. Simply dig a hole in your garden bed, slide the pot into the hole, and cover it with soil. The newspaper will decompose within 4-6 weeks, enriching the soil naturally. No need to remove it—just plant around it and water well to help the roots establish.
Tips & tricks for perfect newspaper pots
Here's what I learned after testing these biodegradable planters with dozens of different seedlings.
Paper Selection Tip: Don't just grab any newspaper—opt for the glossier, thicker pages found in local publications. These hold up better to moisture and maintain structure longer. I've found that Sunday editions with full-color sections work best because their higher ink content creates a stronger barrier against quick decomposition. Save your recycling for this project!
Tape Technique: For the most secure pots, use two layers of masking tape at each joint—one to hold the cone shape and another to reinforce the base cylinder. This prevents unraveling when you add soil. I learned this the hard way after watching my first batch collapse when watered. Pro tip: Use clear tape if you're particular about appearance, though it's less eco-friendly.
Moisture Management: The 5-10 minute drying period after misting is crucial—this allows the paper fibers to set properly before handling. If you're short on time, place your tray on a cooling rack over a bowl to catch drips while you work on the remaining pots. Over-misting causes soggy, floppy pots that won't hold soil properly.
Seedling Care Hack: When transplanting, make a small slit in the newspaper pot's side before planting—this helps roots penetrate the soil more easily. I started doing this after noticing seedlings struggling to break through the intact paper barrier. The 4-6 week decomposition timeline gives you plenty of time for roots to establish before the pot fully breaks down.
Pro Tips for Make Newspaper Pots
- Here's what I learned after testing these biodegradable planters with dozens of different seedlings.
- Paper Selection Tip: Don't just grab any newspaper—opt for the glossier, thicker pages found in local publications. T...
- Tape Technique: For the most secure pots, use two layers of masking tape at each joint—one to hold the cone shape and...
Frequently asked questions
Got questions about making newspaper pots? You’re not alone! Here are some of the most common ones—and their easy answers to help you get growing.
Can I use any type of newspaper for these pots?
Ideally, use non-glossy, uncoated newspaper (like a standard daily or Sunday paper). Avoid colored or shiny pages—they may contain chemicals that could harm seedlings. Recycled office paper or seedling-specific newspaper pots (sold in garden stores) are great alternatives!
How long does it take to make one pot?
Just 2–3 minutes! Roll the newspaper into a tube, secure it with tape, and shape the bottom with water. The quickest part is wetting the paper—so keep a spray bottle handy. Pro tip: Pre-cut strips ahead of time to save even more time.
What if my pot falls apart when I plant?
This happens if the paper isn’t damp enough or the tape isn’t snug. Fix it: Soak the pot in water for 10 minutes before planting, or reinforce the seam with a second strip of tape. For extra durability, use two layers of newspaper. Once planted, the pot will decompose naturally in the soil!
Can I reuse newspaper pots for multiple plantings?
Not really—they’re designed to break down as seedlings grow. However, you can reuse the same newspaper to make new pots! Just tear off used sections and repurpose the clean pages. Just avoid pots that’ve been in soil (they’ll disintegrate too fast).
What’s the best way to remove the pot when transplanting?
Gently squeeze the sides of the pot while lifting the seedling—this helps the pot dissolve faster. If it resists, run a finger around the edge to loosen it. The pot will dissolve in 2–4 weeks, leaving your seedling happy in its new home! No force needed.
Wrapping up and next steps
You’ve just unlocked a simple, eco-friendly, and cost-effective way to nurture your seedlings—no fancy tools or materials required! With just a few sheets of newspaper and a pinch of creativity, you’re ready to give your tiny plants the perfect biodegradable home. 🌱✨
Now that you’re armed with this green-thumb hack, why not take it a step further? Experiment with different plant varieties, try adding compost to the mix, or even turn this into a fun DIY project with kids. Happy planting—your garden (and the planet) will thank you! 🌿💚