
Tools
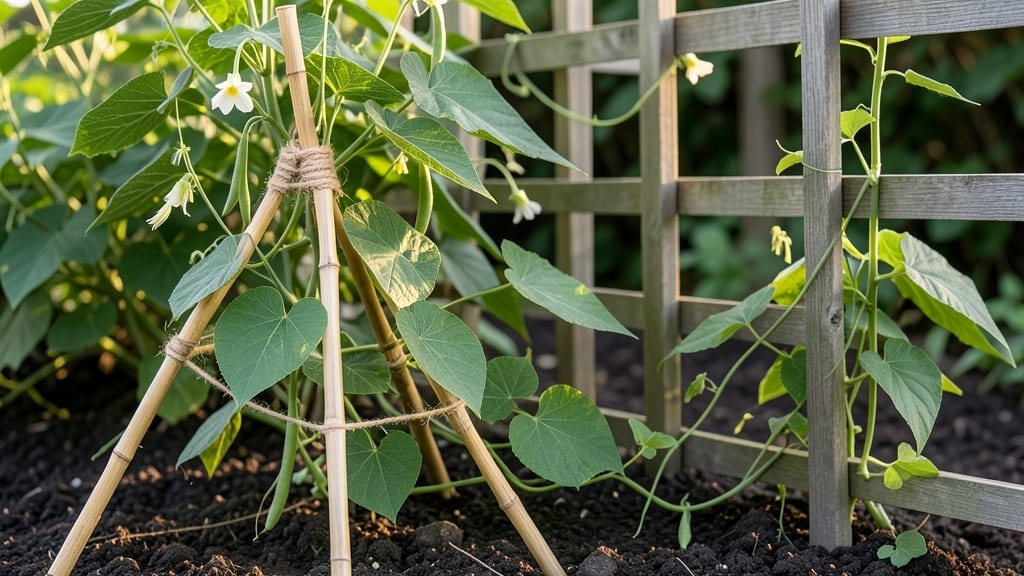
Green beans climbing a sturdy trellis mean double the harvest in half the space. 🌱 I used to waste garden real estate on sprawling vines—until I built a simple bamboo teepee that transformed my patch into a vertical jungle of pods.
The right trellis isn't just about support; it's about redirecting energy where you want it—into more beans, not more sprawl.
You don't need fancy materials—just 4-6 6-foot bamboo stakes (or wooden dowels) and some twine. The teepee style is beginner-friendly, but straight stakes work too for varieties like Kentucky Wonder.
My first attempt wobbled until I secured the base with U-shaped metal stakes—game changer. Even renters can do this on balconies with lightweight materials.
By mid-summer, your beans will be twisting up the trellis like ladders, producing longer, straighter pods that snap easier. The vines stay off the ground, reducing slug damage and making harvesting a breeze.
Plus, you'll reclaim that precious garden real estate for other crops. My trellis now hosts both beans and cucumbers—no more crowded chaos.
Pro tip: Add horizontal twine supports every 18 inches for bushier growth. I learned the hard way that skipping this step means beans flopping over by harvest time. With proper maintenance, your trellis will last 3-5 seasons—worth the 30 minutes of setup. Let's get those vines climbing!
📚 In This Guide
- What you need
- Instructions
- Tips and common mistakes
- Wrapping up and next steps
What you need
- ● Trellis Base: 4 wooden posts (4x4 inches, 6–8 feet tall) OR 4 sturdy metal or PVC pipes (2-inch diameter, 6–8 feet tall)
- ● Concrete mix (for securing posts) OR heavy-duty stakes and garden twine (for temporary setups)
- ● Trellis Structure: Wooden lattice panels (pre-made, 2x4 feet) OR bamboo stakes (1/2-inch diameter, 6–8 feet long)
- ● Fasteners & Hardware: Galvanized screws or nails (2–3 inches long, 10–15 pieces)
- ● Wood glue (for extra reinforcement)
- ● Hammer or power drill
- ○ Optional Extras for Stability & Aesthetics: Crossbeams (2x4 lumber, cut to fit trellis width)
- ● Decorative paint or stain (weather-resistant)
- ● Garden twine or jute twine (for tying vines)
- ● A flat, level garden spot with 6–8 feet of width (adjustable based on trellis size).
- ● Basic woodworking skills OR patience for assembly (no prior experience needed!).
- ● Sunny location (green beans thrive in full sun, 6–8 hours daily).
- ● Well-draining soil (amend with compost if needed).
Step-by-Step instructions for building a sturdy green bean trellis
Here's the simple method I use to create a trellis that supports heavy green bean vines while saving space.
🪴 Step 1: Gather Materials for a Simple, Sturdy Frame
For a 4-foot tall trellis that supports 4 plants, you'll need two 6-foot wooden stakes (2x2 or 2x3 inches thick), four 4-foot wooden slats (1x4 inches), and heavy-duty zip ties or galvanized wire. The stakes should be at least 2 feet long, driven 1 foot deep into the ground to prevent tipping.
If you don’t have wood, bamboo poles or sturdy PVC pipes work too—just ensure they’re at least 1.5 inches thick to handle the weight. I like to pre-drill holes in the slats for easy assembly, but you can also use wood screws or strong staples if you prefer. The key is making sure everything stays tight as the vines grow heavier.
✂️ Step 2: Assemble the Trellis Structure
Drive the two stakes 1 foot apart into the ground, leaving 4 feet of height above soil level. This gives you 3 feet of trellis space for climbing beans. Attach the first slat 6 inches above the ground horizontally between the stakes, then add three more slats at 12-inch intervals up the frame. The top slat should be just below the 4-foot mark to prevent vines from flopping over.
If using zip ties, wrap them every 12 inches along the stakes for extra stability. For a permanent look, paint or stain the wood before assembly—just let it dry 24 hours first. I always test the structure by gently pulling on it; if it wobbles, add more ties or deeper stakes.
☀️ Step 3: Secure the Trellis for Wind and Weight
Green bean vines can get heavy with pods, so reinforce the structure by tying the stakes together at the top with a diagonal crossbrace. Use two 4-foot wooden slats cut at a 45-degree angle and secure them with zip ties or screws. This prevents the trellis from leaning or collapsing when vines are laden.
For extra wind resistance, bury the stakes at a 5-degree angle (leaning slightly into the prevailing wind). If your garden gets strong gusts, add a third stake in the center for support. The goal is to make it unshakable—once the vines start climbing, you’ll notice how much sturdier it feels with these adjustments.
🌱 Step 4: Train the Vines for Maximum Support
When planting, place one seedling near each stake (about 6 inches away). As the vines grow, gently tie the main stem to the bottom slat with soft twine or old fabric strips. Avoid wire—it can damage tender stems. Every 4-6 inches of new growth, guide the vine upward and secure it to the next slat.
Here’s the thing—don’t let vines wrap around the trellis like a spiral. Instead, weave them side-to-side between slats. This spreads the weight evenly and keeps pods accessible for harvesting. If a vine gets too tangled, trim the excess—it’s better to have a few strong, supported plants than one struggling mess.
💧 Step 5: Maintain and Adjust as Needed
Check the trellis weekly for loose ties or leaning stakes. If a slat sags under the weight of beans, add a third horizontal support between the existing ones. Water the base of the trellis deeply once a week, as vines need consistent moisture to climb and produce.
By mid-season, your trellis should look like a lush green tower with beans dangling at every level. If you notice vines growing too fast, prune the tips to encourage bushier growth and more pods. The payoff? Double the harvest in the same space—no more sprawling plants stealing sunlight from your other crops.
Tips & tricks for building a sturdy green bean trellis
Here's what I've learned from years of building these space-saving structures—avoid these common pitfalls for a trellis that lasts the whole season.
Material Selection: When choosing bamboo poles or PVC pipes as alternatives to wood, make sure they're at least 1.5 inches thick—thinner materials bend under the weight of mature green bean pods. I've seen flimsy bamboo poles snap when vines got heavy, so don't cut corners here. For extra stability, look for materials with knotted joints or reinforced seams that can handle the lateral pressure from climbing plants.
Stake Placement: The 1-foot spacing between stakes in Step 2 is crucial—any wider and your trellis will wobble when vines start producing pods. For windy areas, I recommend burying the stakes 1.5 feet deep instead of the minimum 1 foot, and adding a third stake in the center for additional support. This creates a triangular base that's nearly unshakable, even in storms.
Vine Training: In Step 4, when tying vines to the slats, use soft fabric strips or old T-shirts instead of wire—they're gentler on tender stems and won't cut into the vines as they grow. I've found that tying vines every 3-4 inches (instead of 4-6 inches) gives them better support without restricting growth. The key is to guide the vine upward but not strangle it—think of it like helping a child climb a ladder rather than forcing them up.
Maintenance Strategy: The weekly check mentioned in Step 5 is non-negotiable—loose ties or sagging slats can lead to broken vines and lost harvests. I've developed a simple system: mark each trellis with a colored flag when I last checked it. When I see a flag from two weeks ago, I know it's time for another inspection. Also, keep a small bag of zip ties handy—you'll need them to reinforce any sagging sections during the growing season.
Pro Tips for Make Green Bean Trellis
- Here's what I've learned from years of building these space-saving structures—avoid these common pitfalls for a trell...
- Material Selection: When choosing bamboo poles or PVC pipes as alternatives to wood, make sure they're at least 1.5 i...
- Stake Placement: The 1-foot spacing between stakes in Step 2 is crucial—any wider and your trellis will wobble when v...
Frequently asked questions
Got questions about building a green bean trellis?
You’re not alone! Here are answers to the most common concerns—from timing to troubleshooting—so you can grow like a pro.
What’s the best time of year to install a green bean trellis?
Install your trellis before planting green beans—ideally 1–2 weeks ahead. For spring varieties, set it up in early spring (when soil is workable but frost risk has passed). For summer crops, wait until late spring after the last frost. Early installation gives roots time to anchor while vines climb.
How tall should a green bean trellis be?
Most green beans thrive on trellises 5–7 feet tall, but dwarf varieties (like ‘Blue Lake’) may only need 3–4 feet. Pole beans (like ‘Kentucky Wonder’) can reach 8+ feet—so plan taller if you’re growing them! Height also depends on space; taller trellises save ground room for other plants.
Can I reuse a trellis from last year?
Wooden or metal trellises last years if stored properly (dry, off the ground). Clean them with a bleach solution (1 part bleach to 9 parts water) to kill pests/diseases. Avoid plastic trellises—UV rays weaken them over time. Just check for splinters or rust before reuse!
What if my green beans aren’t climbing the trellis?
No climbing? Try these fixes:
- Weave vines gently through the trellis at the base to encourage upward growth.
- Check for crowding—thin plants to 4–6 inches apart for better airflow.
- Ensure the trellis is sturdy—wiggly structures deter vines.
- Use twine or soft ties to guide stubborn vines (avoid wire—it can damage stems).
What are cheap or no-cost trellis alternatives?
No budget for materials? Try these DIY hacks:
- T-posts + twine: Hammer 5–6-foot posts into the ground, then crisscross twine horizontally every 12 inches.
- Old fencing/wire mesh: Bend into a teepee shape or lean against a wall.
- PVC pipes: Cut into 6-foot lengths, bundle 3–4 together, and secure with zip ties.
- Cornstalks or sunflowers: Plant tall stalks alongside beans for natural support (best for small patches).
Wrapping up and next steps
Building a green bean trellis is a simple yet game-changing way to transform your garden into a space-saving powerhouse! With just a few materials and a little creativity, you’ll encourage healthier plants, bigger harvests, and a tidier growing area. 🌱✨
Now that you’ve got the know-how, it’s time to roll up your sleeves and give your green beans the vertical boost they deserve. Start small—even a simple DIY trellis can make a difference!
Once you see those beans climbing and thriving, you’ll be inspired to expand your trellis projects to other plants like cucumbers or peas. Happy gardening! 🌿💚