
Flowers
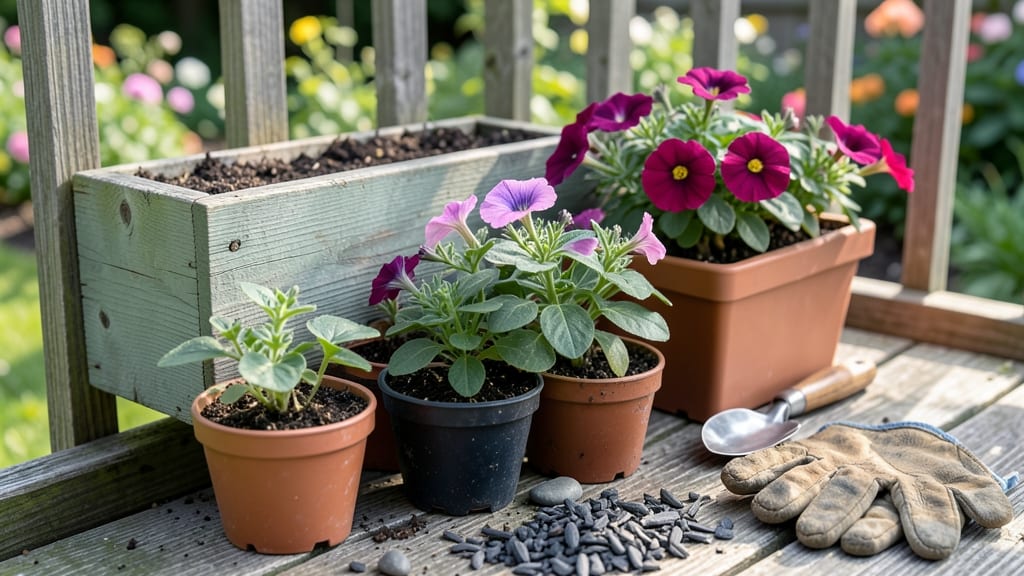
Flower boxes transform blank walls into lush vertical gardens. ✨ I’ve filled mine with trailing petunias and sweet alyssum, creating a fragrant welcome that neighbors envy—and it only took a weekend to build mine from reclaimed wood.
The key isn’t fancy tools; it’s smart drainage and plant placement that keeps everything thriving with minimal effort.
Start with a sturdy base—wood, metal, or even repurposed containers—and drill drainage holes at the bottom. Line with landscape fabric to prevent soil loss, then fill with a lightweight potting mix.
The right plants make all the difference: choose compact annuals like geraniums or cascading ivy for year-round color, or swap them out seasonally for perennials like lavender or sedum.
By mid-summer, your boxes will burst with blooms that frame windows and doors beautifully. The best part? They’re easy to maintain—just water when the top inch of soil feels dry and trim spent flowers to encourage new growth.
I’ve had mine last three seasons with just a fresh coat of paint every couple of years.
Perfect for porches, balconies, or even hanging from fences—these planters work anywhere you want instant curb appeal. Let’s get yours growing!
📚 In This Guide
- What you need
- Instructions
- Tips and common mistakes
- Wrapping up and next steps
What you need
- ● Wooden planks or boards: 1x12" or 2x12" (length depends on box size; e.g., 12–24 inches wide, 12–18 inches deep). Opt for cedar, redwood, or pine for durability and resistance to rot.
- ● Screws or nails: 1.5–2.5 inches long (galvanized or deck screws for outdoor use). Use 4–6 screws per corner for stability.
- ● Drill or hammer: For assembling the frame.
- ● Sandpaper (80–120 grit): To smooth rough edges and splinters.
- ○ Exterior wood glue: (Optional but recommended for extra reinforcement.)
- ● Paint or stain: Weather-resistant (e.g., acrylic latex or oil-based for longevity). Choose colors that match your porch aesthetic!
- ● Drainage material: Required: Pebbles, gravel, or landscape fabric (1–2 inches deep) to prevent root rot.
- ○ Optional: Drainage holes (if not using a pre-drilled box). Drill ¼-inch holes in the bottom corners.
- ● Potting soil: Lightweight, well-draining mix (e.g., 50% potting soil + 50% perlite or coconut coir).
- ● Flowers or plants: Choose spiller-thriller-filler combinations for a lush look (e.g., petunias, ferns, and snapdragons).
- ● Measuring tape & pencil: For precise cuts.
- ● Saw (hand saw or circular saw): To cut wood to size.
- ● Paintbrush or roller: For applying stain/paint.
- ● Level: Ensures your flower box sits straight on the railing.
- ○ L-brackets or hanging hardware: (Optional) If mounting to a wall or railing.
- ○ Waterproof sealant: (Optional) For added protection against moisture.
Step-by-step instructions for building stunning flower boxes
Here’s how to create durable, stylish planters that bring color and life to any porch or balcony.
🪴 Step 1: Choose and Prepare Your Materials
For four flower boxes, you’ll need four wooden planters (pre-cut or raw lumber), exterior-grade wood screws, landscape fabric, and potting soil. I recommend cedar or redwood for natural rot resistance—these woods hold up beautifully in outdoor conditions. If using raw lumber, pre-drill screw holes to prevent splitting when assembling.
Measure your porch or mounting location to determine box dimensions. Standard sizes range from 12 to 18 inches deep, with widths of 12 to 24 inches depending on how many plants you want to feature. For example, a 14-inch deep box works perfectly for trailing plants like petunias alongside upright varieties like snapdragons.
✂️ Step 2: Assemble the Box Frame
Cut your lumber to create two long sides, two short ends, and a bottom piece for each box. Use a miter saw for clean, angled corners if you prefer a refined look, or keep it simple with butt joints and screws for a rustic aesthetic. I like to reinforce the corners with wooden corner brackets for extra stability—especially important if your boxes will hang.
Pre-assemble each box on a flat surface, then secure with exterior screws (stainless steel or galvanized). Leave a small gap (about ¼ inch) between the bottom and sides to allow for drainage. Test the fit by placing the box upside down—if it wobbles, add a center support brace for reinforcement.
💧 Step 3: Add Drainage and Lining
Drill ¼-inch drainage holes along the bottom of each box, spacing them 2 inches apart. This prevents waterlogging, which can rot roots and invite pests. Next, line the interior with landscape fabric to block weeds and retain moisture. Secure the fabric with staples or zip ties, ensuring it covers the drainage holes completely.
Here’s the thing—don’t skip the fabric. Without it, soil will wash out through the holes, and weeds will creep in from the sides. Cut the fabric to fit snugly but leave a 1-inch overhang at the top for easy access when planting.
🌿 Step 4: Mount the Boxes Securely
Decide whether your boxes will hang, sit on a shelf, or mount to a wall. For hanging boxes, use heavy-duty brackets rated for at least 20 pounds each—flower boxes filled with soil and plants can get surprisingly heavy. Attach the brackets to the underside of the box, then secure them to the porch railing or wall with lag screws or masonry anchors.
If mounting to a wall, pre-mark screw locations to ensure even spacing. Use a level to keep the boxes straight—nothing ruins the look faster than crooked planters. For extra security, add waterproof sealant around screw heads to prevent rust and leaks.
☀️ Step 5: Fill, Plant, and Maintain
Fill each box with high-quality potting mix, leaving 1 inch of space at the top for watering and mulch. I like to mix in a slow-release fertilizer to give plants a nutrient boost right from the start. Press the soil down gently to eliminate air pockets, then add a 1-inch layer of mulch on top to retain moisture and suppress weeds.
Plant your flowers, spacing them according to their mature size. For example, petunias need about 6 inches between plants, while salvias can handle 12 inches. Water thoroughly after planting, then maintain a consistent watering schedule—check soil moisture daily in hot weather, as flower boxes dry out faster than ground-level planters.
Tips & tricks for perfect flower boxes
Here's what nobody tells you about building flower boxes that last—and look stunning.
Wood Selection Wisdom: Cedar and redwood are your best bets for rot resistance, but if you're working with budget-friendly pine, seal all exposed surfaces with an outdoor-rated wood finish after assembly. I learned this the hard way after watching untreated pine boxes warp within a year. For extra longevity, consider pre-staining your lumber before building—it's easier than sealing afterward.
The Drainage Detail: Those ¼-inch drainage holes spaced 2 inches apart are non-negotiable, but here's the secret: use a drill bit with a depth stop set to ½ inch. This prevents holes from going all the way through, which could weaken the box structure. Place holes along the center of the bottom board rather than the edges to maintain structural integrity while still allowing proper drainage.
Mounting Mastery: For hanging boxes, I can't stress enough how important those heavy-duty brackets rated for 20+ pounds are. I once saw a beautiful box collapse because the homeowner used decorative brackets that couldn't handle the weight. When mounting to walls, use a stud finder to locate studs—never mount solely to drywall. For extra security, add two brackets per box (one at each end) rather than relying on a single center bracket.
Plant Spacing Strategy: The 6-inch spacing for petunias and 12-inch spacing for salvias mentioned in the instructions are perfect starting points, but here's the pro move: create a simple spacing chart before planting. Draw your box dimensions on paper, then plot where each plant will go based on its mature size. This prevents overcrowding and helps you visualize the final look before committing to the soil.
Pro Tips for Make Flower Boxes
- Here's what nobody tells you about building flower boxes that last—and look stunning.
- Wood Selection Wisdom: Cedar and redwood are your best bets for rot resistance, but if you're working with budget-friendly pine, seal all exposed surfaces with an outdoor-rated wood finish after assembly.
- The Drainage Detail: Those ¼-inch drainage holes spaced 2 inches apart are non-negotiable, but here's the secret: use a drill bit with a depth stop set to ½ inch.
Frequently asked questions
Got questions about crafting your dream flower boxes? We’ve got answers! Here’s what readers ask most often—plus quick solutions to common challenges.
What’s the best time of year to install flower boxes?
Plant in early spring (after the last frost) or early fall for ideal root growth. Avoid extreme heat—summer planting can stress plants. If you’re in a mild climate, spring is safest for most annuals and perennials.
How often should I water flower boxes?
Water every 1–2 days in hot weather (morning is best to reduce evaporation). Check soil moisture—if the top inch feels dry, it’s time to water. Drip irrigation or self-watering boxes help maintain consistency without overwatering.
Can I use flower boxes on balconies with weight restrictions?
Yes! Opt for lightweight materials like plastic, resin, or thin wood (under 10 lbs per box). Distribute weight evenly and avoid overfilling with heavy soil. For extra safety, use wall-mounted brackets or hang them from sturdy railings.
What are the easiest flowers for beginners in flower boxes?
Start with low-maintenance picks like:
- Petunias – Vibrant, drought-tolerant blooms
- Marigolds – Pest-repelling and hardy
- Pansies – Cold-resistant and long-lasting
- Basil or Thyme – Edible herbs that thrive in small spaces
Why are my plants wilting or dying in the flower box?
Common culprits:
- Poor drainage – Ensure holes in the bottom and use a gravel layer.
- Overwatering – Let soil dry slightly between waterings.
- Too much sun/shade – Match plants to your box’s light conditions.
- Pests – Inspect for aphids or spider mites; use neem oil if needed.
Wrapping up and next steps
Creating your own flower boxes is a rewarding way to add beauty, charm, and personal flair to your outdoor space! Whether you’re a seasoned gardener or a beginner, these customizable planters let you experiment with colors, textures, and plant combinations—making every season feel fresh and inviting. 🌸
Now that you’ve got the materials, steps, and answers to common questions, it’s time to get hands-on! Start small with a single box, or go all out with a matching set for your porch or balcony.
Once you’ve mastered the basics, explore advanced designs, like tiered boxes or hanging planters, to take your skills to the next level. Happy planting—your porch (and neighbors!) will thank you! 🌿✨