
Flowers
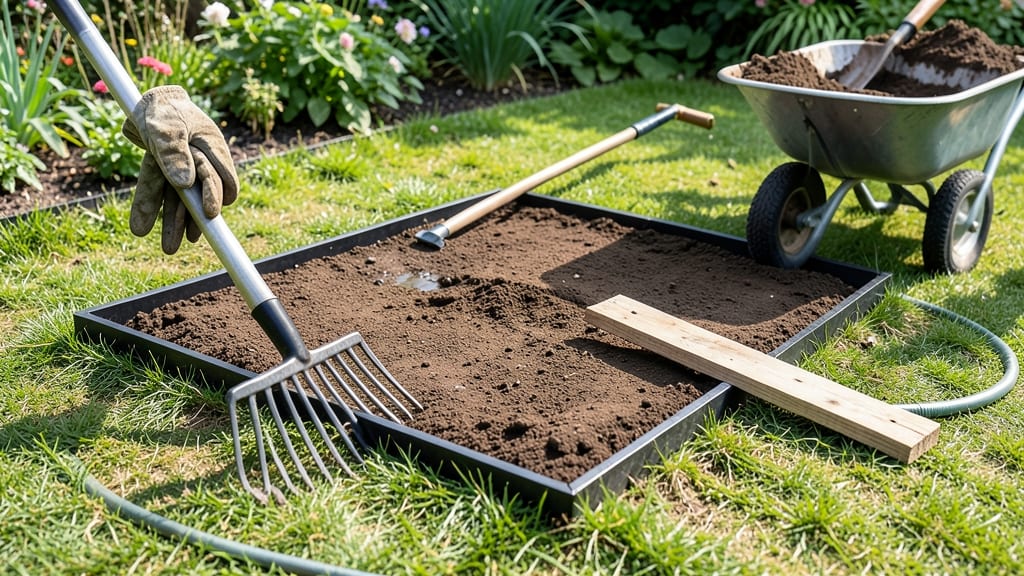
That first uneven patch in your flower bed ruins everything. 🌿 I’ve spent hours watching plants struggle in dips and pools—until I learned how to create a perfectly level base that keeps water flowing where it should and roots thriving.
The secret isn’t brute strength; it’s patience, the right tools, and knowing when to stop digging.
Start with a string line stretched tight across stakes at your desired height—this becomes your guide. Use a shovel to cut into high spots, then fill low areas with a mix of native soil and compost (never just topsoil).
A hand rake smooths the surface while keeping it slightly sloped away from your house or paths to prevent water pooling. Most mistakes come from rushing this step; take your time to check with a level every few feet.
Once smooth, add edging (metal, plastic, or stone) to keep soil in place and define your bed. Top with 2-3 inches of mulch—this locks in moisture, suppresses weeds, and gives your plants a polished look.
The result? A firm, even foundation where every plant gets equal growing power, no matter how steep the original slope was.
This method works for new beds or renovations, from small window boxes to full sunken gardens. The key is adjusting as you go—no two yards are identical, and that’s what makes gardening rewarding. Let’s get that bed picture-perfect before the first bulbs go in.
Root Causes Of Uneven Ground
A perfectly leveled flower bed doesn’t happen by accident—it’s the result of natural forces, human activity, and soil behavior working against your gardening goals. Understanding why your flower bed develops dips, mounds, or slopes is the first step to fixing it permanently.
Below, we break down the key culprits behind uneven terrain, backed by science and real-world gardening challenges.
Soil isn’t static—it’s a dynamic ecosystem that shifts due to moisture, temperature, and organic decomposition. When you first till or amend your flower bed, the ground may look smooth, but beneath the surface, particles are rearranging themselves.
- Compaction from foot traffic or equipment: Walking, mowing, or even heavy rain can compress the top layer of soil, creating low spots where water pools. Over time, this compaction forces roots downward, leaving the surface uneven.
- Organic matter breakdown: Leaves, grass clippings, or compost decompose at different rates, creating pockets of air or soft spots. For example, a thick layer of mulch can break down unevenly, leaving some areas sunken.
- Clay vs. sandy soil reactions: Clay soil expands when wet and shrinks when dry, while sandy soil drains quickly but doesn’t hold moisture well. This cycle creates a "rolling" effect, where some areas rise while others sink.
Actionable insight: Test your soil’s composition with a simple jar test (layer soil in water, shake, and observe settling patterns). Amending with organic matter like compost (20-30%) can improve stability by reducing extreme compaction or erosion.
Water is both a gardener’s best friend and worst enemy. While it nourishes plants, it also carves paths through soil, washing away fine particles and leaving behind uneven surfaces.
- Surface runoff: If your yard has a slope, rainwater will naturally flow downward, eroding soil from higher areas and depositing it in lower ones. Over months, this creates a "terrace-like" effect where the high spots become steeper and the low spots fill with sediment.
- Poor subsoil drainage: If the underlying soil is dense (like hardpan clay), water pools on top, saturating some areas while leaving others dry. This causes roots to seek out moisture, leading to uneven growth and surface depression.
- Irrigation mismanagement: Overwatering or using sprinklers on a slope can create channels where water funnels through the soil, stripping away topsoil and leaving gullies or hollows.
Actionable insight: To combat erosion, install swales (shallow trenches) along contours to redirect water away from flower beds. For drainage issues, consider adding perforated drainage pipes beneath the bed or mixing in coarse sand or perlite to improve aeration.
Even well-intentioned gardening efforts can disrupt the level of your flower bed. From digging to adding new materials, human intervention often introduces unevenness.
- Digging or aerating: Removing soil for planting, installing irrigation, or aerating lawns can create pockets or depressions. For example, digging a hole for a shrub and backfilling with amended soil may leave a slight dip that fills with water.
- Adding mulch or topsoil unevenly: Spreading mulch or soil in thick layers on one side but thinly on another causes the heavier side to settle faster, creating a slope. This is especially common with wood chips or straw, which decompose at different rates.
- Tree or shrub removal: When you uproot a large plant, the soil around it often collapses, leaving a hollow that fills with rainwater and compacts unevenly over time.
- Construction or grading nearby: If your property undergoes grading, driveway installation, or foundation work, the vibrations and soil displacement can shift your flower bed’s level, sometimes by inches.
Actionable insight: Before amending your bed, use a leveling tool (like a 4-foot board and string line) to check for high/low spots. Spread new soil or mulch in thin, even layers (1-2 inches max) and tamp it lightly to prevent settling. For large-scale fixes, consider professional grading if the unevenness is due to external construction.
Underground critters and plant roots don’t just affect what grows above—they actively reshape your soil’s surface.
- Gopher or mole tunnels: These burrowing animals create underground voids that collapse over time, leaving sinkholes or sunken patches in your flower bed. Their tunnels also disrupt drainage, causing water to pool in certain areas.
- Aggressive root systems: Trees like willows or roots from nearby shrubs can spread horizontally, lifting soil as they grow. This "heaving" effect is common in clay soils during freeze-thaw cycles.
- Grass or weed invasion: Grass roots grow in dense mats, pulling soil upward as they expand. If you’re converting a lawn to a flower bed, the transition can leave behind uneven patches where grass was removed.
Actionable insight: To deter burrowing pests, install hardware cloth barriers (1/4-inch mesh) 2 feet deep around your bed. For root intrusion, prune aggressive roots at the drip line of trees/shrubs and apply root barrier fabric if needed. When removing grass, use a sod cutter to avoid tearing soil unevenly.
Temperature and weather play a surprising role in soil leveling. Freeze-thaw cycles, extreme heat, and even wind can all contribute to an uneven flower bed.
- Freeze-thaw cycles: In cold climates, water in soil expands when it freezes, pushing soil upward. When it thaws, the soil settles back down—but not uniformly. This creates a "puffy" effect in some areas that compacts unevenly.
- Desiccation (drying out): Clay soil cracks when dry, and the surface can sink as the soil contracts. Sandy soil, meanwhile, may blow away in windy conditions, leaving depressions.
- Frost heave: In winter, frozen soil can push plants (or soil itself) upward. When spring arrives, the displaced soil doesn’t always settle back to its original level.
Actionable insight: To mitigate seasonal shifts, mulch heavily (3-4 inches) in fall to insulate soil and reduce freeze-thaw damage. In windy areas, use windbreaks or erosion control blankets to protect loose soil. For clay soil, mix in gypsum or sand to improve stability.
Quick Fixes for Uneven Flower Beds
Now that you know the common causes behind uneven flower beds, let’s tackle them with practical solutions—whether you’re dealing with erosion, poor drainage, or just a wonky layout. Each fix is designed to be easy, cost-effective, and long-lasting, so you can enjoy a perfectly leveled garden without the hassle.
Cause: Rain, wind, or foot traffic washes away soil, leaving dips and slopes.
How to Fix It:
- 🔥 Add a Layer of Mulch or Straw Spread a 2–3 inch layer of organic mulch (wood chips, straw, or leaves) over the bed. This slows water runoff and protects soil from erosion. Pro tip: Use cypress mulch—it resists decomposition longer than pine.
- 🍳 Build a Simple Soil Retention Barrier
- Dig a shallow trench (2–3 inches deep) along the lowest edge of the bed.
- Fill it with rocks, logs, or even plastic landscape edging to block soil from washing away.
- For slopes, install terracing with wooden planks or bricks to create flat planting zones.
- 👨🍳 Plant Erosion-Resistant Ground Covers Fast-growing plants like creeping thyme, clover, or sedum hold soil in place while adding beauty. Their dense roots act like natural stabilizers.
Prevention Tips: ✅ Water slowly (use a soaker hose) to avoid heavy runoff. ✅ Avoid walking on bare soil—stick to paths or use stepping stones. ✅ Reapply mulch every spring before rain season hits.
Cause: Compacted soil or a low-lying bed traps water, drowning roots.
How to Fix It:
- 🔪 Dig a Slight Slope (1–2%) Away from the House
- Use a shovel or rake to create a very gentle incline (about 1 inch drop per 10 feet).
- For deeper fixes, amend the soil with perlite, sand, or compost to improve drainage.
- 🥘 Install a French Drain (DIY-Friendly!)
- Dig a 6-inch-wide trench along the lowest edge of the bed.
- Fill it with gravel and a perforated drain pipe, then cover with landscape fabric.
- Redirect water to a dry well or downspout.
- 🌡️ Raise the Bed Slightly
- If water pools in the center, add 2–4 inches of topsoil or use cinder blocks as a base before planting.
- For severe cases, elevate with wooden frames or bricks to keep roots dry.
Prevention Tips: ✅ Test your soil (a simple jar test works!)—if it’s clay-heavy, mix in sand or peat moss. ✅ Plant moisture-loving flowers (like asters or irises) in the wettest spots. ✅ Avoid overwatering—stick to deep, infrequent watering in the morning.
Cause: Old borders collapse, or the bed wasn’t leveled properly from the start.
How to Fix It:
- ✨ Reinforce with Permanent Edging
- Metal or plastic edging (like U-shaped landscape edging) keeps soil in place.
- Natural options: Stacked stones, bricks, or bent wood slats (cheap and rustic!).
- Pro tip: Drive edging 6 inches deep for stability.
- 🔥 Top Off Low Spots with Soil
- Remove weeds, then fill dips with a mix of topsoil and compost (50/50).
- Tamp down lightly with a board or your hands to prevent settling.
- 🏗️ Build Up High Spots (If Needed)
- If a section is too tall, scrape off excess soil and redistribute it to low areas.
- For permanent fixes, use retaining walls (DIY with cinder blocks or pavers).
Prevention Tips: ✅ Plan your layout first—use stakes and string to mark a level line before digging. ✅ Choose flexible edging (like flexible metal) for curved beds. ✅ Recheck levels after rain—adjust as needed to maintain balance.
Final Thought: Most uneven flower beds can be fixed in a weekend with the right tools and a little elbow grease. Start with the biggest issues (drainage or erosion), then refine the edges. Once leveled, mulch and maintain to keep your bed looking flawless all season! 🌿✨
Frequently asked questions
Do I need professional help to level my flower bed, or can I do it myself?
Most DIY gardeners can handle basic leveling with the right tools! Start with a 4-foot leveling board and string line to mark your desired height. For small beds (5x5 feet), a shovel, rake, and wheelbarrow are all you need. Only call professionals for large slopes (>1 foot difference) or if you suspect underground drainage issues.
What's the best way to check if my flower bed is truly level?
Use the string line method for accuracy: Drive stakes at each corner, stretch a taut string between them, and check with a level tool. For quick checks, place a 2x4 board across the bed—if it rocks, you still have work to do. Pro tip: Walk around your bed after watering to spot where puddles form (those are your low spots).
Can I level my flower bed in one day, or should I spread it out?
For small beds (10x10 feet), one day works if you're energetic! For larger areas, break it into sections: Day 1 - mark levels and remove high spots; Day 2 - add soil/compost to low areas; Day 3 - final smoothing and edging. Remember, soil settles—wait 24 hours after adding new soil before planting to avoid sinking roots.
What's the best soil mix to use when leveling a flower bed?
Never use pure topsoil—it compacts easily. Instead, mix 60% native soil with 30% compost and 10% perlite or sand for drainage. For clay-heavy areas, add gypsum to break up compaction. The goal is 60% air space for roots—test by squeezing a handful: it should crumble, not stick together.
How do I prevent my newly leveled flower bed from becoming uneven again?
Start with permanent edging (metal, stone, or plastic) to contain soil. Add 3-4 inches of mulch to prevent erosion, and avoid walking on the bed. For slopes, create 1-2% grade (1 inch drop per 10 feet) away from structures. Recheck levels annually after heavy rains—adjust as needed to maintain your perfect foundation.