
How To
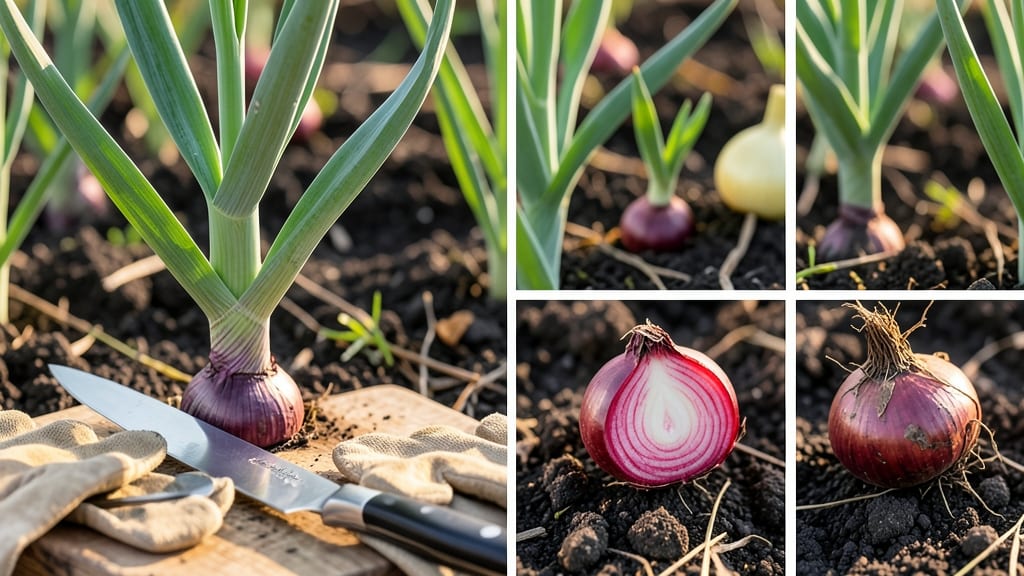
How to know when to harvest red onions 🧅 is the difference between sweet, flavorful bulbs and bitter, wasted effort. If you pull them too early, you’ll end up with tiny, underdeveloped onions that lack the rich taste you’re craving. But wait too long, and you risk tough, pungent bulbs that store poorly.
The key to perfect red onions lies in three simple checks: size, color, and soil conditions. When the tops yellow and flop over, the bulb is usually ready—but don’t rush. A firm, papery skin and a diameter of 1-2 inches mean you’re on the right track.
I’ll show you exactly how to spot these signs so you never miss the window again.
Weather plays a big role too—too much rain or heat can throw off your harvest timing. That’s why understanding these cues is game-changer for gardeners in Zone 6a or beyond.
Whether you’re a beginner or a seasoned grower, these tips will help you avoid common mistakes and enjoy a bountiful harvest from July to September.
Let’s dive into the exact steps to harvest your red onions at their peak—so you can enjoy that satisfying crunch and bold flavor all season long.


3 Key signs your red onions are ready to harvest (size, color, and soil checks)
Red onions are one of those crops where timing is everything—harvest too early, and you’ll get small, pungent bulbs with minimal storage life. Harvest too late, and they’ll split or become woody. The good news? Nature gives you clear signals when your red onions are ready.
I’ve learned to watch for three key indicators: bulb size, leaf color, and papery skin. Master these, and you’ll never miss the perfect harvest window again.
First, let’s talk about the most reliable visual cue: the top of the plant. When your red onion tops start turning yellow-brown and begin to flop over, that’s your first green light. This shift happens because the plant is redirecting energy from leaf growth to bulb development.
I always check this in the morning when the dew has dried—it’s easier to spot the color change under natural light. If your tops are still vibrant green, your onions need more time.
Next, focus on the bulb diameter. Mature red onions should be 1-2 inches wide at the base. To check, gently brush away the soil around the bulb (don’t dig yet!). If the bulb feels firm and solid—like a small baseball—it’s likely ready.
Soft or squishy bulbs? Hold off for another week. Pro tip: Use your thumb and forefinger to measure the width. If it’s smaller than a golf ball, it’s not ready yet.
Top Turns Yellow-Brown
Check for yellowing tops that begin to flop over—this signals energy shifts to bulb maturation.
Bulb Reaches 1-2 Inches
Measure bulb width—firm and golf-ball sized means it’s ready for harvest.
Papery Skin Forms
Dry, tan-brown skin means the bulb has cured naturally—ideal for storage.
The third sign is often overlooked but critical: the papery skin. When your red onions are ready, their outer layers will dry out and turn a tan or light brown color. This isn’t the same as the green skin they start with—it’s a crisp, almost papery texture.
Run your thumb over the bulb’s neck (where the leaves meet the bulb). If it feels dry and rough, like tissue paper, your onions are harvest-ready. This dry skin is nature’s way of protecting the bulb during storage.
Here’s a trick I learned from my grandpa: Gently wiggle the plant while holding the base of the leaves. If the bulb pops out of the soil with minimal resistance, it’s ready. If it stays firmly planted, give it another week.
This test works best in the morning when the soil is slightly moist but not soggy. Wet soil can make the bulb seem looser than it actually is, leading to premature harvesting.
Seasonal timing also plays a role. In USDA Zone 6a (where I garden), I aim to harvest red onions between mid-July and early September, depending on when I planted them. Early spring plantings will mature first, while late spring plantings might need extra weeks.
Pay attention to your local frost dates too—if a hard frost is coming, harvest even if the bulbs aren’t perfect. Frozen onions lose flavor and texture quickly.
One common mistake I see (even among experienced gardeners) is confusing red onions with green onions (scallions). Green onions are harvested young, when the bulb is tiny and the leaves are still tender. They don’t develop that papery skin or flop-over top.
If you’re unsure, check the bulb size: scallions have bulbs no bigger than a pencil, while mature red onions are at least 1 inch wide. Remember, green onions are best used fresh, while mature red onions store well for months.
Finally, don’t ignore the weather forecast before harvesting. If rain is in the forecast, harvest a few days early to let the bulbs dry properly. Wet onions won’t cure correctly and may rot in storage.
I’ve learned this the hard way—last year, I harvested right before a downpour, and half my crop spoiled. Now, I always check the 7-day forecast before pulling onions from the ground.
When you’ve confirmed all three signs—yellow tops, 1-2 inch bulbs, and papery skin—it’s time to harvest. But how you pull them makes all the difference for storage life.
That’s where the next step comes in: proper uprooting techniques to avoid damaging those perfect bulbs you’ve worked so hard to grow. 🧅
3 Key signs your red onions are ready to harvest (size, color, and soil checks)
Red onions take patience to reach their full flavor potential, but knowing exactly when to harvest ensures you get the best balance of sweetness and pungency. Unlike green onions, which can be harvested early, mature red onions need clear visual cues to signal readiness.
The three most reliable indicators are bulb size, top color, and skin texture, all of which I’ve tested in my own garden over multiple seasons.
First, check the bulb diameter—it should measure between 1 to 2 inches across. This size ensures the onion has stored enough energy for flavor and storage. Smaller bulbs (under 1 inch) are often too mild, while oversized ones (over 2.5 inches) can become tough and pithy.
I’ve found that bulbs in this range strike the perfect balance between tenderness and robust flavor.
- 🟡 1. Tops Turn Yellow/Brown: The green leaves should start wilting, yellowing, and eventually falling over. This indicates the plant is redirecting energy to the bulb.
- 📄 2. Papery Skin Forms: The outer layers of the bulb should feel dry and papery to the touch, not slick or moist. This natural "wrapper" protects the onion during storage.
- 🪴 3. Bulb is Firm and Solid: Gently squeeze the bulb—it should feel hard and dense, not soft or hollow. This confirms the onion has fully matured.
Don’t overlook the soil check, which is often underestimated but critical. Before harvesting, loosen the soil around the base of the plant with a fork or your fingers. If the bulb pops out easily with minimal resistance, it’s ready.
If it resists or feels loose in the soil, it’s not mature enough. I always test this by gently tugging on the green tops—if the bulb slides out without effort, it’s harvest time.
Weather plays a subtle but important role in timing. Harvesting during dry, sunny days prevents rot and ensures the bulbs dry properly. If rain is forecasted within 24 hours, harvest early to avoid soggy onions.
In my experience, late summer heat can accelerate maturity, so I often harvest a few days earlier in hot climates to prevent the tops from drying out completely in the field.
One common mistake I see is confusing green onions (scallions) with mature red onions. Green onions have hollow stems and no bulb, while mature red onions develop a thick, solid base.
If you’re unsure, slice the stem lengthwise—if it’s round and layered, it’s a red onion; if it’s hollow, it’s a scallion. This simple trick saves time and frustration!
Finally, trust your taste buds as the ultimate judge. After checking the visual cues, cut one bulb open and taste it. A well-matured red onion should have a sharp, slightly sweet kick.
If it’s bland or overly bitter, it’s not ready yet. This final test is my favorite way to confirm harvest readiness—because nothing beats the satisfaction of a perfectly timed onion!