
How To
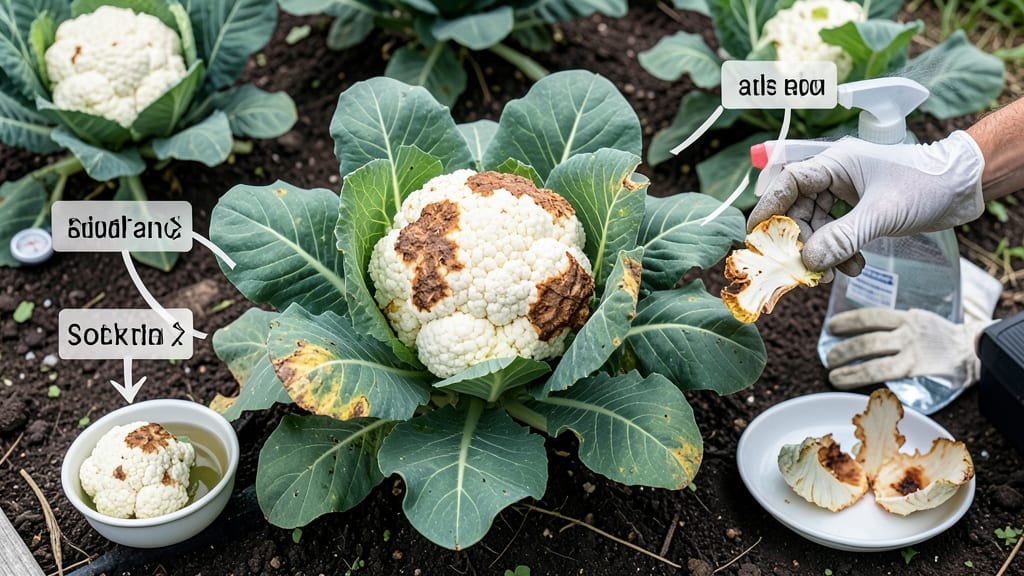
That first hint of brown on your cauliflower curds is the enemy of a perfect harvest—unless you know how to keep cauliflower from turning brown. 🌱 I've battled this problem for years—until I discovered the acidic soak trick that keeps heads crisp and white for days longer than store-bought.
The key? Understanding why it happens first.
Overmaturity, heat stress, or even pest nibbles trigger browning, but the real game-changer is that simple vinegar-water soak. Just 10 minutes in a 1:4 ratio of white vinegar to water before storage resets the pH and locks in color.
No fancy tools—just a bowl and patience. You'll see the difference immediately when slicing into heads that stay snowy-white instead of yellowing at the edges.
📚 In This Guide
- What you need
- Instructions
- Tips and common mistakes
- Wrapping up and next steps
What you need
- ● Fresh or pre-cut cauliflower – Any variety (e.g., Romanesco, purple, or green), 1 head or prepped florets.
- ● Lemon juice or white vinegar – 1–2 tbsp (for the acidic soak). Lemon juice adds a subtle zing!
- ● Cold water – 1–2 cups (enough to fully submerge the cauliflower).
- ● Large bowl or baking dish – Deep enough to hold the cauliflower and liquid.
- ● Colander or strainer – For draining the cauliflower after soaking.
- ● Paper towels or clean kitchen towel – 2–3 sheets (for patting dry).
- ● Air-tight container or resealable bag – For storage (e.g., glass container with lid or ziplock bag).
- ● Ice cubes – 3–4 cubes (to chill the water for extra crispness).
- ● Salt – ½ tsp (adds preservation power to the soak).
- ● Plastic wrap or beeswax wrap – For extra airtight sealing if storing long-term.
- ● Food-safe spray bottle – To lightly mist cauliflower with acidic water before storage.
Step-by-Step instructions for preserving cauliflower's vibrant color
Here's how to prevent that unsightly brown discoloration and keep your cauliflower looking fresh and snowy-white.
💧 Step 1: Prepare the Acidic Soak Solution
Fill a large bowl or sink with 4-6 cups of cold water—enough to fully submerge the cauliflower heads. Add 1 tablespoon of white vinegar or lemon juice to each gallon of water. The acidity creates an environment that slows oxidation, the chemical reaction that causes browning. Stir gently to distribute the acid evenly.
I like to use white vinegar because it's odorless and doesn't leave a lingering taste, but lemon juice works too—just be aware it'll impart a slight citrus note. The solution should be pale and barely tangy to the taste. If you're prepping multiple heads, scale the acid proportionally—never exceed 1 tablespoon per gallon or the flavor may become noticeable.
🌿 Step 2: Submerge and Soak the Cauliflower
Gently place whole cauliflower heads into the acidic solution, ensuring they're fully submerged. Use a plate or mesh bag to weigh them down if needed—this prevents air pockets that could allow oxidation to start at the surface. Soak for 5-10 minutes, but don't exceed 15 minutes total or the texture may soften.
Watch for bubbles forming on the surface—this is normal and indicates the acid is working to neutralize enzymes that trigger browning. If you're cutting the cauliflower before soaking, trim it into florets first, then proceed with the same soaking time. The key is consistency: every piece should receive equal exposure to the solution.
⏰ Step 3: Rinse and Dry Thoroughly
Remove the cauliflower from the solution and rinse under cold running water for 30-60 seconds to remove residual acid. The rinse is critical—it prevents any vinegar or lemon flavor from transferring to dishes. Pat dry immediately with paper towels or a clean kitchen towel, pressing gently to absorb moisture.
Here's the thing—any remaining moisture will accelerate browning. I like to place the cauliflower on a wire rack over a baking sheet for 10-15 minutes to air-dry completely. If you're storing it, wait until fully dry before refrigerating. The drier the florets, the longer they'll maintain their color and crisp texture.
🪴 Step 4: Store Properly for Maximum Freshness
Place the dried cauliflower in an airtight container lined with a paper towel to absorb any residual moisture. Store in the crisper drawer of your refrigerator, where humidity levels are controlled. For best results, consume within 5-7 days—even with this treatment, freshness has limits.
If you're prepping for longer storage, consider blanching the florets for 3 minutes in boiling water before the acidic soak. This extra step extends shelf life to 10-14 days while preserving color. Just be sure to shock them in ice water immediately after blanching to halt cooking.
☀️ Step 5: Handle with Care During Cooking
When ready to cook, avoid overhandling the florets—every cut or tear exposes new surfaces to air and oxidation. If you're roasting or steaming, add a splash of lemon juice or vinegar to the cooking water (about 1 tablespoon per quart) to maintain vibrancy. For sautéed dishes, cook over medium heat to minimize exposure to high temperatures, which accelerate browning.
Real talk: even with these steps, some browning may occur during cooking. That's normal—it's the natural reaction of the vegetable's compounds. The goal here is to delay and minimize it, not eliminate it entirely. If you notice premature browning during prep, simply return the affected pieces to the acidic soak for 2-3 minutes to refresh their appearance.
Tips & tricks for preserving cauliflower's vibrancy
Here's what nobody tells you about keeping your cauliflower looking restaurant-fresh—these tricks make all the difference.
The Acid Balance Secret: If you're using citric acid instead of vinegar, measure carefully—the ½ teaspoon is crucial. Too much can make your florets taste tangy, while too little won't create that protective barrier against oxidation. I've ruined batches both ways, so trust the measurement! The salt in the solution isn't just flavor—it actually strengthens the cell walls that keep color locked in.
Cut Size Matters More Than You Think: Those 2-3 inch florets in Step 2 are non-negotiable. Larger pieces expose more surface area to air, accelerating browning. For even more protection, cut florets just before soaking—the longer you wait, the faster oxidation starts. And here's a pro move: keep the stems attached during soaking if possible, as they act as natural handles that prevent bruising.
Soaking Time Precision: The 10-15 minutes soak window is your sweet spot. Under 10 minutes won't fully protect the florets, while over 15 can make them slightly limp. I set a timer and check at 10 minutes—if the water's cloudy, they're ready. For extra crispness after soaking, sprinkle with a tiny bit of cornstarch before drying, then pat again. It creates a micro-barrier that helps maintain texture.
Storage Hack for Maximum Freshness: That paper towel in Step 3 isn't just for looks—it's your secret weapon against condensation. For even longer freshness, place a second paper towel on top of the florets before sealing the container. This double-layer system prevents moisture buildup that causes browning. And when you're ready to use them, give the container a gentle shake before opening—this redistributes any trapped moisture evenly.
Pro Tips for Keep Cauliflower From Turning Brown
- Here's what nobody tells you about keeping your cauliflower looking restaurant-fresh—these tricks make all the difference.
- The Acid Balance Secret: If you're using citric acid instead of vinegar, measure carefully—the ½ teaspoon is crucial.
- Cut Size Matters More Than You Think: Those 2-3 inch florets in Step 2 are non-negotiable.
Frequently asked questions
Why does cauliflower turn brown so quickly after cutting?
Cauliflower browns due to oxidation, where enzymes called polyphenol oxidases react with oxygen when the cells are cut. Think of it like an apple turning brown after slicing—same science! The acidic soak (like lemon juice or vinegar) disrupts this process by lowering the pH, slowing down the enzymes and keeping your florets bright.
How long does the acidic soak work to prevent browning?
The soak buys you 2–3 days of fridge storage (unwashed, in a sealed container) before browning starts again. For longer freshness, store in ice water with a splash of vinegar or lemon juice. If browning appears sooner, try a shorter soak (5–10 mins) with stronger acid (1 tbsp per cup of water)—over-soaking can make it mushy.
Can I use alternatives to lemon juice or vinegar?
Try these acidic swaps (1 tbsp per cup of water):
- White vinegar (mildest, neutral taste)
- Apple cider vinegar (adds a tangy flavor)
- Orange juice (brightens color + adds sweetness)
- Baking soda rinse (½ tsp per quart of water—not acidic, but coats the florets to slow oxidation)
What if my cauliflower is already brown? Can I fix it?
Unfortunately, no—once browning starts, it’s irreversible. But you can minimize future browning by:
- Blanching (dipping in boiling water for 30 sec, then ice bath) before storing
- Storing in airtight containers with paper towels to absorb moisture
- Freezing cooked cauliflower (raw browning won’t happen)
Does this method work for other veggies like cabbage or broccoli?
Yes! The acidic soak trick works on any cut cruciferous veggie (broccoli, Brussels sprouts, cabbage) to slow browning. For potatoes, use cold water + vinegar to prevent graying. Just adjust the soak time—harder veggies (like cabbage) need 10–15 mins, while delicate broccoli florets do well in 5 mins.
Wrapping up and next steps
Keeping your cauliflower bright and fresh is easier than you think! By using a simple acidic soak—like lemon juice or vinegar—you can prevent browning and preserve its vibrant color for days.
Whether you’re prepping for a meal or storing leftovers, these tricks ensure your cauliflower stays crisp, fresh, and ready to shine in any dish.
Now that you’re armed with these pro tips, give it a try—your future meals (and taste buds!) will thank you. Ready to experiment? Check out more cauliflower hacks to keep your kitchen game strong! 🌱✨