
How To
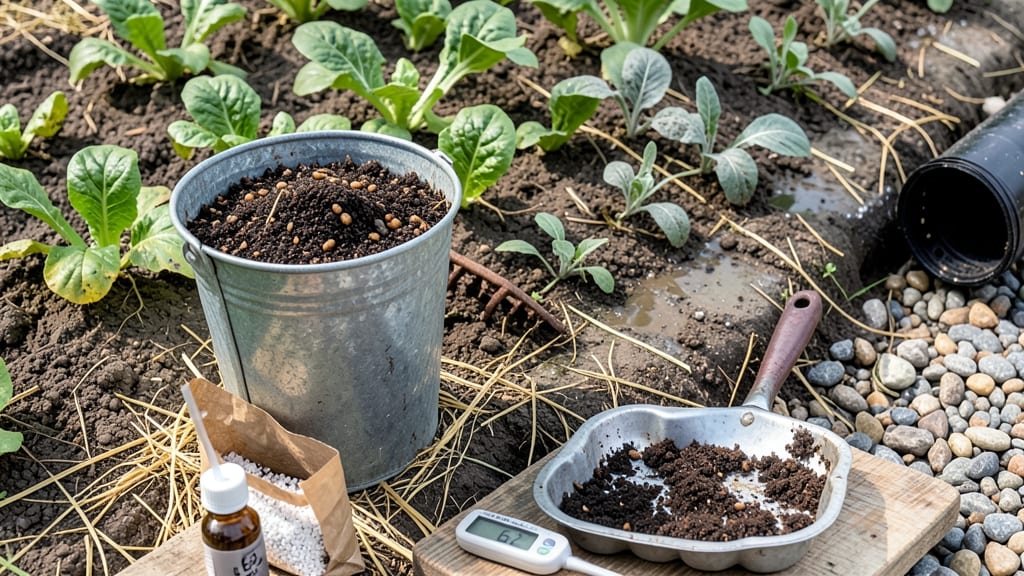
How to improve this soggy garden isn’t a lost cause—it’s a fixable problem. 🌱 Waterlogged soil suffocates roots, turns nutrients to mush, and leaves plants gasping for air. But with the right approach, you can transform that swampy mess into soil that drains properly and supports strong root growth.
The key is breaking up compaction and adding structure. Start by mixing in 3-4 inches of compost to improve aeration, then top with 1-2 inches of coarse sand or perlite to create drainage channels.
For severe cases, consider raised beds or French drains to redirect excess water—both work like magic for heavy clay or low-lying areas.
Once the soil’s breathing again, choose plants that thrive in moist conditions—like hostas, ferns, or daylilies—while avoiding water-hoggers like tomatoes or peppers. The payoff? Roots that grow deep, not rot, and plants that bounce back from soggy starts with stronger stems and better yields.
This isn’t a quick fix—it’s a long-term game. Test your soil’s drainage with a simple percolation test (dig a 12-inch hole, fill with water, and time how long it drains). Adjust as needed, and soon your garden will be as productive as it is resilient.
📚 In This Guide
- What you need
- Instructions
- Tips and common mistakes
- Wrapping up and next steps
What you need
- ● Drainage pipes (4-inch diameter, corrugated or smooth) – 10–20 feet per affected area (depending on soil size).
- ● Perforated drainage pipe (4-inch, with holes) – Same length as above for underground channels.
- ● Gravel or crushed stone (¾-inch to 1-inch size) – 2–3 cubic feet per 10 sq. ft. of soil for pipe bedding.
- ● Sand (coarse, not fine) – 1–2 cubic feet per 10 sq. ft. for filling gaps.
- ● Shovel and spade – For digging trenches (12–18 inches deep).
- ● Wheelbarrow – To haul gravel, sand, and soil.
- ● Rake – For leveling and smoothing surfaces.
- ● Heavy-duty gloves – To protect your hands from rough materials.
- ● Waterproof landscape fabric – 10–15 sq. ft. per trench to prevent clogging.
- ● Outlets or downspout diverters – If redirecting surface water.
- ● French drain kit – Pre-built systems for easier installation.
- ● Compost or organic matter (leaf mold, peat moss) – 1–2 bags per 10 sq. ft. to improve soil structure.
- ● Soil moisture meter – To track drainage progress over time.
- ● Mulch (straw, wood chips) – 2–3 inches thick to reduce evaporation and compaction.
- ● Drainage tiles with end caps – To seal underground pipes and prevent backflow.
Step-by-Step instructions for reviving waterlogged soil
Here's my battle-tested approach to transform soggy ground into a well-draining garden haven.
🌱 Step 1: Assess the Problem and Identify Drainage Issues
Start by testing your soil's drainage. Dig a 12-inch deep hole and fill it with water. If it drains in less than 4 hours, you're in decent shape—but if it takes longer, you've got a serious waterlogging issue. Look for signs like yellowing leaves, root rot, or mushrooms growing on the surface.
Check for underlying causes: compacted soil, poor slope, or clay-heavy composition. I've seen gardens with perfect irrigation systems fail because the land itself was sloped wrong. Use a level tool to confirm if water naturally pools in certain areas. This step ensures you're not just treating symptoms but fixing the root cause.
💧 Step 2: Amend Soil with Organic Matter for Long-Term Fixes
Spread a 3-4 inch layer of coarse organic matter like composted leaves, shredded bark, or well-rotted manure across the affected area. This improves soil structure by creating air pockets that break up clay's natural water-holding properties. Work it into the top 6-8 inches of soil using a broadfork or garden fork.
For heavy clay soils, mix in 1 part sand to 3 parts soil—but only coarse sand, not fine beach sand. I've seen gardeners use the wrong sand and make things worse. The goal is to loosen the soil's grip on water, not create a sand desert. Water the amended area lightly to help the organic matter settle.
☀️ Step 3: Install French Drains or Swales for Structural Solutions
For persistent waterlogging, install a 4-inch diameter perforated drain pipe surrounded by gravel in a trench along the lowest point of your garden. Cover with landscape fabric to prevent soil from clogging the pipe, then backfill with more gravel. This redirects water away from plant roots before it becomes a problem.
Alternatively, create swales—shallow, curved trenches that slow and spread water across the landscape. These work best on slopes and mimic natural water flow patterns. I've used swales to transform soggy low spots into thriving garden beds by capturing water where it's needed most. Always slope the trench away from your planting area at about 1 inch per 10 feet.
✂️ Step 4: Adjust Plant Selection and Mulch Strategically
Replace water-sensitive plants with native species or those adapted to wet conditions, like cattails, rushes, or swamp milkweed. For existing plants, mulch with 2-3 inches of wood chips or straw to prevent water from pooling at the soil surface. This also insulates roots and encourages beneficial microbial activity that breaks down excess moisture.
Consider raised beds for high-value plants—they give you complete control over drainage. Fill them with a mix of 60% topsoil, 30% compost, and 10% perlite to create an ideal growing medium. The key is to give plants both good drainage AND moisture retention—you don't want to swing to the opposite extreme.
⏰ Step 5: Monitor and Maintain for Lasting Results
After implementing fixes, check drainage monthly by digging a small hole and filling it with water. The goal is 4-6 hours of complete drainage—any longer means you need more amendments. Install a simple rain gauge to track how much water your garden actually receives during storms.
For clay-heavy soils, repeat the organic matter amendment every 2-3 years to maintain structure. I've seen gardens where the initial fix worked for years, then compacted again after heavy rains. Regular maintenance keeps your soil's porosity working for you, not against you. Think of it like giving your garden a spa treatment—consistent care delivers the best results.
Tips & tricks for perfect soil drainage solutions
Real talk: Even the best-laid garden plans can go south when water pools like a swamp. Here's how to avoid common pitfalls and get the most out of your soil revival efforts.
Drainage Test Precision: When testing soil drainage in Step 1, use a clear container to measure the water level precisely. The 12-inch depth is critical—shallower tests won't reveal true water retention issues. I've seen gardeners use 6-inch tests and miss chronic waterlogging problems. Mark your hole with stakes to ensure consistent depth measurements. The goal is to see if water drains in less than 4 hours—any longer means you're dealing with serious compaction or clay dominance.
Organic Matter Selection: In Step 2, don't just grab any compost—look for well-aged, chunky materials like shredded hardwood bark or leaf mold. These create larger air pockets than fine compost, which is what breaks up clay's water-holding grip. I've had great success with a mix of 50% composted leaves and 50% shredded bark for clay-heavy soils. Avoid fresh manure, which can burn plants and compact soil further. Work the organic matter into those top 6-8 inches aggressively—this is where roots need the most aeration.
French Drain Placement: For Step 3's French drain, position the 4-inch pipe at least 18 inches deep to intercept groundwater before it reaches plant roots. The trench should slope 1% (1 inch per 10 feet) away from your garden beds, not toward them. I've seen poorly installed drains where water actually pooled near the garden because the slope was reversed. Use a laser level to verify your slope—it's worth the investment for a permanent fix. The gravel envelope around the pipe should be at least 6 inches wide to prevent clogging over time.
Mulch Thickness Matters: In Step 4, that 2-3 inch mulch layer isn't just for looks—it's a critical moisture barrier. Too thin (under 2 inches) and you won't prevent surface pooling. Too thick (over 4 inches) and you'll suffocate roots. I recommend 3 inches of wood chips for most gardens, topped with a 1-inch layer of straw to slow evaporation. For clay soils, add a 1-inch layer of coarse sand under the mulch to create an immediate drainage layer at the surface.
Pro Tips for Improve Waterlogged Soil
- Real talk: Even the best-laid garden plans can go south when water pools like a swamp.
- Drainage Test Precision: When testing soil drainage in Step 1, use a clear container to measure the water level precisely.
- Organic Matter Selection: In Step 2, don't just grab any compost—look for well-aged, chunky materials like shredded hardwood bark or leaf mold.
Frequently asked questions
Got questions about fixing waterlogged soil? You’re not alone!
Here are answers to the most common concerns—from quick fixes to long-term strategies—to get your garden back in shape.
How long does it take to improve waterlogged soil?
Improvement timelines vary! Light compaction or organic matter additions may show results in weeks, while deep drainage fixes (like French drains) can take months. Patience is key—focus on consistency over speed. Monitor soil moisture and adjust as needed.
Can I plant anything in waterlogged soil right away?
Not ideal! Waterlogged soil lacks oxygen, stressing roots. Wait until drainage improves (test by digging a 6-inch hole—if water pools after 24 hours, hold off). For urgent fixes, opt for tolerant plants like cattails, willows, or watercress while you work on the soil.
What’s the difference between sand and compost for drainage?
Sand
improves drainage fast but can wash away and disrupt soil structure. Compost (or peat moss) boosts drainage gradually while adding nutrients and improving long-term soil health. For best results, mix both—start with 20% sand/compost and 80% native soil.
My plants are still wilting after adding drainage materials. What’s wrong?
Wilted plants could signal root rot (from lingering water) or nutrient imbalance. Check roots—if mushy, trim damaged areas and repot in fresh, amended soil. Avoid overwatering until drainage is visibly better (test with a trowel). For severe cases, fungicides may help.
Will heavy rain undo my drainage fixes?
Heavy rain can temporarily reverse progress, but proper fixes last. French drains, swales, or raised beds handle excess water long-term. For extra protection, mulch heavily (3–4 inches) to slow water absorption. Monitor after storms and reapply organic matter if needed.
Wrapping up and next steps
Improving waterlogged soil is all about patience, strategy, and consistency—your plants will thank you for it! 🌱 Whether you’ve added organic matter, adjusted drainage, or planted deep-rooted helpers, these steps create a healthier foundation for your garden’s future.
Start small, track progress, and soon you’ll see roots thriving in soil that’s just right—neither too soggy nor too dry.
Ready to take the next step? Test your soil’s moisture levels every few weeks and tweak your approach as needed. Happy gardening—your green space is about to bloom like never before! 🌿✨