
Companion Plants
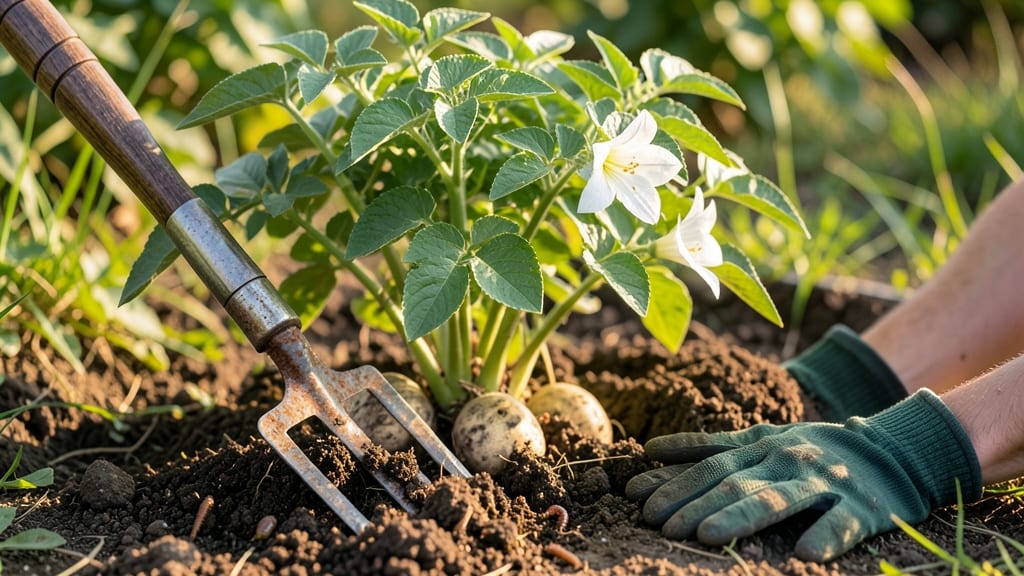
Hilling up potato plants doubles your harvest and keeps stems sturdy. 🌱 I learned this the hard way—skipping it left my plants flopping and tubers small. The secret is simple: pile soil around stems as they grow, encouraging more tubers to form underground.
You’ll need a shovel, loose soil, and about 6-8 weeks of consistent effort. Start when plants reach 6 inches tall, then repeat every 2-3 weeks. The goal is to cover stems halfway up each time, leaving just the top leaves exposed.
By harvest time, you’ll have bigger potatoes and stronger plants that resist disease. The soil acts as a shield, keeping tubers from turning green and bitter in sunlight. Plus, it prevents scab—a common potato problem. Works for all varieties, from russets to fingerlings.
Just avoid compacted soil and don’t overdo it—too much hilling can smother plants. Here’s how to do it right!
📚 In This Guide
- What you need
- Instructions
- Tips and common mistakes
- Wrapping up and next steps
What you need
- ● Potato plants: Healthy, established plants (4–6 weeks old) with 6–12 inches of stem growth. Aim for 2–3 plants per hill for optimal spacing.
- ○ Garden soil: Well-draining, loose soil (sandy loam or amended with compost works best). Optional: Mix in 1–2 inches of compost or aged manure for extra nutrients.
- ● Garden fork or trowel: A sturdy 6–8-inch trowel or a broadfork for loosening soil without disturbing roots.
- ● Gloves: Heavy-duty gardening gloves to protect your hands from dirt and sharp soil.
- ● Watering can or hose: A gentle spray nozzle to avoid displacing soil around plants.
- ○ Mulch (optional but recommended): Straw or shredded leaves (2–3 inches thick) to retain moisture and suppress weeds.
- ● Grass clippings (dried first to avoid matting).
- ● Sunlight: A full-sun spot (6+ hours/day) for potatoes to thrive.
- ● Spacing: Ensure plants are 12–18 inches apart in rows spaced 2–3 feet apart for easy hilling.
- ● Weather check: Hill on a cloudy day or late afternoon to reduce stress on plants.
Step-by-Step instructions for hilling up potato plants
Here's how I transform my potato plants into sturdy, high-yielding bushes in just a few simple steps.
🌱 Step 1: Wait Until Plants Reach 6 Inches Tall
Hilling too early stunts growth, so wait until your potato plants reach about 6 inches tall with 4-5 leaves. You'll notice the stems have thickened noticeably—this means they're ready for the first hilling. I check daily after the leaves unfurl; the moment the plant looks like a small bush, it's time.
This timing ensures the plant has established enough roots to support the extra soil. If you hill too soon, the stems may weaken and fall over. The ideal moment is when you can gently grasp the stem near the base and feel it's sturdy but still flexible.
🪴 Step 2: Gather Soil and Create a Mound
Use the loose, well-draining soil from your garden bed—no need for special mix. Scoop up about 2-3 inches of soil and mound it gently against the base of the plant, leaving the top leaves exposed. I like to form a loose pyramid shape rather than a tight clump to prevent air pockets.
Don't pack the soil tightly—just enough to hold its shape. The goal is to cover the lower stems while keeping the foliage above ground. If your soil is heavy clay, mix in a handful of compost to improve drainage. You'll see the stems begin to thicken and develop new roots where they touch the new soil.
🌿 Step 3: Repeat Every 2-3 Weeks Until Plant Matures
Hill again when the plant reaches 12 inches tall, adding another 2-3 inches of soil each time. I aim for the soil mound to be about 6 inches high by the time flowering begins. This gradual approach prevents shocking the plant and encourages more tuber formation.
Stop hilling when the plant flowers and begins to yellow at the bottom. At this point, most of the tubers have formed, and adding more soil won't help. You'll notice the stems thicken significantly and the plant take on a bushier appearance with each hilling.
⏰ Step 4: Final Hilling Before Harvest
About 2 weeks before harvest, give one last hilling if the plant is still green and growing. This final mound helps protect new tubers from light exposure, which turns them green and bitter. I use this as my signal to start checking for harvest readiness—when the plant flowers fade and the leaves begin to yellow.
After the final hilling, water the plants thoroughly to settle the soil. This ensures the tubers have space to grow without being crowded. The mound should be high enough to cover any exposed stems while leaving the top leaves exposed to sunlight for photosynthesis.
☀️ Step 5: Monitor for Signs of Stress
Watch for wilting or yellowing leaves after hilling—this usually means the plant needs more water. Potato plants are heavy feeders, so I fertilize lightly with compost tea after each hilling to support the extra growth. Avoid nitrogen-heavy fertilizers, which encourage foliage over tuber production.
If you see stems breaking at the base, you've piled soil too high. Reduce the mound slightly and stake the plant if needed. A properly hilled plant will have strong, sturdy stems that support the weight of the foliage and developing tubers.
Tips & tricks for perfectly hilled potato plants
These simple tricks will help you transform your potato plants into sturdy, high-yielding bushes without the guesswork.
Timing is Everything: The 6-inch height mark in Step 1 is your first critical cue—wait until you see those 4-5 leaves unfurling and the stems thickening noticeably. I learned this the hard way after hilling too early and watching my plants struggle. That flexibility test (gently grasping the stem) is your secret weapon for perfect timing.
Soil Texture Matters: When creating your mound in Step 2, focus on loose, well-draining soil. I've found that mixing in a handful of compost (about 1 part compost to 4 parts soil) works wonders for heavy clay soils. This prevents waterlogging while encouraging those new root formations where the stems touch the new soil. The pyramid shape creates better air circulation at the base.
Gradual Growth Strategy: That 2-3 week interval between hillings in Step 3 isn't arbitrary—it gives your plants time to adjust and develop new roots. I've noticed that plants hilled too frequently (every 1-2 weeks) develop weaker stems. The key is watching for that bushier appearance and thicker stems between hillings, not just following a schedule.
Stress Signals: After hilling, watch for wilting or yellowing leaves as your plant's first sign it needs water. I've found that a light application of compost tea (about 1 tablespoon per gallon of water) after each hilling gives plants that extra boost they need. The stems breaking at the base? That's your warning to reduce the mound height immediately and consider staking for support.
Pro Tips for Hill Up Potato Plants
- These simple tricks will help you transform your potato plants into sturdy, high-yielding bushes without the guesswork.
- Timing is Everything: The 6-inch height mark in Step 1 is your first critical cue—wait until you see those 4-5 leaves unfurling and the stems thickening noticeably.
- Soil Texture Matters: When creating your mound in Step 2, focus on loose, well-draining soil.
Frequently asked questions
Got questions about hilling up potato plants? You’re not alone! Here are some of the most common queries—and their answers—to help you master this technique like a pro.
When is the best time to hill up potato plants?
Hill your potatoes when the plants reach 6–8 inches tall and again every 2–3 weeks until the hill reaches the base of the plant. Early hilling (around 4–6 weeks after planting) encourages more tuber formation. Pro tip: Wait until the soil is slightly damp to prevent clumping.
How often should I hill potato plants?
Hill potatoes 3–4 times total during the growing season. Space hilling sessions about 2–3 weeks apart to avoid stressing the plant. Stop hilling when the plant flowers heavily—this signals the tubers are nearly mature. Watch for: Yellowing leaves or wilting as signs to pause.
What if I forget to hill my potato plants?
Don’t panic! While hilling maximizes yield, potatoes can still grow without it. If you missed hilling early, focus on watering deeply and mulching to encourage tuber development. Late hilling (even at flowering) still helps, though yields may be smaller. Bonus: Harvest a few "new potatoes" early to check progress!
Can I use grass clippings or straw for hilling?
Yes! Grass clippings, straw, or even leaves work great for hilling. Just avoid fresh grass clippings (they can mat and rot). Straw is ideal because it breaks down slowly and adds organic matter. Mix in a little compost for extra nutrients. Warning: Avoid hay with weed seeds!
What if bugs or rot appear after hilling?
If you see blight (brown spots) or wireworms, act fast! Improve airflow by loosening the hill slightly. For blight, remove infected foliage and avoid overhead watering. To deter pests, rotate crops yearly and use row covers early in the season. Prevention tip: Plant resistant varieties like ‘Red LaSoda’ if your area is prone to issues.
Wrapping up and next steps
Hilling up your potato plants is a simple yet powerful technique to boost your harvest and strengthen those sturdy stems! 🌱 By following these steps—whether you’re using soil, straw, or mulch—you’ll encourage deeper root growth, prevent greening, and enjoy healthier tubers. Remember, consistency is key! Start hilling early and repeat as your plants grow.
Now that you’re armed with the know-how, roll up your sleeves and get growing! 🌟 Try this method with your next potato patch and watch your yield thrive. Happy gardening—your future meals (and bragging rights) will thank you!