
How To
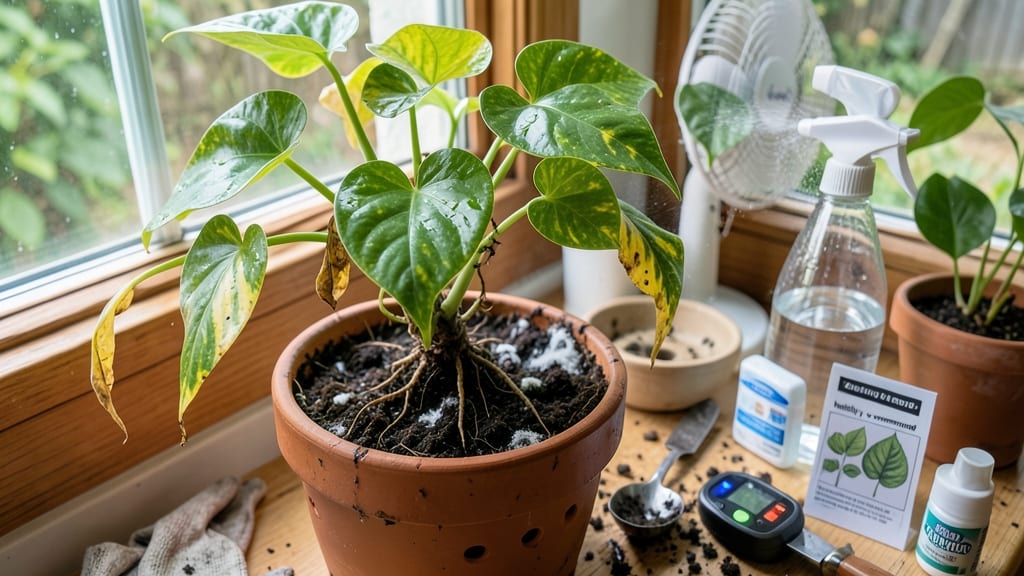
Your plant’s drooping leaves aren’t a death sentence—just a cry for help. 🌱 I’ve revived more overwatered plants than I’ve lost, and the key is acting fast before root rot takes over.
The first sign? Yellowing leaves that feel mushy when you touch them, or soil that smells sour instead of earthy.
Stop watering immediately—that’s rule number one. Then, gently remove the plant from its pot and inspect the roots. Healthy roots are firm and white; rotten ones are brown, slimy, and smell terrible.
Trim away the bad parts with clean scissors, then repot in fresh, well-draining soil (cactus mix works great for most plants).
After repotting, let the soil dry out completely between waterings—stick your finger in to check the top inch. Within a week, you’ll see new growth signaling the plant’s fighting back.
The secret? Balance. Overwatering is a habit, not a one-time mistake, so adjust your watering schedule to match your plant’s needs.
For long-term success, upgrade your pots with drainage holes and use a moisture meter to avoid guesswork. Even my black thumb plants thrive now that I’ve learned to listen to their roots. You’ve got this—one careful step at a time.
📚 In This Guide
- What you need
- Instructions
- Tips and common mistakes
- Wrapping up and next steps
What you need
Reviving an overwatered plant doesn’t have to be a guessing game—just grab these essential tools and materials to get started! Whether you’re a seasoned gardener or a plant parent in training, having the right supplies on hand will make the process smoother and more effective. Here’s your must-have
Step-by-Step instructions for reviving an overwatered plant
Here’s how I rescue plants with soggy roots—most recover beautifully if you act fast.
🌱 Step 1: Stop Watering Immediately
First, halt all watering completely. Overwatered plants need time to dry out, and adding more water just suffocates their roots. Place the pot in a spot with bright, indirect light—no direct sun yet, which could stress the plant further. You’ll know you’re on the right track when the top 1-2 inches of soil feel dry to the touch after a few days.
If the plant is in a decorative pot without drainage holes, transfer it to a temporary container with holes. I use an old plastic nursery pot for this—it’s cheap and functional. The goal is to let excess moisture escape while the roots recover.
💧 Step 2: Check Root Health and Trim Damaged Areas
Gently remove the plant from its pot and inspect the roots. Healthy roots are firm and white or light tan, while rotten roots are mushy, dark brown or black, and smell foul. Use clean, sharp scissors to trim away any mushy or discolored roots. I always sterilize my tools with rubbing alcohol first—this prevents introducing new pathogens.
Rinse the roots lightly under lukewarm water to remove excess soil, then let them air-dry for 10-15 minutes. This step is critical—it helps identify how severe the damage is. If more than half the roots are rotted, the plant may not recover, but don’t give up yet. Even a few healthy roots can regenerate.
☀️ Step 3: Repot in Fresh, Well-Draining Soil
Use a clean pot that’s only 1-2 inches larger in diameter than the original—overpotting can trap more moisture. Fill the bottom with a layer of perlite or coarse sand to improve drainage, then add a mix of 50% potting soil and 50% perlite or orchid bark. This blend prevents compaction and allows roots to breathe.
Place the plant in the new pot, ensuring it sits at the same depth as before. Fill around the roots with the soil mix, pressing lightly to eliminate air pockets. Water just enough to settle the soil—you’re aiming for barely damp, not soggy. Let the plant sit in this setup for 3-5 days before watering again.
⏰ Step 4: Monitor Light and Watering Patterns
After repotting, move the plant to bright, indirect light for 1-2 weeks. Avoid direct sunlight, which can stress the plant as it recovers. You’ll notice new growth in 2-4 weeks if the roots are healing—look for fresh leaves or stems pushing out from the base. If the plant drops leaves, don’t panic; it’s shedding damaged foliage to focus energy on root recovery.
Water only when the top 1-2 inches of soil feel completely dry. Stick your finger in the soil to check—if it’s damp, wait another day. Overwatering is the #1 mistake here. Once the plant shows signs of recovery (new leaves or stems), gradually reintroduce its normal watering routine, but stay on the lighter side for another 2-3 weeks.
Tips & tricks for reviving overwatered plants
Here’s what I’ve learned from saving dozens of plants that looked like they were beyond help—these small details make all the difference.
Root Inspection Tip: When checking roots in Step 2, focus on the smell as much as the appearance. Healthy roots shouldn’t have any odor, while rotting roots often emit a sour or putrid scent—this is your first warning sign. I’ve saved plants where the roots looked questionable but smelled fine, and others where the smell was off but roots seemed okay. Trust your nose!
Soil Mix Strategy: For Step 3, if you don’t have perlite or orchid bark, crushed gravel or even clean aquarium stones work in a pinch for that bottom drainage layer. The key is creating air pockets—anything that won’t compact completely helps. I once used coffee grounds mixed with sand (they break down slowly) and it worked surprisingly well for a fern that needed extra moisture retention.
Light Transition Tip: Moving plants to bright indirect light in Step 4 can be tricky—start with morning sun if possible, as it’s less intense. I’ve seen plants scorch when moved directly to afternoon sun too soon. Watch for yellowing leaves as a warning sign and move them to a slightly shadier spot if needed. The goal is to build their tolerance gradually.
Watering Cue: That 3-5 day wait before watering in Step 3 is harder than it sounds! Use a chopstick or wooden skewer to check soil moisture—push it in about 1 inch. If it comes out clean, it’s ready. If it’s damp below the surface, wait another day. This simple test prevents the most common relapse into overwatering.
Pro Tips for Help Overwatered Plant
- Here’s what I’ve learned from saving dozens of plants that looked like they were beyond help—these small details make...
- Root Inspection Tip: When checking roots in Step 2, focus on the smell as much as the appearance. Healthy roots shoul...
- Soil Mix Strategy: For Step 3, if you don’t have perlite or orchid bark, crushed gravel or even clean aquarium stones...
Frequently asked questions
Got questions about saving your soggy-leaved plant? You’re not alone! Here are some of the most common concerns—and practical solutions—to help you revive your overwatered green friend without stress.
How do I know if my plant is really overwatered?
Check for these red flags: yellowing leaves, mushy stems, roots that smell rotten (like wet socks!), or soil that stays clumpy even after drying. If the pot feels heavy with moisture and leaves drop easily, it’s time to act fast!
How long does it take to revive an overwatered plant?
Recovery time varies! Mild cases may bounce back in 1–2 weeks with proper care, while severely damaged plants could take 4–6 weeks or longer. Patience is key—focus on draining excess water and reducing humidity around the roots.
Can I use paper towels or newspaper to dry roots?
Gently wrap damp (not soaking) roots in paper towels or newspaper to absorb excess moisture. Replace every few hours until roots feel firmer. Pro tip: Avoid plastic—it traps moisture and worsens rot!
Should I move my plant to a warmer or cooler spot?
Cool, indirect light (like a north-facing window) is ideal during recovery. Avoid heat sources (radiators, direct sun) until roots stabilize. Most plants prefer 60–75°F (15–24°C)—think cozy, not tropical!
What if my plant’s leaves are already falling off?
Don’t panic! Prune only the most damaged leaves to redirect energy to healthy growth. Focus on root recovery first—new leaves will sprout once roots regain strength. Bonus: Trim with clean scissors to prevent disease spread.
Wrapping up and next steps
Reviving an overwatered plant isn’t just possible—it’s a rewarding challenge that can strengthen your green thumb! 🌱 By acting quickly, adjusting care routines, and giving your plant the right conditions, you can bring it back to life. Remember: patience and observation are key—your plant’s recovery depends on consistent, gentle adjustments.
Now that you’re equipped with the know-how, take action today! Start by assessing your plant’s needs and implementing the steps above. Before you know it, your leafy friend will be thriving again—proving that even the most "hopeless" cases can turn around with care. Happy gardening! 🌿