
How To
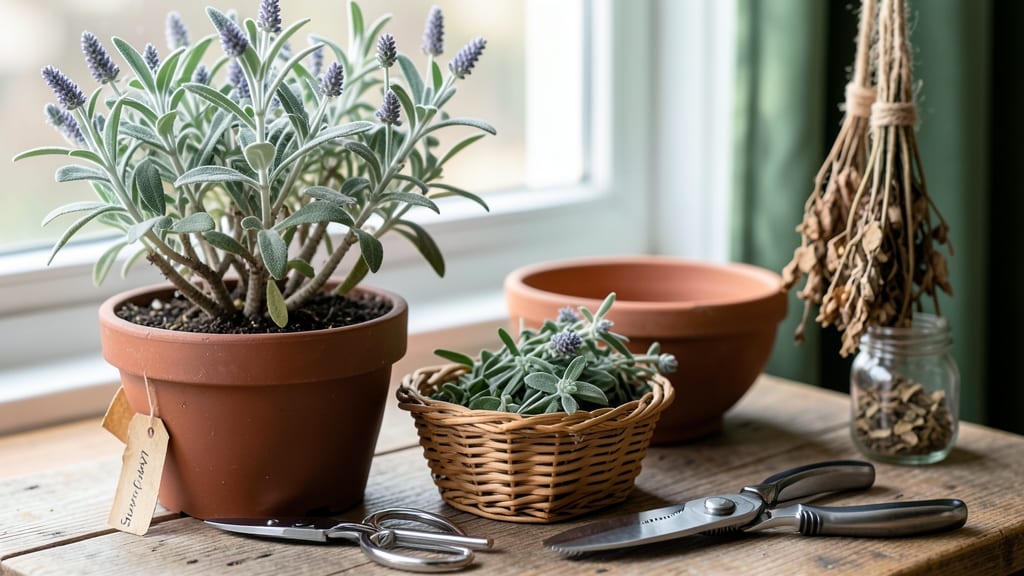
Harvesting sage for winter is one of the best ways to keep that fresh, aromatic flavor all season long—without breaking the bank on store-bought herbs. Whether you're a seasoned gardener or just starting out, knowing the right time to pick and how to preserve it makes all the difference.
Sage 🌿 thrives in USDA Zone 6a and beyond, but the key to preserving its potency lies in harvesting it at peak maturity—typically between August and October—when the leaves are fully developed and fragrant.
Miss this window, and you risk losing that rich, earthy taste that makes sage so special in cooking and crafts.
Once you’ve harvested, drying or freezing sage properly is the secret to keeping it flavorful for months. I’ll walk you through the easiest methods, from air-drying bundles to quick oven techniques, so you can store it like a pro.
No more dull, flavorless herbs—just vibrant, homegrown goodness whenever you need it.
Ready to turn your summer harvest into winter staples? Let’s dive into the steps that’ll have your sage tasting as fresh as the day you picked it—even in the dead of winter.


When and how to harvest sage for maximum flavor and preservation
Harvesting sage at the right time ensures the best flavor retention and drying success. The ideal window is late summer to early fall, just before flowering begins. This timing captures the plant's peak aromatic oils, which fade once flowers appear.
For perennial sage, you can harvest multiple times per season as long as you leave enough foliage for regrowth.
Look for mature leaves that are gray-green, fully developed, and highly fragrant. The stems should be woody but still flexible, not brittle. Avoid harvesting from plants younger than 1 year old—they won’t produce the same robust flavor.
If your sage is container-grown, ensure the pot is at least 12 inches wide to support healthy growth before harvesting.
Harvesting technique matters just as much as timing. Use clean, sharp pruning shears or scissors to cut 3-4 inch stems just above a leaf node. This encourages new growth while preserving the plant’s shape. Never harvest more than one-third of the plant at once, or you risk stressing it. For maximum yield, focus on harvesting in the morning after the dew has dried but before the heat of the day.
If you’re harvesting for long-term storage, prioritize stems with larger leaves—they dry more evenly and retain flavor better. Smaller leaves can still be used but may require more careful drying.
Always harvest on a dry, sunny day to minimize moisture on the leaves, which can lead to mold during drying. Remove any yellow or damaged leaves immediately to ensure only the freshest parts make it to your storage.
Signs your sage is ready include a strong, earthy aroma when leaves are crushed and a bushy, healthy appearance. The plant should have multiple sets of mature leaves along each stem. If you’re unsure, pinch a leaf—it should feel thick and leathery, not thin or papery. Overharvesting can weaken your sage plant, so balance your needs with its ability to recover.
| Harvest Stage | Key Characteristics | Best Practices |
|---|---|---|
| Early Growth | Plant < 6 in tall, small leaves | Avoid harvesting; focus on care |
| Mature Leaves | Gray-green, fragrant, woody stems | Harvest stems 3-4 in long |
| Pre-Flowering | Peak aroma, no buds yet | Ideal time for bulk harvest |
| Post-Flowering | Fading flavor, woody stems | Harvest sparingly for crafts |
For container-grown sage, harvesting is slightly different. Since pots limit root space, avoid heavy pruning—stick to light trimming to encourage bushier growth. If your sage is in a small pot, consider dividing it every 2-3 years to refresh the plant and improve harvest quality.
Always use sterilized tools to prevent disease, and never harvest after heavy rain when leaves may be waterlogged.
One common mistake is harvesting too late in the season, when cold weather reduces the plant’s ability to recover. Aim to finish your final harvest by late September in most climates to allow the plant to harden off before winter.
In warmer zones (USDA 8+), you can extend harvesting into October or November, but monitor for signs of stress like yellowing leaves.
If you’re growing multiple sage varieties, such as golden sage or purple sage, harvest each type separately. They have slightly different flavor profiles and drying times.
Golden sage, for example, has a milder, slightly citrusy note and dries faster than classic gray sage. Always label your harvested bundles to keep varieties straight during storage.
After harvesting, give your sage plant a light feeding with a balanced fertilizer (5-10-10) to encourage new growth for next season. Water deeply but avoid overwatering, as sage is drought-tolerant and prefers well-draining soil.
With proper care, your sage will bounce back and be ready for another harvest in spring or early summer.
When and how to harvest sage for maximum flavor and preservation
Harvesting your sage plants at the perfect moment ensures the best flavor retention and drying success for winter storage. The key is timing—wait until the plant is mature but hasn’t yet flowered.
This usually happens between late summer and early fall, around August to October, depending on your climate.
Look for fully developed leaves that are gray-green and aromatic. The stems should be slightly woody but still flexible—not brittle. If your sage is over 1 year old (if grown from seed), it’s likely ready.
Avoid harvesting when leaves are small or the plant is less than 6 inches tall—this means it’s not mature enough.
| Harvest Sign | What to Look For | Best Time |
|---|---|---|
| ✅ Ready to Harvest | Large, gray-green, fragrant leaves | Late summer/early fall |
| 🔊 Woody but Flexible Stems | Stems are firm but bendable | August–October |
| ❌ Not Ready | Small leaves, less than 6" tall | Avoid harvesting |
To harvest, use clean, sharp pruning shears or scissors to cut 3-4 inch stems just above a leaf node. This encourages new growth and prevents over-pruning. Avoid cutting more than one-third of the plant at once—this can stress the sage and reduce future harvests.
Harvest on a dry, sunny morning after any dew has evaporated. This helps the leaves dry faster and preserves their natural oils. Bundle stems together with a rubber band and hang them upside down in a well-ventilated, dry spot like a pantry or shed.
Avoid direct sunlight, which can bleach the leaves.
If you’re harvesting for immediate use, pick only the outer leaves and leave the inner growth intact. This way, your sage plant keeps producing fresh leaves for future harvests. For long-term storage, focus on cutting entire stems to maximize drying efficiency.
Once harvested, your sage should be ready to dry within 2-3 weeks. Store it in an airtight container away from light and moisture to keep its flavor intact all winter long.
With the right timing, your dried sage will retain its earthy, aromatic qualities for up to 1 year.