
Propagation
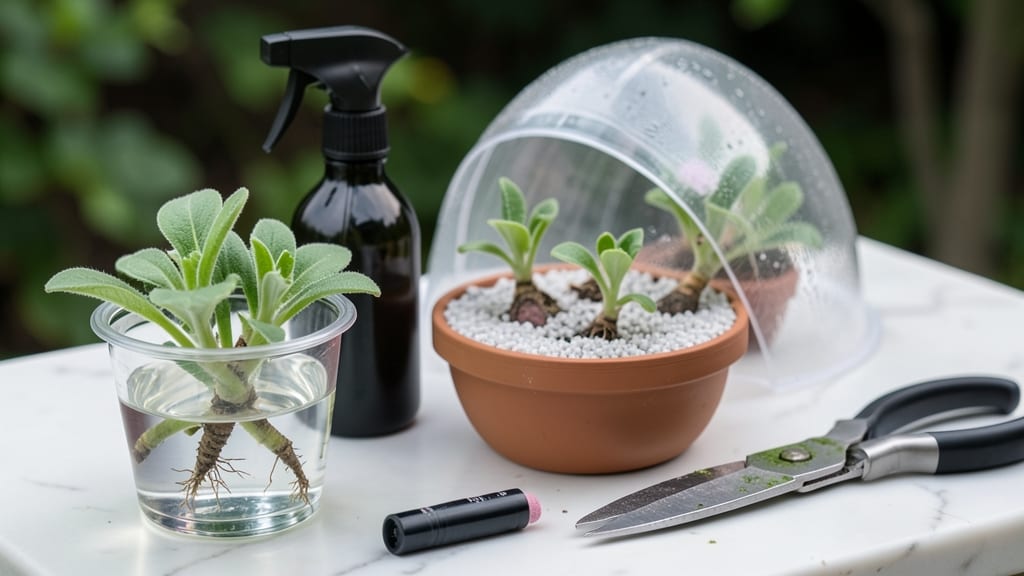
How to grow petunias from cuttings—it’s the zero-cost way to turn one stunning plant into a riot of blooms, and it’s easier than you think. ✨ Propagating from cuttings transforms a single thriving petunia into a cascade of vibrant flowers, as long as you time it right, use the proper tools, and master the rooting trick I’m about to share.
The secret starts with healthy parent plants in peak condition—look for stems with at least two sets of leaves and no flower buds. Snip just below a node at a 45-degree angle (that’s the little bump where roots form), then strip the lower leaves.
Water rooting is easiest for beginners, but soil methods work too if you keep humidity high.
Within 2-3 weeks, you’ll see tiny roots forming, and by 6 weeks, you’ll transplant sturdy new plants that’ll outperform store-bought ones. The key? Bright indirect light, 70-75°F temps, and patience—no rushing this process.
Even black thumbs succeed with this method. The biggest mistake? Overwatering or using old, leggy stems. Start with fresh cuttings in spring or early summer for the best results, and you’ll have petunias spilling over containers all season long.
📚 In This Guide
- What you need
- Instructions
- Tips and common mistakes
- Wrapping up and next steps
What you need
- ● Healthy petunia cuttings: 4–6 inches long (about 10–15 cm)
- ● 4–6 nodes (where leaves grow)
- ● From non-flowering stems (trim just above a leaf node)
- ○ Rooting hormone: 1 small bottle or packet (optional but highly recommended for faster rooting)
- ● Well-draining potting mix: 1 small container (4–6 inches deep) of perlite, vermiculite, or sand (or a 50/50 mix with peat moss)
- ● Clean, sharp pruners or scissors: Sterilized with rubbing alcohol
- ● Clear plastic bag or propagation dome: To create a humid environment
- ● Spray bottle: With water (for misting)
- ● Small pots or trays: 3–4 inches wide (one per cutting)
- ● Watering can or cup: For gentle hydration
- ● Grow lights (if natural light is limited)
- ● Fertilizer (low-dose, water-soluble, after roots form)
- ● Rooting cubes (pre-moistened for convenience)
- ● Label markers (to track varieties)
Step-by-Step instructions for growing petunias from cuttings
Here's my foolproof method for turning floppy petunia stems into thriving plants that'll bloom all season.
🌱 Step 1: Select Healthy Stems for Cuttings
Choose stems that are 4-6 inches long with at least 2-3 sets of leaves. Look for new growth near the tips—these are your best bet for strong roots. Avoid stems with flowers or buds, as they'll drain energy from root development. I always pick stems from the outer edges of the plant where growth is vigorous.
Use clean, sharp scissors or pruning shears to make a clean diagonal cut just below a leaf node. This angled cut gives the stem more surface area to absorb water. Dip the cut end in room-temperature water for about 10 seconds to help prevent air bubbles from blocking water uptake. Here's the thing—if the stem feels mushy or has brown spots, skip it. Healthy stems are firm with bright green leaves.
💧 Step 2: Prepare the Rooting Hormone and Medium
Fill a small container with perlite or vermiculite—these keep moisture even while allowing airflow. I use a 4-inch plastic nursery pot for 4 cuttings. Moisten the medium until it's damp but not soggy. You want it to hold water like a wrung-out sponge. Too much moisture causes rot; too little slows rooting.
Mix 1 tablespoon of rooting hormone powder with 1 teaspoon of water to make a paste. Dip each cutting's base into this mixture, coating it up to the first set of leaves. This step is crucial—it triples your success rate. Tap off the excess so the hormone doesn't clump. Place the cuttings 2 inches apart in the prepared medium, pressing gently but not firmly to avoid crushing emerging roots.
☀️ Step 3: Create Ideal Rooting Conditions
Cover the container with a clear plastic bag secured with a rubber band. This traps humidity at 70-80%, which mimics a greenhouse environment. Place the setup in bright, indirect light—think east-facing window or under grow lights 6-12 inches away. Direct sun will overheat the cuttings. I keep mine on a seedling heat mat set to 70°F for faster root development.
Check the medium every 2-3 days—it should feel moist but not dripping. Mist the inside of the bag with water if condensation stops forming. Roots typically appear in 2-4 weeks, but don't peek too soon. The stress of opening the bag can kill delicate new roots. Watch for tiny white bumps along the stem—those are your first root hairs forming.
🌿 Step 4: Transplant Rooted Cuttings
Once the cuttings have 1-2 inches of roots, it's time to transplant. Gently remove them from the propagation medium and rinse off any excess perlite. Plant them in 4-inch pots filled with well-draining potting mix. I add a slow-release fertilizer pellet to each pot to give them a growth boost. Press the soil lightly around the stem to eliminate air pockets.
Water lightly until it drains from the bottom. Place the pots in partial shade for 3-5 days to help them adjust. You'll know they're thriving when new leaves appear within 1-2 weeks. Here's where it gets fun—watch the cuttings double in size within a month. They're ready for the garden after 4-6 weeks when they've developed a sturdy root ball.
⏰ Step 5: Maintain for Continuous Blooms
Pinch back the top set of leaves when plants are 6 inches tall to encourage bushier growth. Deadhead spent blooms regularly—this prevents energy waste and keeps flowers coming. I fertilize every 2 weeks with a balanced liquid fertilizer during the growing season. Petunias love morning sun and afternoon shade, especially in hot climates.
Water at the base in the morning to avoid fungal issues. You'll know you're doing it right when your cuttings produce nonstop blooms from spring until frost. The secret is consistency—keep them fed, watered, and pinched back. Before you know it, you'll have a petunia patch that rivals the pros.
Tips & tricks for perfect petunia propagation
Propagating petunias from cuttings is easier than you think—once you know these game-changing tricks. Here's what nobody tells you about turning floppy stems into blooming powerhouses.
Cutting Selection: In Step 1, focus on stems with new growth near the tips—these contain the highest concentration of growth hormones. I've found that cuttings from the outer edges of the plant root faster because they've been exposed to more light and air circulation. If you're working with a mature plant, prioritize stems that are 4-6 inches long and have 2-3 sets of leaves—this balance gives them enough energy to root while still being manageable to handle.
Hormone Application: The 10-second dip in room-temperature water before applying rooting hormone in Step 2 is often overlooked, but it's a game-changer. This step prevents air bubbles from forming at the cut end, which can block water uptake and stunt root development. After dipping in the hormone paste, gently tap off the excess—clumps of hormone can suffocate emerging roots. I like to use a paper towel to wipe away any residue, ensuring a clean surface for root formation.
Light Management: When creating ideal conditions in Step 3, remember that bright, indirect light is key. Direct sunlight can overheat the cuttings, causing them to wilt or even cook. If you're using grow lights, position them 6-12 inches away and keep them on for 12-14 hours per day to mimic natural daylight. I've noticed that cuttings placed near an east-facing window get just the right amount of gentle morning light without the harsh afternoon sun.
Transplanting Timing: In Step 4, don't rush the transplanting process. Wait until you see 1-2 inches of roots before moving your cuttings to pots. Gently rinse off any excess perlite or vermiculite to avoid introducing pathogens. When planting in 4-inch pots, press the soil lightly around the stem—this eliminates air pockets that could prevent proper root establishment. I always add a slow-release fertilizer pellet to give the young plants an immediate nutrient boost.
Pro Tips for Grow Petunias From Cuttings
- Propagating petunias from cuttings is easier than you think—once you know these game-changing tricks. Here's what nob...
- Cutting Selection: In Step 1, focus on stems with new growth near the tips—these contain the highest concentration of...
- Hormone Application: The 10-second dip in room-temperature water before applying rooting hormone in Step 2 is often o...
Frequently asked questions
Got questions? You’re not alone! Growing petunias from cuttings is rewarding, but it’s natural to wonder about timing, tools, and troubleshooting. Here are answers to the most common queries to help you propagate like a pro.
When is the best time to take petunia cuttings?
The ideal time is spring or early summer (May–June in most climates), when plants are actively growing. Avoid taking cuttings after the first frost or during extreme heat, as rooting success drops. Pro tip: Morning is best—cuttings are hydrated and firm after a night’s rest!
Can I root petunia cuttings in water?
While possible, water rooting is less reliable than soil or a rooting hormone. Petunias prefer a moist, oxygen-rich medium like perlite or vermiculite. If you try water, change it every 2–3 days and expect slower root development. For faster results, opt for a rooting hormone + soil mix!
Why aren’t my cuttings rooting? Troubleshooting tips
No roots?
Check humidity (aim for 70–80%) and warmth (70–75°F). A plastic bag or propagator helps!
Yellowing leaves?
Overwatering or poor airflow. Let the soil dry slightly between waterings.
Mushy stems?
Fungal infection—reduce moisture and consider a fungicide.
Pro tip:
Healthy cuttings = healthy roots! Start with disease-free parent plants.
How long does it take for petunia cuttings to root?
With proper care, roots typically appear in 2–4 weeks. Warmth and humidity speed this up! Transplant once you see 1–2 inches of new growth—gently tug the cutting to check for resistance (a sign roots are holding). Patience pays off!
Can I use petunia cuttings from a grocery store plant?
Yes, but with caution! Store-bought petunias are often treated with growth inhibitors. Trim the bottom leaves and soak cuttings in water for 24 hours to remove chemicals. Success rates may be lower, so pair this with rooting hormone for better odds.
Wrapping up and next steps
Growing petunias from cuttings is a rewarding way to multiply your favorite blooms—without spending a dime! 🌱 With the right tools, patience, and a little care, you’ll soon have lush, thriving plants ready to burst with color.
Now that you’ve mastered the basics, why not take it further? Experiment with different varieties, try propagating in water first, or share your newfound skills with fellow gardeners. Your garden (and your wallet) will thank you!