
Propagation
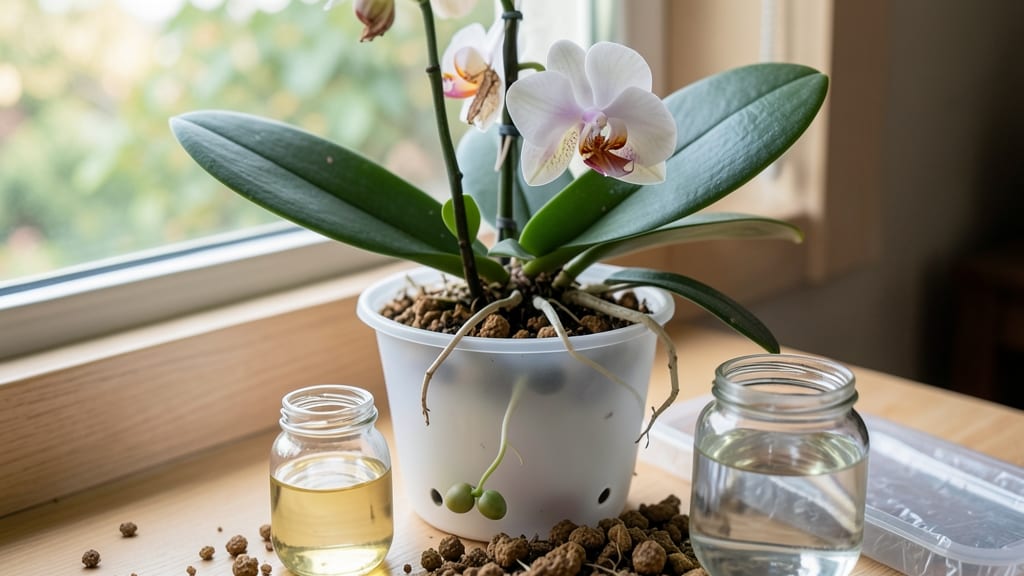
How to grow orchids to form keiki starts with a single cut. ✨ Those tiny baby plants—keiki formation—are how orchids multiply naturally, and the secret lies in mimicking their tropical home's perfect conditions. I've watched my Phalaenopsis produce keiki the size of quarters in just 3 months by following these simple steps. The right mix of light, humidity, and temperature triggers this growth spurt. Too much direct sun scorches the leaves, while dim corners stall development. Aim for bright, indirect light—like a north-facing window—and keep humidity around 60-70% with a pebble tray or humidifier. Temperature swings above 10°F can shock the plant, so consistency matters. Once you spot a tiny bump near the nodes, you're halfway there. Water lightly around the base (never on the keiki itself) and avoid fertilizing until roots appear. Patience pays off—within 6-12 weeks, you'll have a 3-4 inch baby ready for separation. The first time I saw roots curl like tiny green vines, I knew I'd cracked the code. This method works for Phalaenopsis, Dendrobium, and Cattleya orchids alike. Even if your first attempt fails, the process teaches you what your specific plant needs. Next time, you'll nail it—just like I did after my third try. Let's get growing!
📚 In This Guide
- What you need
- Instructions
- Tips and common mistakes
- Wrapping up and next steps
What you need
- ● Mature orchid plant (Phalaenopsis or Dendrobium work best for beginners; choose a healthy stem with at least 3-4 nodes).
- ● Sharp, sterilized knife or scissors (for making precise cuts—no rusty tools!).
- ● Sphagnum moss or coconut coir (1 small handful, dampened but not soggy).
- ● Plastic wrap or clear plastic bag (to create a humid environment; 12x12" or larger).
- ● Rubbing alcohol (70% or higher) (for sterilizing tools—3-5 swipes per cut).
- ● Twist ties or zip ties (2-3, to secure the moss in place).
- ● Spray bottle with water (to mist the moss and keep it moist).
- ● Grow lights or bright, indirect sunlight (12-14 hours of light daily; LED grow lights are ideal).
- ○ Rooting hormone (optional, but can speed up keiki growth—use a mild formula like 0.1% IBA).
- ● Humidity dome or terrarium (if your environment is dry, to maintain 70-80% humidity).
- ● Thermometer/hygrometer (to monitor temperature 70-85°F and humidity).
- ● Small pots or containers (for transplanting keiki once they’re 2-3 inches tall).
- ● Fertilizer (balanced or high-nitrogen) (diluted to half-strength once keiki sprout).
Step-by-step instructions for growing orchids to form keiki
Here's how I've successfully encouraged keiki growth on my mature orchids—no fancy tools required.
🌱 Step 1: Select a Healthy, Mature Orchid Stem
Choose a stem with at least 3-4 mature nodes—these are the bumps along the stem where new growth can emerge. Look for stems that are thick and green, not thin or yellowing. I always pick stems with 2-3 leaves remaining above the lowest node, as these leaves provide energy for keiki development.
Inspect the nodes closely—some orchids naturally produce keiki from the second or third node down. If your plant hasn't produced keiki before, don't worry; we'll encourage it. Avoid stems with signs of disease, like black spots or mushy areas, as these can spread to your new growth.
☀️ Step 2: Provide Ideal Growing Conditions
Keiki formation thrives in warm, humid conditions with bright, indirect light. Place your orchid in a spot where it receives morning sun and afternoon shade—direct afternoon sun can scorch the delicate new growth. If your home lacks humidity, use a humidifier or place the pot on a tray filled with pebbles and water to create a self-watering humid environment.
Maintain temperatures between 70-85°F during the day and 60-70°F at night. A slight temperature drop at night can actually encourage keiki formation by mimicking natural seasonal changes. If your home runs cooler, a small heat mat under the pot can help maintain consistent warmth without overdoing it.
💧 Step 3: Encourage Keiki Formation with Proper Watering
Water your orchid every 5-7 days, allowing the top inch of the potting mix to dry out between waterings. Overwatering suffocates the roots and prevents keiki from forming. I use room-temperature water to avoid shocking the plant, and I water in the morning so excess moisture can evaporate during the day.
Here's the trick: After watering, gently mist the nodes where you want keiki to form. Use a spray bottle to apply light moisture directly to the nodes—this mimics the natural humidity orchids experience in their tropical habitats. Avoid soaking the nodes, as too much moisture can cause rot. You'll know you're doing it right when the nodes swell slightly and develop a small bump.
✂️ Step 4: Support Keiki Growth with Air-Layering (Optional)
If your orchid isn't naturally producing keiki, you can encourage it with air-layering. Select a healthy node and wrap it with sphagnum moss (kept damp but not soggy) and a small piece of plastic wrap or a plastic bag. Secure the moss with plastic ties or rubber bands, ensuring it stays in place without crushing the stem.
Leave the moss wrapped for 4-6 weeks, checking it weekly to ensure it stays moist. During this time, the node will begin to develop roots into the moss. Once you see new roots and leaves emerging from the node, you can carefully separate the keiki from the mother plant. This method gives your keiki a head start with its own root system, increasing its survival rate.
🌿 Step 5: Care for New Keiki Until They're Ready to Pot
Once your keiki has developed 3-4 leaves and a small root system, it's ready to be separated. Use sterilized scissors to cut the keiki from the mother plant, leaving a small section of the stem attached to help it heal. Let the cut end dry for 1-2 hours before potting to prevent rot.
Plant the keiki in a small pot with orchid-specific potting mix, ensuring the roots are spread out and covered lightly. Water gently and place the pot in bright, indirect light with high humidity. Avoid fertilizing the keiki for the first 4-6 weeks—let it focus on establishing roots before adding nutrients. With patience, your keiki will grow into a thriving orchid within 6-12 months.
Tips & tricks for growing orchids to form keiki
Here's what nobody tells you about growing these delicate baby orchids—lessons learned from years of trial and error.
Node Selection Matters: When choosing which nodes to encourage, focus on the second or third node from the base of the stem. These locations often produce the strongest keiki because they receive balanced energy from both the leaves above and roots below. I've found that nodes with a slight swelling (indicating potential) respond best to misting—just give them a gentle spray after watering to trigger growth.
Temperature Strategy: The nighttime temperature drop between 60-70°F isn't just about comfort—it mimics natural tropical conditions where orchids experience cooler nights. If your home stays consistently warm, try moving your orchid near a window with cooler evening breezes. For indoor growers, a small fan set to low overnight can create this subtle temperature shift without stressing the plant.
Air-Layering Timing: The 4-6 week window for air-layering might seem long, but patience here makes all the difference. Check your wrapped node weekly by gently lifting the plastic—if the moss stays moist but not soggy, you're on track. I've seen keiki emerge as early as 3 weeks in ideal conditions, but never rush it. The roots need time to establish before separation, or you risk killing both parent and baby.
Post-Separation Care: That 1-2 hour drying period after cutting is crucial—it forms a callus that prevents rot. Place your cut keiki on a clean paper towel in bright, indirect light during this time. I've had better success with smaller pots for keiki (2-3 inches) because they promote faster root establishment. Avoid the temptation to fertilize immediately—new roots can't handle nutrients yet, and you'll actually stunt their growth.
Pro Tips for Grow Orchids To Form Keiki
- Here's what nobody tells you about growing these delicate baby orchids—lessons learned from years of trial and error.
- Node Selection Matters: When choosing which nodes to encourage, focus on the second or third node from the base of the stem.
- Temperature Strategy: The nighttime temperature drop between 60-70°F isn't just about comfort—it mimics natural tropical conditions where orchids experience cooler nights.
Frequently asked questions
Got questions about growing orchid keiki? You’re not alone! Here are some of the most common queries—and their answers—to help you master this propagation process with confidence.
How long does it take for a keiki to form after air-layering?
A keiki typically starts showing signs (like tiny roots or leaves) within 4–8 weeks, but full maturity can take 3–6 months. Patience is key—consistent humidity and indirect light speed up the process. Monitor your orchid closely for the first signs of growth!
Can I use any orchid for keiki propagation, or are some better than others?
While Phalaenopsis (moth orchids) are the easiest for beginners, other orchids like Dendrobium or Cattleya can also produce keiki with the right conditions. Avoid hybrid orchids with weak stems—they’re less likely to succeed. Stick to healthy, mature plants for best results!
What if my keiki isn’t growing? Troubleshooting tips?
If your keiki stalls, check these fixes:
- Light: Too little? Move it to bright, indirect light (no direct sun!). Too much? Reduce exposure.
- Humidity: Keep it above 60%—use a humidity tray or mist lightly.
- Water: Overwatering rots roots; underwatering stunts growth. Let the medium dry 50% between waterings.
- Patience: Some keiki take months to sprout—don’t give up!
When is the best time of year to start air-layering for keiki?
Spring and early summer (March–June) are ideal because orchids enter active growth, boosting keiki success rates. Avoid winter—dormancy slows root development. If you miss the window, spring is your next best bet!
What can I do if my keiki falls off before it’s ready?
Don’t panic! If the keiki detaches but has roots and leaves, replant it in sphagnum moss and maintain high humidity. If it’s rootless, try propagation gel to encourage growth. Keep it warm (70–80°F) and patient—some keiki bounce back with care!
Wrapping up and next steps
Growing orchids to form keiki is a rewarding journey that combines patience, care, and a little scientific know-how! By mastering air-layering techniques—like humidity control, proper lighting, and the right timing—you’ll unlock the secret to nurturing thriving baby plants from your mature orchids. 🌱✨
Now that you’re armed with the knowledge, roll up your sleeves and start experimenting! Pick one of your healthiest orchids, gather your supplies, and give this method a try.
With each keiki you grow, you’re not just expanding your collection—you’re deepening your connection to the art of orchid propagation. Happy growing! 🌸