
Propagation
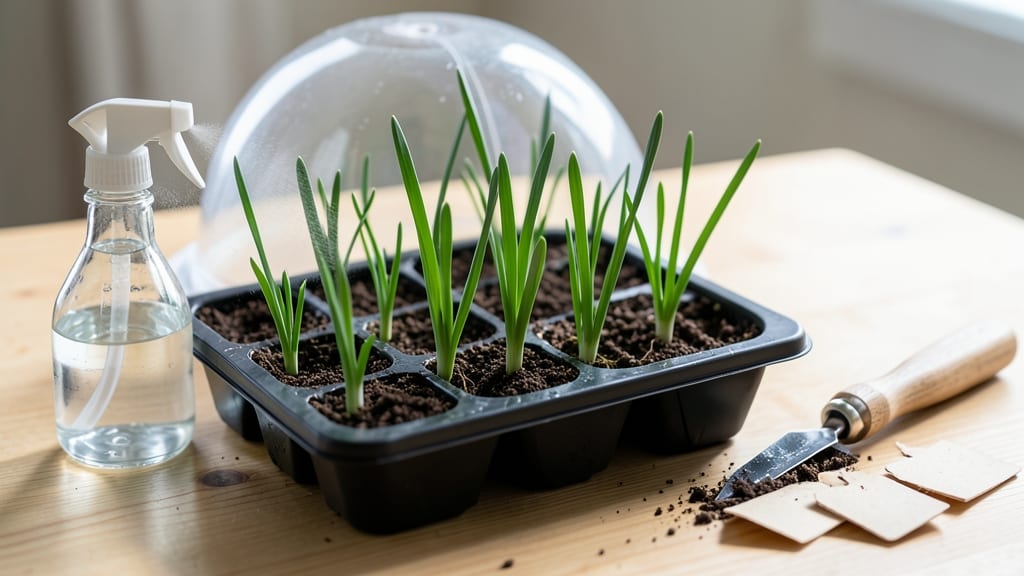
How to grow narcissus from seeds—six months of waiting pays off with daffodils you'll never find at the nursery. 🌱 Growing narcissus from seeds isn't just rewarding—it's a chance to cultivate rare varieties that take years to appear in garden centers. My first batch of seed-grown daffodils bloomed last spring, and the scent alone made the wait worthwhile.
The secret lies in patience and precise timing. Unlike cuttings, narcissus seeds need cold stratification to break dormancy, mimicking winter's natural process. You'll need fresh seeds (or carefully stored ones), a mix of sand and peat, and a cool, dark spot for at least 8-12 weeks before any green shows.
Most gardeners rush this step—and end up disappointed.
By the time those first pale shoots appear, you'll be hooked on the process. Seedlings grow slowly at first, but with proper light and nutrients, they'll develop into sturdy plants ready for transplanting by their second year.
The payoff? Unique, disease-resistant blooms that multiply over time, creating drifts of color your neighbors will envy.
Perfect for patient gardeners who love a challenge—or those who want to grow heirloom varieties unavailable elsewhere. Here's how to turn tiny seeds into a springtime showstopper without the nursery price tag.
📚 In This Guide
- What you need
- Instructions
- Tips and common mistakes
- Wrapping up and next steps
What you need
- ● Narcissus seeds – Buy from a reputable supplier (true narcissus seeds take 2–3 years to bloom; paperwhites bloom faster). Quantity: 10–20 seeds (more = higher success rate!).
- ● Seed-starting mix – Lightweight, well-draining, and sterile. Recommended: 50% peat moss + 50% perlite or vermiculite (1–2 cups per pot).
- ● Small seed trays or pots – 2–3 inch (5–7.5 cm) pots or a seed tray with drainage holes. Quantity: 1 pot per 3–5 seeds (or 1 tray with divided cells).
- ○ Clear plastic dome or plastic wrap – To create a humidity tent (optional but highly recommended for germination).
- ● Spray bottle – For gentle watering (avoid drowning seeds!).
- ● Grow lights or sunny windowsill – Narcissus seeds need 12–16 hours of light daily. A LED grow light (12–15W) works great if natural light is limited.
- ● Fertilizer (balanced, water-soluble) – 5-10-5 or 10-10-10 ratio, diluted to half-strength. First use: After 4–6 weeks of growth.
- ● Heat mat – Speeds up germination (keep soil at 65–75°F (18–24°C)).
- ● Seedling heaters – For extra warmth if your home runs cool.
- ● Humidity tray – Adds moisture without overwatering.
- ● Labels & markers – Track seed varieties and planting dates!
- ● Pruning shears – For trimming foliage later (once seedlings sprout 2–3 leaves).
Step-by-Step instructions for growing narcissus from seeds
Here's how to coax those delicate blooms from tiny seeds—it takes time, but the results are worth every day.
🌱 Step 1: Harvest and Prepare Fresh Seeds
Narcissus seeds must come from a healthy, mature flower. After blooming, leave the seed pod on the plant until it turns brown and papery—this usually takes 4-6 weeks after flowering. Once dry, gently squeeze the pod to release the flat, winged seeds inside. Store them in a cool, dry place until ready to plant.
Don’t rush this step. Seeds from a fresh pod have the highest germination rate, while dried-out seeds may take years—or never sprout at all. I like to label the pods with the variety and harvest date so I don’t mix them up later.
💧 Step 2: Stratify Seeds for Better Germination
Narcissus seeds need cold stratification to break dormancy. Place the seeds in a sealed container with a damp paper towel, then refrigerate for 8-12 weeks at 35-40°F. Check weekly to ensure the towel stays moist but not soggy—excess water can cause mold.
This cold treatment mimics winter conditions and tricks the seeds into thinking they’ve survived a natural cycle. After 8 weeks, move the container to a warm spot (65-75°F) for another 2-4 weeks before sowing. Patience here pays off—skipping stratification often results in poor or uneven germination.
☀️ Step 4: Sow Seeds in a Controlled Environment
Fill a shallow tray with a sterile seed-starting mix (avoid garden soil—it’s too dense and may harbor fungi). Scatter the seeds on the surface, pressing them lightly into the mix so they make contact but aren’t buried. A light dusting of sand or perlite helps prevent fungal issues.
Keep the tray in a bright, indirect light spot (like a north-facing window) and maintain consistent moisture by misting daily. Cover the tray with clear plastic wrap to retain humidity, but remove it daily for 10 minutes to prevent mold. Germination can take 4-12 weeks—don’t give up if nothing appears in the first month.
🌿 Step 5: Transplant Seedlings to Individual Pots
Once seedlings develop 2-3 true leaves (not just the first tiny cotyledons), carefully transplant them into 2-inch pots filled with a well-draining potting mix. Use a small spoon or your finger to loosen the soil around the roots before transferring. Water gently after planting to settle the soil.
Place the pots in a cool, shaded spot for the first 2 weeks to help them adjust. After that, gradually introduce them to morning sun and partial afternoon shade. Overwatering is the biggest killer here—let the top inch of soil dry out between waterings. Strong seedlings will have thick stems and deep green leaves by this stage.
⏰ Step 6: Gradually Acclimate and Plant Outdoors
After 12-18 months, when seedlings are 4-6 inches tall with a few leaves, they’re ready for outdoor planting. Choose a sheltered spot with dappled shade (full sun can scorch young plants). Dig a hole twice as wide as the root ball but only as deep as the pot’s height.
Water deeply before and after transplanting. Mulch lightly with organic matter to retain moisture and protect roots. It’ll take another 2-3 years before these seedlings bloom—so mark their location well! The first flowers might be small, but each year they’ll grow stronger and more vibrant.
Tips & tricks for growing narcissus from seeds
Here's what nobody tells you about nurturing these delicate blooms from tiny seeds—these tricks will help you avoid common pitfalls and maximize your success.
Seed Selection and Storage: When harvesting those flat, winged seeds in Step 1, look for pods that are completely dry and papery. Store them in a sealed container with a desiccant packet to prevent moisture buildup, which can cause mold. I've found that labeling each pod with the variety name and harvest date makes organization a breeze, especially when dealing with multiple batches. The slight extra effort now prevents headaches later when you're ready to sow.
Stratification Success: During the 8-12 week cold stratification in Step 2, I recommend using a clear plastic container so you can easily monitor moisture levels without opening it. Place a small piece of cardboard over the seeds to keep them in darkness—this mimics their natural underground conditions. After the 8-week mark when you move to warm conditions, place the container near a heat source (like the back of your fridge) to maintain that 65-75°F range consistently. This temperature shift is crucial for breaking dormancy.
Germination Environment: For Step 4, the bright indirect light requirement can be tricky with indoor lighting. I've had the most success using a combination of natural north-facing light and a simple LED grow light on a timer (12 hours on, 12 hours off). The plastic wrap covering helps maintain humidity, but remember to remove it daily for that critical 10-minute ventilation. This balance prevents both mold growth and seed desiccation—two common reasons germination fails.
Transplanting Strategy: When transplanting to individual pots in Step 5, use a small spoon to gently loosen the soil around the delicate roots before transferring. This prevents root damage that could set back growth. After transplanting, I like to water with a diluted seaweed solution (1 tsp per gallon) to reduce transplant shock. The cool, shaded spot requirement is non-negotiable—direct sunlight at this stage can scorch young seedlings before they've developed protective mechanisms.
Pro Tips for Grow Narcissus From Seeds
- Here's what nobody tells you about nurturing these delicate blooms from tiny seeds—these tricks will help you avoid common pitfalls and maximize your success.
- Seed Selection and Storage: When harvesting those flat, winged seeds in Step 1, look for pods that are completely dry and papery.
- Stratification Success: During the 8-12 week cold stratification in Step 2, I recommend using a clear plastic container so you can easily monitor moisture levels without opening it.
Frequently asked questions
Got questions?
Growing narcissus from seeds is rewarding but comes with its own set of curiosities. Here are answers to the most common ones to help you navigate the process like a pro!
How long does it take for narcissus seeds to germinate?
Narcissus seeds are notoriously slow—expect germination in 6 to 12 months, sometimes even longer! Patience is key. Store seeds in a cool, dry place (like the fridge) for 3–4 months before sowing to break dormancy. Once planted, keep them consistently moist and warm (around 65–75°F) to encourage sprouting.
Can I grow narcissus from seeds faster?
Not really! Unlike bulbs, seeds require a cold stratification period to mimic winter conditions, which is non-negotiable for germination. However, you can speed up bulb formation by providing ideal growing conditions (bright light, well-draining soil) once seeds sprout. Within 2–3 years, you’ll have tiny bulbs ready for transplanting.
Will seeds grown from narcissus produce flowers like the parent plant?
Probably not! Seeds often result in unpredictable hybrids—your blooms may differ in color, shape, or size from the parent plant. For true-to-type narcissus, bulb offsets or division are better bets. If you love surprises, though, seed-growing is a fun experiment!
Why aren’t my narcissus seeds sprouting?
Common culprits include dormancy not broken, poor soil drainage, or inconsistent moisture. Double-check these:
- Did you stratify seeds for 3–4 months?
- Are they in a well-draining mix (like sand/peat)?
- Are they kept moist but not soggy?
Can I grow narcissus from seeds indoors?
Start seeds in small pots with a light, airy mix (like perlite + compost). Place them near a sunny window or under grow lights (12–14 hours/day). Once seedlings are 2–3 inches tall, transplant them outdoors in spring or fall—they’ll need gradual acclimation to outdoor conditions.
Wrapping up and next steps
Growing narcissus from seeds is a rewarding journey that blends patience with beauty—and yes, those cheerful blooms are totally worth the wait! 🌱 With the right soil, timing, and care, you’ll soon enjoy vibrant daffodils popping up in your garden. Start small, stay consistent, and trust the process!
Ready to take the next step? Once your seedlings sprout, transplant them carefully and watch them thrive. Happy gardening—your future narcissus blooms are cheering for you! 🌸