
Size
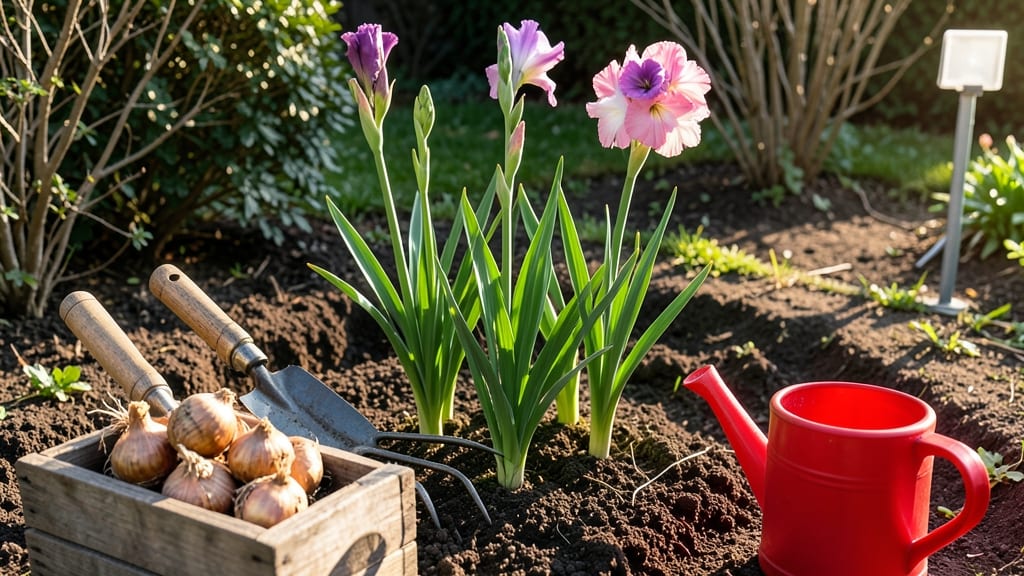
How to grow glads transforms your garden into a vertical rainbow. 🌈 These sun-loving perennials multiply every year, giving you more blooms than you started with—if you plant them right. The secret isn't complicated, but timing and soil prep make all the difference between a few sad stems and a tower of vibrant flowers.
Start with healthy corms (not bulbs!) planted 4-6 inches deep in well-draining soil. Most gardeners mess this up by planting too shallow or crowding them—stick to 6-inch spacing for proper airflow.
Glads thrive in full sun (6+ hours daily) and need consistent moisture, but soggy soil is their worst enemy. A layer of mulch helps retain moisture without suffocating the roots.
By midsummer, you'll see those iconic sword-like leaves pushing up, followed by dramatic spikes of blooms in every color imaginable. The best part? Each corm produces 2-4 baby corms, so your plants multiply effortlessly.
Just dig them up in fall, separate the clusters, and replant next season for even more dramatic displays.
Perfect for cutting gardens, borders, or containers—just avoid heavy clay soil. Here's where most people trip up: overwatering and poor drainage. Let's fix that before you even plant your first corm.
📚 In This Guide
- What you need
- Instructions
- Tips and common mistakes
- Wrapping up and next steps
What you need
- ● Gladiolus corms: 5–10 healthy, firm corms (size 2 or larger for best blooms). Choose from varieties like Telemon or Picasso for vibrant colors!
- ● Well-draining potting mix: 2–3 bags (10–15 lbs each) of a blend like 50% garden soil + 50% perlite/sand to prevent rot.
- ● Garden bed or containers: For in-ground planting: A sunny spot with at least 6+ hours of sunlight and loose, fertile soil.
- ● For container growing: Pots 8–12 inches deep with drainage holes (1–2 corms per pot).
- ● Organic fertilizer: A balanced 10-10-10 or 5-10-10 (1–2 lbs per 10 sq ft) to boost growth.
- ● Mulch: Straw or shredded leaves (1–2 inches) to retain moisture and regulate soil temp.
- ● Garden trowel or hand fork for planting.
- ● Watering can or hose with a gentle spray nozzle (avoid overwatering!).
- ○ Stakes or plant supports (optional, for tall varieties like Green Star).
- ● Garden gloves to protect hands while handling corms.
- ○ Soil pH test kit (optional but helpful—glads thrive in pH 6.0–6.8).
Step-by-Step instructions for growing glads
Here's the straightforward method I've used to grow healthy, multiplying glads year after year.
🌱 Step 1: Choose and Prepare Healthy Corms
Select firm, plump corms that are free of soft spots or mold—these are your foundation. I always inspect mine under bright light to catch any early signs of rot. Glads multiply through corm "babies" that form around the mother corm, so choose larger corms for more vigorous growth.
Soak the corms in lukewarm water for 15-20 minutes before planting. This softens the outer skin slightly and kickstarts root growth. You'll see tiny root hairs appear within a few days if you check occasionally. Planting them dry can delay emergence by a week or more.
☀️ Step 2: Plant in Well-Draining Soil with Full Sun
Glads demand full sun (6+ hours daily) and soil that drains like a sieve—waterlogged roots will rot before blooms appear. I dig holes 3-4 inches deep and space them 6 inches apart in rows 12 inches apart for easy maintenance. Mix in a handful of compost at the bottom to give roots a nutrient boost without compacting the soil.
Place each corm with the flat side down and the pointed end up. Cover lightly with soil, leaving the top third exposed. This ensures the corm stays above soil level as it grows. Press gently around the edges to eliminate air pockets, but don't pack it down—roots need space to spread.
💧 Step 3: Water and Fertilize for Strong Growth
Water deeply right after planting to settle the soil, then let it dry out slightly before watering again. Glads are drought-tolerant once established, but young plants need 1 inch of water weekly during their first growing season. You'll know moisture is right when the soil feels damp 2 inches below the surface.
Apply a balanced fertilizer (10-10-10) when shoots reach 4-6 inches tall. I use about 1 tablespoon per plant and water it in immediately. Too much fertilizer now causes weak stems that flop over. Feed again when buds form in early summer, but cut back after blooming to encourage next year's corms.
✂️ Step 4: Deadhead and Divide After Blooming
Snip off faded blooms as soon as they wilt to redirect the plant's energy into corm production. I use clean pruners and cut stems back to just above the first set of leaves. This prevents seed formation, which weakens the mother corm. You'll see new shoots emerging from the base in late summer—these are the corm "babies" that will multiply your plants.
After the first frost blackens the foliage, cut back stems to 2 inches above the corms. Dig up the corms in early fall, separate the babies, and store them in a cool, dry place (50-60°F) until spring planting. I use a cardboard box with peat moss to keep them from drying out or rotting.
⏰ Step 5: Overwinter and Plant Next Season
In late winter, inspect stored corms for any that feel soft or smell off—they won't survive. Plant the remaining corms in late spring when soil temperatures reach 60°F. You'll see shoots emerge in 2-3 weeks if conditions are right. The key is patience—rushing planting in cold soil delays growth by weeks.
Here's the thing—glads thrive when left undisturbed for 3-4 years. Each year, the corms multiply, creating a dense clump. When you see the mother corm surrounded by 5+ babies, it's time to divide. This ensures you always have fresh, vigorous plants without the risk of overcrowding.
Tips & tricks for perfect glads growth
These simple strategies will help you grow thriving glads that multiply beautifully year after year.
Soaking Secret: That 15-20 minute lukewarm water soak in Step 1 is your secret weapon. I've found that adding a pinch of compost tea to the soaking water gives an extra boost to root development. The water should feel comfortably warm to your wrist—not hot. If you forget to soak, don't panic—just plant immediately, but expect a 5-7 day delay in emergence.
Planting Position: The "top third exposed" rule in Step 2 is crucial—this prevents rot while allowing sunlight to reach the corm. I like to mark planting depth with a small stick beside each hole as a visual reminder. If your soil is particularly sandy, you can bury the corms slightly deeper (up to 4 inches) since they'll need extra moisture to establish roots.
Fertilizer Timing: The 1 tablespoon of 10-10-10 fertilizer in Step 3 should be sprinkled around—not on top of—the corms. I've ruined plants by over-fertilizing early, so remember: "less is more" with glads. If your soil is very poor, you can apply a second light feeding when buds appear, but never after blooming if you want strong corm babies.
Division Strategy: When dividing in Step 4, look for corms with at least 3-4 babies attached—they'll establish faster. I always separate the largest babies (about 1-inch diameter) for immediate planting, while smaller ones can wait until next spring. Store divided corms in a single layer in your cardboard box to prevent damage during overwintering.
Pro Tips for Grow Glads
- These simple strategies will help you grow thriving glads that multiply beautifully year after year.
- Soaking Secret: That 15-20 minute lukewarm water soak in Step 1 is your secret weapon. I've found that adding a pinch...
- Planting Position: The "top third exposed" rule in Step 2 is crucial—this prevents rot while allowing sunlight to rea...
Frequently asked questions
Got questions about growing glads? You’re not alone! Here are some of the most common queries—and their straightforward answers—to help you cultivate these vibrant perennials with confidence.
How long does it take for glads to bloom after planting?
Gladiolus bulbs typically take 8–12 weeks to bloom after planting, depending on your climate and the variety. Early bloomers (like ‘Picotee’ or ‘Green Star’) may flower in as little as 7 weeks, while later varieties can take closer to 3 months. Planting in early spring ensures the longest bloom time!
Can glads grow in containers, or do they need a garden bed?
Glads thrive in containers** (at least 12–18 inches deep) with well-draining soil. Use a mix of potting soil and perlite, and place the pot in full sun. Just be sure to divide and refresh the bulbs every 2–3 years to prevent overcrowding. Perfect for patios or small spaces!
Why aren’t my glads blooming this year?
Several factors can stunt blooms: overcrowded bulbs, poor sunlight (they need 6+ hours daily), or lack of nutrients. Try dividing clumps in fall, fertilizing with a balanced 10-10-10 mix, or moving them to a sunnier spot. If the foliage is lush but no flowers appear, the bulbs may need a rest—cut back stems in late fall and replant next spring.
Do glads spread on their own, or do I need to replant them yearly?
Glads are perennial and will multiply over time, but they don’t spread aggressively like some perennials. Each bulb produces 3–5 offsets (baby bulbs) per year. Dig up and divide clumps every 2–3 years in fall to maintain vigor. This also prevents overcrowding, which can reduce blooms.
Are glads deer- or rabbit-resistant?
Unfortunately, no! Glads are not deer- or rabbit-proof—their tender shoots and blooms are a tasty snack. To protect them, use repellent sprays, chicken wire barriers, or plant them near deer-resistant companions like lavender or alliums. A quick check for nibbled leaves in the morning can save your blooms!
Wrapping up and next steps
Growing glads (or gladiolus) is a rewarding journey that brings bold blooms and easy propagation to your garden year after year! With the right location, soil, and care, these sun-loving perennials will thrive—and even multiply—with minimal effort.
Whether you’re a beginner or a seasoned gardener, their striking colors and resilience make them a must-have for any outdoor space.
Ready to watch your garden transform? Start by planting your first corms this season, and soon you’ll be sharing cuttings with fellow plant lovers! 🌱✨