
Propagation
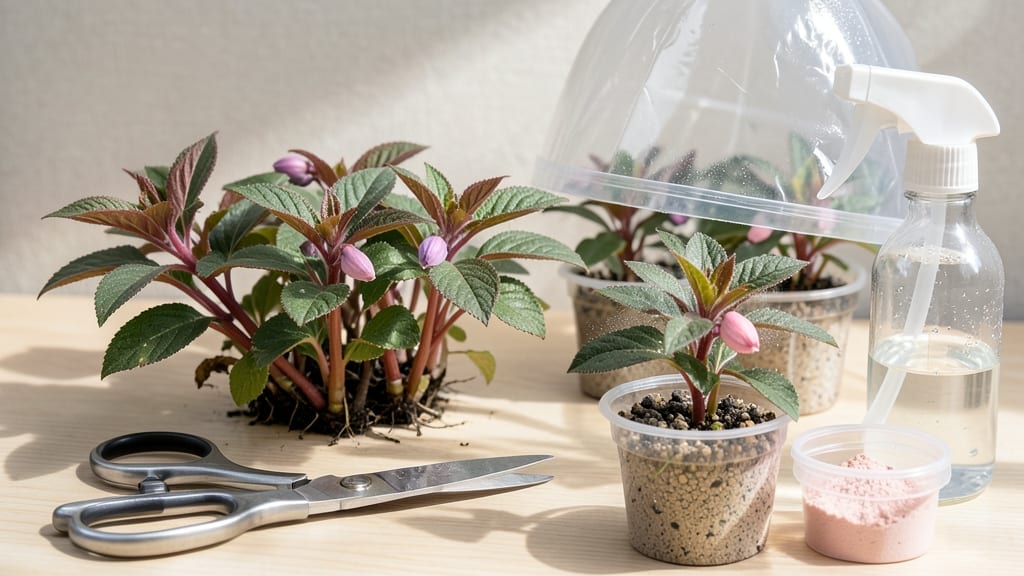
Fuchsias multiply like magic when you master cuttings—no seeds, no waiting. ✨ I’ve rooted dozens of these velvety beauties from scraps, and the secret lies in a humid chamber where roots dare to grow.
The process feels intimidating until you see those first fuzzy roots appear in just 2-3 weeks. You’ll need sharp scissors, rooting hormone (optional but helpful), small pots or jars, and a clear plastic bag to trap humidity. Skip the fancy tools—even a clean pop bottle works.
The key is keeping cuttings moist but not soggy, and patiently waiting for roots to form before transplanting. By summer’s end, you’ll have a dozen thriving fuchsias where one plant stood before. The best part?
These new plants bloom just as heavily as their parents, and you’ll never pay nursery prices again. Timing matters—spring and early summer are ideal—but even winter cuttings work with bright light. Here’s where it gets interesting: fuchsias root best in warmth (70-75°F) and bright, indirect light.
Too much sun scorches tender leaves, while drafts stunt root growth. Watch for wilting or yellowing—common early signs of stress—and adjust your setup before it’s too late.
📚 In This Guide
- What you need
- Instructions
- Tips and common mistakes
- Wrapping up and next steps
What you need
- ● Healthy fuchsia cuttings: 4–6 inches long, with at least 2–3 sets of leaves (use sharp, clean scissors or pruning shears).
- ○ Rooting hormone: (Optional but recommended) A powder or gel to boost root growth (e.g., Clonex or Hormex).
- ● Small pots or containers: 3–4 inches in diameter (one per cutting). Use plastic, peat pots, or seed trays with drainage holes.
- ● Well-draining potting mix: A blend of perlite, vermiculite, or sand mixed with peat or coconut coir (sterilized to prevent disease).
- ● Clear plastic bags or propagation domes: To create a humid environment (e.g., zip-top bags with holes or a humidity tent).
- ● Spray bottle: For misting cuttings to maintain moisture.
- ● Watering can or spray bottle: With a fine mist setting for gentle hydration.
- ● Twine or rubber bands: To secure plastic bags around cuttings (if using bags).
- ○ Heating mat: (Optional) A seedling heat mat (70–75°F) to encourage faster rooting.
- ● Fertilizer: A diluted, water-soluble fertilizer (e.g., ½-strength fish emulsion) for post-rooting care.
- ● Grow lights: (If natural light is limited) LED or fluorescent lights to supplement weak sunlight.
- ● Label markers: To track cutting varieties if propagating multiple types.
Step-by-Step instructions for growing fuchsias from cuttings
Here’s how I turn floppy fuchsia stems into thriving plants—no fancy tools needed.
🌱 Step 1: Select and Prepare Healthy Cuttings
Choose 4-6 inch stems from the current season’s growth. Look for non-flowering sections with at least 3-4 leaf nodes—these are the spots where roots will sprout. Use clean, sharp scissors to cut just below a node at a 45-degree angle. This increases surface area for root development.
Remove the lower leaves, leaving only the top 2-3 leaves on each cutting. Too many leaves mean the stem will focus on foliage instead of roots. Dip the cut end in rooting hormone (optional but helpful for faster results). I skip it when humidity is high—fuchsias root easily in the right conditions.
💧 Step 2: Create a Humid Rooting Chamber
Fill a clear plastic container (like a takeout box or propagator) with 2 inches of moistened perlite or vermiculite. These materials drain well while keeping roots hydrated. Water lightly until the mix feels damp like a wrung-out sponge—not soggy. Place the container in a warm spot (65-75°F) away from direct sun.
Insert the cuttings 1-2 inches deep into the mix, spacing them 2 inches apart. Cover the container with a clear plastic lid or plastic wrap to trap humidity. Fuchsias love moisture, but stagnant air causes rot. Poke a few tiny holes in the lid if condensation forms—you want mist, not a sauna.
☀️ Step 3: Provide Indirect Light and Monitor Moisture
Place the chamber in bright, indirect light—think east-facing window or under fluorescent lights. Direct sun will scorch the cuttings before roots form. You’ll see tiny white bumps at the nodes in 2-4 weeks—these are the first roots! Keep the perlite evenly moist by misting lightly every 2-3 days or when the top feels dry to touch.
Check for condensation daily. If the plastic fogs up, lift the lid for 10 minutes to air it out. Overwatering is the #1 killer here—roots need oxygen too. When new leaves appear (usually 6-8 weeks), roots are strong enough to handle normal watering.
🪴 Step 4: Transition to Individual Pots
Once roots fill the container (gently tug a cutting—resistance means roots!), transplant each into its own 4-inch pot with well-draining potting mix. I use a mix of 50% potting soil and 50% perlite to prevent compaction. Water thoroughly after potting to settle the soil and remove the plastic wrap—your cuttings are now ready for real-world humidity.
Place the pots in bright, filtered light for a week to acclimate. Avoid full sun until new growth appears. Fuchsias grown from cuttings often bloom their first year if given consistent moisture and patience. Pinch back leggy stems to encourage bushiness—your plants will thank you with bold, vibrant flowers.
Tips & tricks for perfect fuchsia propagation
Here's what I learned after reviving dozens of floppy fuchsia stems—these tricks make all the difference between success and sad cuttings.
Selection is Everything: In Step 1, focus on stems with 3-4 leaf nodes that are 4-6 inches long—these give you the best balance of energy for rooting. Avoid stems with flowers or buds; they'll drain energy from root development. I've found that morning stems (cut just after dew dries) root faster than afternoon ones, likely because they're hydrated but not stressed.
Rooting Hormone Hack: While rooting hormone is optional, I've discovered a simple alternative when I don't have it: crush a low-dose aspirin tablet (81mg) into powder and mix it with water to make a paste. Apply this to the cut end instead—it contains auxin, a natural rooting compound. This works particularly well in humid conditions where fuchsias root easily anyway.
Lighting Secret: For Step 3's indirect light requirement, I use a grow light on a timer set for 12 hours daily if natural light is limited. Place it 6-12 inches above the cuttings—close enough for gentle warmth but not so near it causes heat stress. The key is maintaining that bright but diffused light while preventing scorching.
Transplant Timing: When testing for roots in Step 4, I look for two clear signs: visible roots through the container AND resistance when gently tugging (roots should feel like they're gripping the medium). I've learned to wait until both conditions are met—transplanting too early often leads to root shock and failure.
Pro Tips for Grow Fuchsias From Cuttings
- Here's what I learned after reviving dozens of floppy fuchsia stems—these tricks make all the difference between succ...
- Selection is Everything: In Step 1, focus on stems with 3-4 leaf nodes that are 4-6 inches long—these give you the be...
- Rooting Hormone Hack: While rooting hormone is optional, I've discovered a simple alternative when I don't have it: c...
Frequently asked questions
Got questions about propagating fuchsias from cuttings?
You’re not alone! Here are answers to the most common concerns—so you can grow your own thriving plants with confidence.
When is the best time to take fuchsia cuttings?
The ideal window is late spring to early summer (May–June in most U.S. zones), when new growth is vigorous but hasn’t hardened off yet. Avoid winter cuttings—they’re too dormant to root well. For indoor growers, spring or early fall works too, but supplement with grow lights if natural light is weak.
How long does it take for fuchsia cuttings to root?
With patience, you’ll see roots in 4–8 weeks, depending on conditions. Check by gently tugging the cutting—if resistance is felt, roots are forming! Warmth (70–75°F) and humidity speed things up. Pro tip: Mist daily and avoid overwatering to prevent rot.
Why are my fuchsia cuttings turning yellow or mushy?
Yellowing leaves often signal overwatering or poor drainage, while mushy stems mean rot from excess moisture. Adjust by:
- Using a well-draining mix (perlite + peat or coco coir).
- Watering only when the top inch of soil is dry.
- Ensuring the cutting’s bottom node stays moist but not soggy.
Boost airflow with a small fan (24/7) to prevent fungal issues.
Can I root fuchsia cuttings in water instead of soil?
Yes! Water rooting is easier for beginners—just place a 3–4 inch cutting in clean water, changing it weekly. Roots typically appear in 3–6 weeks. But here’s the catch: Water-rooted cuttings often struggle when transplanted to soil. To harden them off, let them sit in water for 2 weeks, then plant in a humid chamber for 2 more weeks before full exposure.
Do fuchsias need special care after rooting?
Once rooted, gradually reduce humidity over 1–2 weeks to acclimate plants. Keep soil lightly moist (not soggy) and provide bright, indirect light (avoid harsh sun). Fertilize lightly with a balanced 10-10-10 mix after 4–6 weeks to encourage lush growth. Pinch back leggy stems to promote bushiness!
Bonus Tip:
Label your cuttings! Fuchsias come in thousands of varieties, and new growth can look identical. Use toothpicks + masking tape to track colors, sizes, and parent plants—your future garden will thank you.
Wrapping up and next steps
Growing fuchsias from cuttings is a rewarding way to expand your garden—and it’s easier than you think! With the right tools, a little patience, and a humid chamber, you’ll soon have thriving new plants ready to bloom.
Start with healthy cuttings, keep them cozy, and watch roots sprout in just a few weeks. 🌱✨
Now that you’re armed with the know-how, why not try it today? Grab a few cuttings, set up your propagation station, and enjoy the satisfaction of growing your own fuchsias.
Once your new plants are rooted, you can transplant them into pots or your garden—and maybe even share the love with fellow plant enthusiasts!