
Propagation
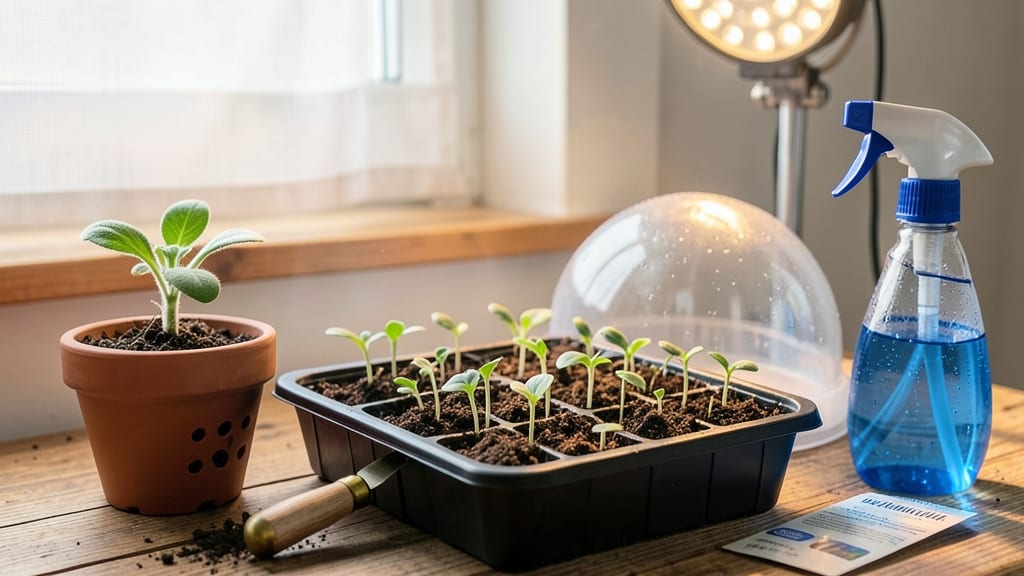
Forget-me-nots bloom in just 6 weeks when you learn how to grow forget-me-nots from seed indoors. 🌱 I’ve grown these delicate blue flowers from seed for years, and the secret to fast germination isn’t complicated—it’s all about light, warmth, and patience.
Most beginners struggle with slow starts, but these tiny seeds pack a surprising punch when given the right conditions.
The key is mimicking their natural habitat: cool soil and bright, indirect light. You’ll need a shallow tray, well-draining potting mix, and a heat mat or sunny windowsill to keep temperatures steady. Forget-me-nots despise soggy soil, so a spray bottle keeps moisture even without drowning the seeds.
Within 10-14 days, you’ll see those first fuzzy green leaves push through the soil—tiny but determined. The real magic happens when you transplant them into individual pots, where they’ll grow into lush, bushy plants ready for spring gardens.
Even if your seedlings stretch too tall (a common issue), don’t panic. A little extra light and pruning will keep them sturdy. By summer, you’ll have clusters of those signature sky-blue blooms that last for weeks—proof that patience pays off in the garden.
📚 In This Guide
- What you need
- Instructions
- Tips and common mistakes
- Wrapping up and next steps
What you need
- ● Forget-me-not seeds: Myosotis sylvatica (ensure they’re fresh or pre-chilled for better germination). Quantity: 10–20 seeds (enough for a small tray or pot).
- ● Seed-starting trays or small pots: 2–4" deep with drainage holes. Quantity: 1–2 trays or 4–6 small pots.
- ● Seed-starting mix: Lightweight, sterile, and well-draining (avoid garden soil). Quantity: Enough to fill your trays/pots (about 1–2 cups per tray).
- ● Grow lights or a sunny windowsill: Forget-me-nots need 12–16 hours of light daily. A full-spectrum LED grow light (12–24W) works best if natural light is limited.
- ● Spray bottle with water: For gentle hydration (avoid overwatering).
- ● Plastic wrap or humidity dome: To retain moisture during germination.
- ○ Heat mat (optional but helpful): Keeps soil temps at 65–70°F for faster germination (7–14 days).
- ● Fertilizer: A balanced liquid fertilizer (5-5-5 or 10-10-10) diluted to half-strength for seedlings.
- ● Humidity tray: A shallow tray with pebbles and water to boost humidity.
- ● pH test kit: Forget-me-nots prefer slightly acidic soil (pH 6.0–7.0).
- ● Transplanting pots: 3–4" pots for seedlings once they’re 2–3" tall.
Step-by-step instructions for growing forget-me-nots indoors
Here's how to coax these delicate blooms from seed—using light to speed germination and avoid common pitfalls.
🌱 Step 1: Prepare Seeds and Containers for Fast Germination
Forget-me-not seeds need a cold, moist environment to break dormancy. Place the 1 packet of seeds between two damp paper towels, fold them, and refrigerate for 2-3 weeks. Check daily—they're ready when they split open slightly. This mimics winter chilling, which triggers germination in just 2-4 weeks instead of months.
While seeds chill, fill 4-inch diameter containers with a sterile seed-starting mix. Forget-me-nots hate soggy soil, so mix in 20% perlite to improve drainage. Moisten the mix until it feels like a damp sponge—no puddles. Press it down gently so the surface is firm but not compacted. I like to tap the containers on the counter once or twice to settle everything evenly.
💧 Step 2: Sow Seeds and Maintain Ideal Moisture
Once seeds are pre-chilled, sow them 1/8 inch deep—any deeper and they’ll struggle to reach light. Space them 1/2 inch apart in rows 1 inch apart to avoid overcrowding. Forget-me-nots are tiny, so I use a toothpick to create small holes and drop seeds one at a time. Cover lightly with additional mix, then mist gently with water until the surface looks evenly damp.
Place containers in a clear plastic bag to create a mini greenhouse. This traps warmth and humidity, which forget-me-nots crave for germination. Set them in 65-70°F conditions—no heat mat needed. Watch for condensation on the bag’s interior; if it disappears, mist the soil again. Germination should begin in 7-14 days, but don’t be surprised if it takes up to 3 weeks—patience is key with these finicky seeds.
☀️ Step 3: Introduce Light Gradually to Prevent Leggy Growth
The moment you see first true leaves (the second set after the initial cotyledons), remove the plastic bag immediately. Forget-me-nots need bright light to stay compact, but too much too soon causes them to stretch toward the light. Start with 12 hours of indirect light daily, then increase by 1 hour every 3 days until they get 14-16 hours.
I use a grow light on a timer positioned 6 inches above the seedlings. Forget-me-nots grow best under cool, blue-rich light—avoid warm white bulbs, which make them leggy. Rotate the containers a quarter turn daily so they grow straight. You’ll know your light setup is right when seedlings have dark green, sturdy stems with leaves spaced 1/2 inch apart.
🌿 Step 4: Thin Seedlings and Prepare for Transplanting
When seedlings have 2-3 sets of true leaves (about 4-6 weeks after sowing), thin them to 1 plant per container. Use scissors to snip unwanted seedlings at soil level—never pull them, or you’ll disturb roots. Forget-me-nots are sensitive, so handle them gently. After thinning, water deeply to help remaining plants establish.
Two weeks before your last frost date, start hardening off seedlings by placing them outside in a shaded, sheltered spot for 1 hour daily. Gradually increase time outside over 10-14 days, ending with a full day. Forget-me-nots thrive in partial shade, so avoid direct sun during this period. Once hardened off, transplant to the garden or larger containers, spacing them 6-8 inches apart.
✂️ Step 5: Encourage Blooms and Maintain Long-Term Health
Forget-me-nots bloom best when they feel slightly crowded, so don’t rush to thin them after transplanting. Deadhead spent flowers by pinching them off at the base—this redirects energy to new blooms. Fertilize lightly every 4-6 weeks with a balanced, water-soluble fertilizer diluted to half strength. Over-fertilizing makes forget-me-nots produce more leaves and fewer flowers.
Keep soil consistently moist but never soggy. These plants love humidity but hate wet feet. Mulch with 1 inch of organic mulch to retain moisture and suppress weeds. In USDA Zones 3-9, forget-me-nots are perennial and will return year after year if given partial shade and consistent care. The first year’s blooms may be modest, but subsequent years reward patience with vibrant blue clusters.
Tips & tricks for growing forget-me-nots indoors
These light-based tricks will help you coax vibrant blooms from stubborn seeds—without the usual delays.
Cold Stratification Shortcut: Forget-me-not seeds need that 2-3 week cold treatment to break dormancy, but you can speed things up slightly by using a damp paper towel method instead of refrigerating loose seeds. Place the folded towel with seeds in a sealed plastic bag and store it in your refrigerator's crisper drawer—it stays consistently 35-40°F, which is perfect for stratification. Check daily for the telltale split in the seed coat; this means they're ready to plant and can cut your waiting time by a few days.
Lighting Hack for Small Spaces: If you don't have a dedicated grow light, use a simple LED shop light with cool white bulbs (around 5000K color temperature) positioned 6 inches above your seedlings. Forget-me-nots thrive under 12-16 hours of light daily, so set a timer to remind you to turn it on and off—consistency matters more than intensity. I've even used a bright window with sheer curtains for 12 hours daily in a pinch, though results are slower. The key is gradual exposure: increase light time by 1 hour every 3 days to prevent leggy growth.
Container Prep Pro Tip: When preparing your 4-inch containers, mix the 20% perlite thoroughly into the seed-starting mix before moistening—this prevents clumping and ensures even drainage. Forget-me-nots hate soggy roots, so I like to press the mix firmly into the containers and tap them gently on the counter to eliminate air pockets. This creates a firm, well-aerated growing medium that mimics their natural rocky soil conditions. Pro tip: Sterilize containers by soaking them in a 10% bleach solution for 10 minutes before rinsing—this prevents damping-off disease, which can wipe out seedlings overnight.
Germination Troubleshooting: If your seeds don't germinate within the expected 7-14 days, don't panic—just check a few key factors. First, ensure the paper towel method seeds split open before planting (they should look slightly cracked). Second, verify your soil temperature stays between 65-70°F—use a small thermometer if needed. Third, check moisture levels: the soil should feel like a damp sponge, not a wet rag. If all else fails, try a second batch with fresh seeds—some packets can be particularly stubborn. Remember, these seeds are designed to wait for ideal conditions, so patience is key.
Pro Tips for Grow Forget Me Nots From Seed Indoors
- These light-based tricks will help you coax vibrant blooms from stubborn seeds—without the usual delays.
- Cold Stratification Shortcut: Forget-me-not seeds need that 2-3 week cold treatment to break dormancy, but you can speed things up slightly by using a damp paper towel method instead of refrigerating loose seeds.
- Lighting Hack for Small Spaces: If you don't have a dedicated grow light, use a simple LED shop light with cool white bulbs (around 5000K color temperature) positioned 6 inches above your seedlings.
Frequently asked questions
Got questions about growing forget-me-nots from seed indoors? You’re not alone! Here are some of the most common concerns—and their solutions—to help you succeed with these delicate blooms.
How long does it take for forget-me-not seeds to germinate indoors?
With the right light tricks (like a grow light or sunny windowsill), forget-me-not seeds typically sprout in 14–21 days. Keep soil consistently moist and warm (around 60–65°F) to speed up germination. Patience is key—these tiny seeds take their time!
Do forget-me-not seeds need light to germinate, or should I keep them in the dark?
Forget-me-not seeds do not need light to germinate—keep them in darkness until sprouts appear (about 2–3 weeks). Once seedlings emerge, move them to a bright, indirect light source (or under a grow light for 12–14 hours daily). Too much light too soon can dry out the soil or stress fragile sprouts.
Can I grow forget-me-nots indoors year-round, or do they need a cold period?
While forget-me-nots thrive in cool climates, they don’t require a cold period to germinate indoors. However, for stronger plants, expose them to 50–55°F nights (like a fridge for a few weeks) after germination to mimic outdoor conditions. Skip this step if you’re short on space—just ensure good light!
What’s the best soil mix for forget-me-not seeds, and can I reuse potting soil?
Use a light, well-draining mix like 50% peat moss + 50% perlite or sand to prevent rot. Avoid heavy potting soil—it can suffocate seeds. If reusing soil, sterilize it first (bake at 200°F for 30 mins or use hydrogen peroxide). Forget-me-nots hate soggy roots!
My forget-me-not seedlings look leggy and weak—how do I fix it?
Leggy seedlings usually mean not enough light. Move them closer to a grow light (2–3 inches away) or rotate trays daily for even growth. If overcrowded, thin seedlings to 1 inch apart. Avoid fertilizing until after the first true leaves appear—too much food = more flopping!
Can I grow forget-me-nots from store-bought flowers, or do I need seeds?
Unfortunately, no—forget-me-nots rarely produce viable seeds from cut flowers. Stick to fresh, untreated seeds (available online or at garden centers). If you spot seed pods on your plants, save them for next year’s batch!
Wrapping up and next steps
Growing forget-me-nots from seed indoors is a rewarding journey that combines patience with a few clever tricks—like light exposure and consistent moisture. With the right setup, you’ll soon enjoy delicate blue blooms that brighten any space.
Now that you’re armed with these tips, why not take the next step? Try experimenting with seed trays or even a DIY grow light setup to see what works best for your home. Happy growing—your future garden awaits! 🌱✨