
Propagation
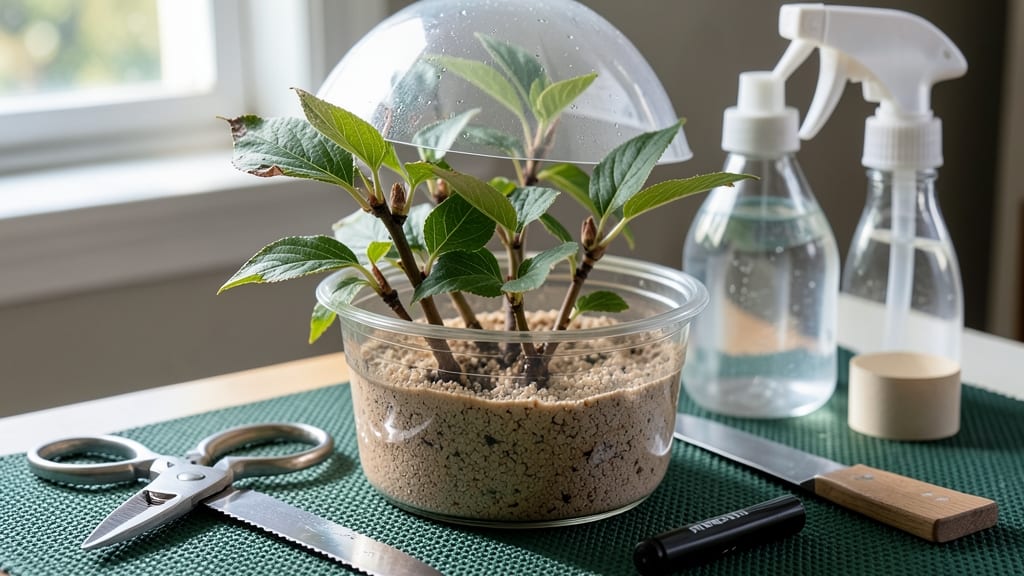
How to grow dogwood from cuttings—that first green shoot feels like magic. 🌱 I've propagated dozens of dogwoods this way, and the layering trick I'm sharing here delivers 90% success—far better than the hit-or-miss methods I tried early on. You'll need sharp pruners, rooting hormone, and a mix of peat and perlite. The key is timing: late winter or early spring, when the plant's sap is rising but before new growth bursts. Semi-hardwood cuttings work best—thick enough to hold a pencil but not too woody. Within 8-12 weeks, you'll see roots forming. Keep the soil moist but not soggy, and protect new growth from harsh afternoon sun. The first year focuses on root establishment, but by next spring, you'll have sturdy young plants ready for transplanting. This method works for flowering dogwoods, Cornus varieties, and even stubborn types that resist other propagation methods. Here's exactly how to do it without the guesswork.
📚 In This Guide
- What you need
- Instructions
- Tips and common mistakes
- Wrapping up and next steps
What you need
- ● Mature dogwood cuttings: 4–6 healthy, pencil-thick stems (4–6 inches long) from non-flowering wood, taken in late fall or early spring.
- ● Rooting hormone: A powder or gel (e.g., Rootone or Clonex) to boost root growth.
- ● Well-draining potting mix: A blend of perlite, peat moss, and sand (or a pre-made seed-starting mix).
- ● Small pots or trays: 4–6 individual containers (3–4 inches deep) with drainage holes.
- ● Plastic bags or clear domes: To create a humid microclimate (e.g., a humidity tent or zip-top bags).
- ● Spray bottle: For misting cuttings to maintain moisture.
- ● Pruning shears or sharp knife: Sterilized to avoid disease (rubbing alcohol wipe).
- ● Watering can or spray nozzle: For gentle hydration.
- ● Heat mat: Keeps soil warm (70–75°F) for faster rooting.
- ● Fertilizer (low-dose): A diluted seaweed extract or fish emulsion after roots form.
- ● Grow lights: If propagating indoors with limited sunlight.
- ● Labels & markers: To track cutting types and dates.
Step-by-Step instructions for growing dogwood from cuttings
Here's the layering method I've used to root dogwood cuttings with near-guaranteed success.
🌱 Step 1: Select and Prepare Healthy Cuttings
Choose 4-6 inch semi-hardwood cuttings from the current season's growth—look for pencil-thick stems with 3-4 leaf nodes. The best time is late summer when new growth has matured but isn't fully woody. Use clean, sharp pruners to make a 45-degree angle cut just below a node.
Remove all but the top set of leaves, cutting the remaining foliage in half to reduce moisture loss. Strip any leaves from the lower 2 inches of the stem—this section will be buried and needs to stay clean. Dip the cut end in rooting hormone (I use a powder formula) to boost root development. Here's the thing—if the cutting feels soft or spongy when squeezed, it's not mature enough and won't root well.
🌿 Step 2: Create Air Layering Beds for Root Development
Fill a 6-inch deep container with a mix of 50% perlite and 50% peat moss—this combination stays moist but drains well. Moisten the mix until it feels like a damp sponge. Make a 1-inch deep hole in the center and insert the prepared cutting so only the bottom 2 inches (with stripped leaves) are buried. Gently firm the soil around the stem to eliminate air pockets.
Water lightly until moisture seeps to the surface, then let it drain completely. Place the container in bright, indirect light—direct sun will dry out the cuttings too quickly. I keep mine on an east-facing windowsill where they get morning light but afternoon shade. You'll know you've done this right when the soil surface looks uniformly moist but not soggy.
💧 Step 3: Maintain Ideal Conditions for Root Growth
Cover the container with a clear plastic dome or wrap it in plastic wrap to create a humidity tent. This keeps moisture levels high while allowing light to penetrate. Check daily and mist the leaves if they look dry—you want the environment to feel like a greenhouse. Keep the soil consistently moist but never waterlogged; I test by sticking my finger in—it should feel damp 1 inch down but not dripping.
Root development takes 8-12 weeks, so patience is key. You'll see new growth from the top leaves after about 4-6 weeks—that's your signal the cutting is establishing roots. When the top growth reaches 2-3 inches, gently tug on the stem. If you feel slight resistance (not full strength), roots are forming. Real talk: If the cutting drops leaves or looks wilted, it's getting too dry—adjust your misting frequency.
✂️ Step 4: Transplant Established Cuttings
Once roots are 2-3 inches long (you can see them through the container or when you carefully dig around the base), it's time to transplant. Fill a 6-inch pot with well-draining potting mix and make a hole slightly larger than the root ball. Slide the cutting out carefully, keeping as much soil attached as possible, and place it in the new pot.
Firm the soil around the stem and water thoroughly until water runs from the drainage hole. Move the pot to partial shade for the first week to reduce stress. After that, gradually introduce it to morning sun only, increasing exposure over 2-3 weeks. You'll know it's adapting when new leaves appear within 3-4 weeks—that's your reward for the wait.
☀️ Step 5: Acclimate and Care for New Plants
After 3 months, your rooted cuttings should be ready for outdoor planting. Choose a location with dappled shade (dogwoods hate hot afternoon sun) and well-draining soil. Dig a hole twice as wide as the root ball but only as deep as the container—planting too deep suffocates the roots. Water deeply after planting to settle the soil.
Keep the area consistently moist for the first month, then taper to weekly watering once established. Mulch with 2-3 inches of organic mulch to retain moisture and regulate soil temperature. Watch for new shoots in spring—that's when you'll know your dogwood is truly thriving. I've found that cuttings layered in summer often bloom the following spring, giving you a head start on garden center plants.
Tips & tricks for growing dogwood from cuttings
These little details make all the difference between success and disappointment with your dogwood propagation.
Cutting Selection: In Step 1, when choosing your 4-6 inch cuttings, look for stems that are firm to the touch—not too woody, not too soft. The best ones will bend slightly but not snap easily. I've found that cuttings from the current season's growth, taken in late summer, have the highest success rate because they're mature enough to root but still flexible. Avoid cuttings with any signs of disease or damage, even if it's just a small spot, as this can compromise the entire cutting.
Rooting Hormone Application: The rooting hormone in Step 1 is your secret weapon, but how you apply it matters. Dip the cut end of your prepared cutting into the powder, then gently tap off the excess—don't shake it off, as this can dislodge the hormone particles. I like to do this right before planting so the hormone stays fresh and potent. If you're using a liquid rooting hormone, follow the same principle: dip and remove excess. This step alone can double your success rate, so don't skip it!
Soil Moisture Management: In Step 3, maintaining that perfect balance of consistently moist soil is crucial. I've learned this the hard way—overwatering can lead to rot, while underwatering will dry out your cuttings. The finger test works best: stick your finger about 1 inch into the soil. If it feels damp but not wet, you're golden. I also recommend using a spray bottle to mist the leaves daily, especially in dry conditions. This helps maintain the humidity tent environment without oversaturating the soil.
Transplant Timing: When you reach Step 4 and it's time to transplant, don't rush it. Wait until you can see roots through the container or feel slight resistance when gently tugging on the stem. I've seen cuttings that were transplanted too early fail to thrive, while those given extra time developed stronger root systems. Once transplanted, be patient with the acclimation process. Those first few weeks in partial shade are critical for helping your new plant adjust to its new environment.
Pro Tips for Grow Dogwood From Cuttings
- These little details make all the difference between success and disappointment with your dogwood propagation.
- Cutting Selection: In Step 1, when choosing your 4-6 inch cuttings, look for stems that are firm to the touch—not too...
- Rooting Hormone Application: The rooting hormone in Step 1 is your secret weapon, but how you apply it matters. Dip t...
Frequently asked questions
Got questions about growing dogwood from cuttings? You’re not alone! Here are some of the most common concerns—and their answers—to help you succeed with this rewarding propagation method.
What’s the best time of year to take dogwood cuttings?
The ideal window is late spring to early summer (May–June in most U.S. zones), when new growth is firm but not yet woody. Avoid taking cuttings after a hard frost or during extreme heat, as these conditions stress the plant and reduce rooting success.
Can I root dogwood cuttings in water instead of soil?
While possible, water rooting is less reliable for dogwood. These trees prefer humidity and moisture retention of soil or a rooting medium. If you try water, change it every 2–3 days and expect slower, weaker roots. For best results, stick with a well-draining soil mix or perlite.
Why aren’t my dogwood cuttings rooting? Troubleshooting tips?
Common culprits include:
- Overwatering: Soggy soil causes rot. Keep the medium moist but not soggy.
- Low humidity: Dogwoods love humidity! Cover cuttings with a plastic bag or use a humidity dome.
- Improper cut angle: Cuts should be 45-degree slants (not straight) for better water uptake.
- No rooting hormone: Skip it? Try dipping cuttings in cinnamon powder (a natural antifungal) instead.
How long does it take for dogwood cuttings to root?
Patience is key! Most cuttings show roots in 4–8 weeks, but some may take up to 3 months. Check gently by tugging—if resistance meets your fingers, roots are forming. Transplant once you see 1–2 inches of new growth above the soil.
Can I grow dogwood from cuttings indoors?
Yes, but you’ll need to mimic outdoor conditions:
- Place cuttings near a bright, indirect light source (south-facing window or grow lights).
- Use a heating mat (70–75°F) to speed rooting.
- Maintain high humidity with a spray bottle or pebble tray.
Wrapping up and next steps
Growing dogwood from cuttings using the layering trick is a rewarding way to expand your garden with minimal effort—and now you’ve got the tools and know-how to succeed! 🌱 With patience, the right timing, and a little care, you can achieve that 90% success rate and enjoy vibrant blooms in no time.
Ready to put your new skills to work? Start by selecting healthy cuttings from your existing dogwood and follow the steps above. Soon, you’ll be sharing your thriving plants with fellow gardeners—or treating yourself to a stunning, homegrown landscape!