
Propagation
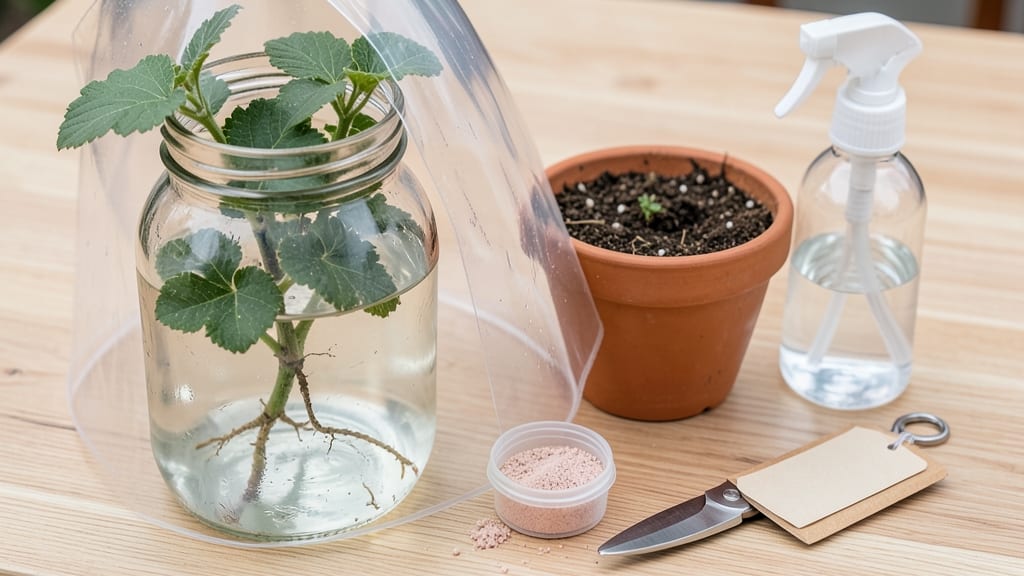
How to grow cuttings from a bush is like cloning your favorite plant—except you don’t need a lab coat. 🌿 I’ve turned struggling lavender and mint into thriving bushes just by snipping a few stems and giving them the right conditions. The best part? No fancy tools or years of experience required. You’ll need sharp scissors, rooting hormone (optional but helpful), small pots, and a sunny windowsill or grow light. The process works for everything from coleus to hydrangeas, and once you master it, you’ll never buy plants again. My first batch rooted in just 3 weeks, and now I’ve got free plants everywhere. The secret lies in clean cuts, proper moisture, and patience—no black magic involved. You’ll watch those cuttings sprout roots and grow into full plants before you know it. The satisfaction of creating new life from a simple stem is unmatched. Works for both indoor plants and outdoor bushes, and you can even propagate in water if you prefer. Let’s get those cuttings growing!
📚 In This Guide
- What you need
- Instructions
- Tips and common mistakes
- Wrapping up and next steps
What you need
- ● Healthy parent plant: Choose a bush with strong, disease-free stems (avoid flowering or overly woody branches).
- ● Sharp pruning shears or scissors: 1 pair (sterilized with rubbing alcohol to prevent contamination).
- ○ Rooting hormone: 1 small bottle or powder (optional but recommended for faster rooting; brands like Rootone or Dip ‘N Grow work well).
- ● Well-draining potting mix: 1 small bag (1-2 quarts) (use a cactus/succulent mix for drought-loving plants or a peat-perlite blend for most others).
- ● Containers: Small pots or trays (3–4 inches deep, 1 per cutting or a propagation tray with drainage holes).
- ● Plastic cups or yogurt containers (with holes poked in the bottom as a budget-friendly option).
- ● Misting bottle or spray nozzle: 1 (to keep cuttings hydrated without overwatering).
- ● Clear plastic bag or humidity dome: 1 (to create a mini greenhouse effect; a ziplock bag with holes works too!).
- ● Watering can or cup: 1 (with a fine rose attachment for gentle watering).
- ● Labeling tags: 5–10 (to track plant types and dates).
- ● Heating mat: 1 (speeds up rooting for slow starters like orchids or ferns).
- ● Grow lights or sunny windowsill: (bright, indirect light is ideal; a LED grow bulb helps if natural light is limited).
- ● Perlite or vermiculite: Small bag (mixes into soil for extra aeration).
- ● Hydrogen peroxide (3%) or cinnamon powder: (dip cuttings in H2O2 or sprinkle cinnamon to prevent rot).
- ● Plant hormone gel: (alternative to powder for precise application).
Step-by-Step instructions for growing cuttings from a bush
Here’s my foolproof method for rooting cuttings—tested on everything from lavender to coleus.
🌿 Step 1: Select Healthy Stems for Cuttings
Choose non-flowering stems with at least 3-4 sets of leaves—they’ll grow roots faster. Look for new growth from the current season, as older wood roots poorly. Snip just below a leaf node (the bump where leaves attach) with clean, sharp scissors. This ensures the cutting has energy reserves to focus on rooting instead of supporting leaves.
Strip the lower leaves off the stem, leaving only the top 2-3 sets. Too many leaves mean the cutting will lose too much moisture while roots develop. If the leaves are large, trim them in half to reduce water loss. You’ll know you’ve picked the right stems when they’re plump, vibrant, and free of damage.
💧 Step 2: Prepare the Cuttings for Rooting
Dip the cut end of each stem in rooting hormone to speed up root development. I like to use a powder or gel because it’s easy to control the amount. Gently press the cutting into the hormone so it coats the bottom inch—this is where new roots will form. If you’re rooting in water, skip this step, but expect slower results.
Fill a small container with well-draining potting mix (like a mix of perlite and peat moss). Moisten it until damp but not soggy—you want it to hold water without pooling. Stick the cutting 1-2 inches deep into the mix, pressing lightly to secure it. Space cuttings 2-3 inches apart to avoid overcrowding as they grow.
☀️ Step 3: Create Ideal Conditions for Root Growth
Place your cuttings in a spot with bright, indirect light—think east-facing windows or under fluorescent grow lights. Direct sun can scorch tender new growth, while too little light slows rooting. Keep the air around the cuttings humid by covering them with a clear plastic bag or a homemade greenhouse made from a cut-off plastic bottle. This traps moisture and mimics a tropical environment, which most cuttings love.
Check the soil daily and mist the leaves lightly to maintain humidity. You’ll know the conditions are right when condensation forms on the inside of the plastic. Keep the mix consistently moist but never waterlogged—soggy soil causes rot. In 2-4 weeks, you’ll see new growth at the top of the cutting, signaling roots are forming below.
✂️ Step 4: Transplant When Roots Establish
After 4-6 weeks, gently tug on the cutting to check for resistance—this means roots have formed. If it resists slightly, it’s ready to transplant. Remove the plastic cover gradually over a week to acclimate the cutting to normal air. Water lightly before transplanting to reduce shock.
Plant your rooted cutting in a small pot with fresh potting mix, burying it to the same depth as before. Keep it in bright, indirect light for another week while it adjusts. You’ll know it’s thriving when new leaves appear and the stem feels sturdy. Once it’s established, you can move it to its permanent spot in the garden or a larger container.
Tips & tricks for perfect plant propagation
These little details make all the difference between thriving new plants and sad, wilted cuttings.
Timing is Everything: The best time to take cuttings is in the morning when plants are fully hydrated. This gives them energy to focus on rooting rather than recovering from water loss. I always choose stems that are firm and plump—if they feel limp or shriveled, wait until the next day. The 3-4 sets of leaves mentioned in Step 1 should be vibrant, not yellowing or spotted, as these can indicate stress or disease.
Rooting Hormone Hack: When using rooting hormone in Step 2, don't be shy—coat the entire bottom inch of your cutting. I like to use a gel because it's easier to control than powder, which can blow away. If you're rooting without hormone, try dipping the cut end in cold water for 10 seconds first—it helps reduce shock and improves rooting success. The well-draining potting mix is key here; if it feels too dense, mix in extra perlite or vermiculite to improve aeration.
Light and Humidity Secrets: For Step 3, if you don't have a humidifier, try placing your cuttings on a bed of damp pebbles under their plastic cover. The evaporating water creates natural humidity. And here's a pro tip: rotate your cuttings every few days so all sides get equal light exposure. This prevents them from growing lopsided toward the light source. That 2-4 week window for root development can feel like forever, but patience pays off—new growth at the top means roots are forming below!
Pro Tips for Grow Cuttings From A Bush
- These little details make all the difference between thriving new plants and sad, wilted cuttings.
- Timing is Everything: The best time to take cuttings is in the morning when plants are fully hydrated. This gives the...
- Rooting Hormone Hack: When using rooting hormone in Step 2, don't be shy—coat the entire bottom inch of your cutting....
Frequently asked questions
Got questions about propagating cuttings from a bush? You’re not alone! Here are answers to the most common queries to help you succeed like a pro.
When is the best time to take cuttings from a bush?
The ideal time depends on your plant, but spring or early summer is usually best for most bushes. This is when growth is active, and new cuttings root more easily. For woody plants (like roses or lavender), late spring to early summer works well. If you’re unsure, check if your plant has soft, green growth—that’s your cue!
How do I know if my cutting will root successfully?
Look for these signs: healthy, disease-free stems with at least 2–4 sets of leaves. Avoid woody or overly mature growth. A good cutting should feel firm (not mushy) and have a slightly angled cut just below a leaf node. Pro tip: Younger, softer stems root faster than older, tougher ones!
Why are my cuttings rotting instead of rooting?
Overwatering or poor drainage is usually the culprit. Make sure your cuttings are in a well-draining medium (like perlite or sand) and only water when the top inch feels dry. Also, avoid placing cuttings in direct sunlight right away—bright, indirect light prevents stress. If mold appears, increase airflow or reduce moisture.
Can I grow cuttings indoors without a greenhouse?
Use a clear plastic bag or a propagator (even a repurposed fish tank) to create a humid environment. Place your cuttings under grow lights or near a sunny window (but not in direct sun). Mist the cuttings lightly every few days to maintain humidity. With patience, you’ll see roots in 4–8 weeks!
What if my bush doesn’t have enough stems for cuttings?
No problem! Prune your bush lightly to encourage new growth—this gives you more cuttings while keeping the plant healthy. If your bush is small, focus on one or two healthy stems and let the rest recover. Over time, you’ll have plenty of material for propagation!
Wrapping up and next steps
Growing cuttings from a bush is a rewarding way to expand your garden without spending a dime—and now you’ve got all the know-how to succeed! 🌱 From selecting healthy stems to nurturing roots, each step builds confidence in your green thumb. Don’t stop here—try your hand with a few cuttings today!
Ready to turn your new skills into action? Start small: pick a low-maintenance plant like mint or coleus, follow the steps, and watch your garden grow. Happy propagating! 🌿