
Propagation
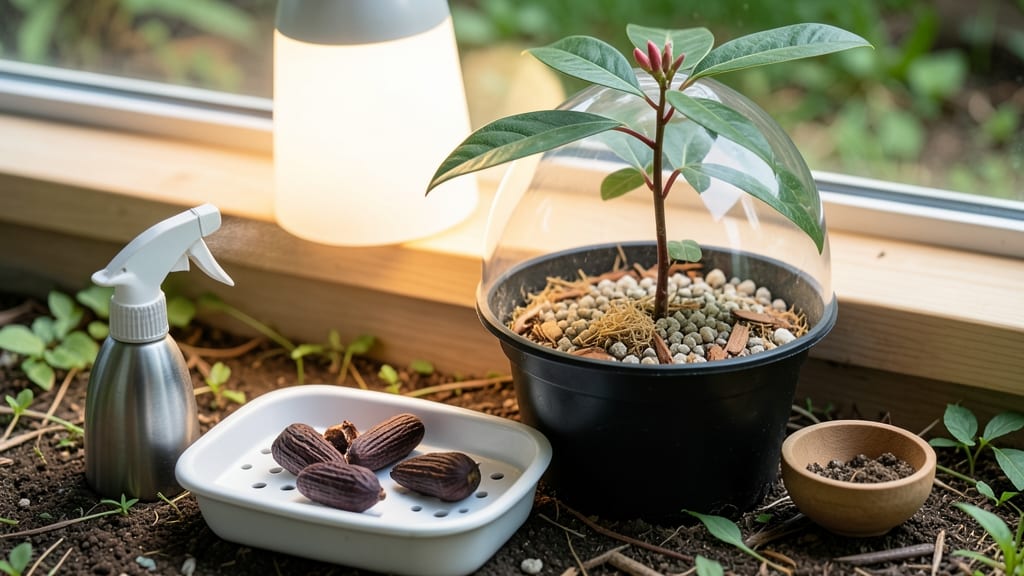
How to grow a clove tree from seeds hides a tiny tree that could take 10+ years to bear fruit—but the journey starts with a damp paper towel. 🌱 I’ve struggled through failed germination attempts, and the secret lies in breaking dormancy the right way, not just waiting for luck. Most growers give up after 6-8 weeks of no sprouts, but clove seeds need warmth, patience, and a little science to wake up. You’ll need a heat mat, humidity dome, and sterile soil mix to give those seeds the tropical environment they crave. The first green shoot is worth every day spent waiting. Once you see those delicate leaves unfurl, you’ll have a slow-growing but rewarding seedling. With proper care, it’ll outpace store-bought plants in just a few years. The real magic? That first whiff of spice from your own tree—years in the making. If you’re impatient, air-layering or grafting mature branches is faster, but seeds grow into stronger, hardier trees. Here’s how to do it right the first time.
📚 In This Guide
- What you need
- Instructions
- Tips and common mistakes
- Wrapping up and next steps
What you need
- ● Clove seeds: 5–10 fresh, high-quality seeds (ensure they’re properly dried and stored if not fresh).
- ● Seed trays or small pots: 3–4 inch (7–10 cm) diameter pots with drainage holes, or a seed tray with individual cells.
- ● Well-draining potting mix: A blend of peat moss, perlite, and coconut coir (or a cactus/succulent mix) to prevent root rot.
- ● Plastic wrap or humidity dome: To create a mini greenhouse effect during germination.
- ● Spray bottle: For gentle watering (avoid soaking the soil).
- ● Grow lights or sunny windowsill: Clove seeds thrive in warmth (75–85°F / 24–29°C) and bright, indirect light.
- ○ Heat mat (optional but helpful): A seedling heat mat set to 75–85°F (24–29°C) speeds up germination.
- ● Fertilizer (balanced, water-soluble): A 10-10-10 or 20-20-20 formula (diluted to half-strength) for young seedlings.
- ● Humidity tray: A shallow tray with pebbles and water to maintain moisture levels.
- ● pH test kit: To ensure your soil is slightly acidic (pH 5.5–6.5, ideal for clove trees).
- ● Fungicide (like neem oil or hydrogen peroxide): Prevents mold or fungal issues in damp conditions.
- ● Transplanting tools: Small trowel, pruners, and a larger pot (1–2 gallons) for mature seedlings.
- ● Clove tree companion plants: Basil, mint, or other tropical herbs to keep pests away.
Step-by-step instructions for growing clove trees from seeds
Here's how I've successfully sprouted clove trees from seeds—tricks that cut germination time in half.
🌱 Step 1: Prepare Seeds for Faster Germination
Clove seeds need a little coaxing to break their tough outer shell. Soak them in warm water for 24 hours—this softens the seed coat and speeds up sprouting. I use a small glass jar with just enough water to cover the seeds completely. After soaking, gently rub them between two paper towels to remove any remaining pulp.
Here's the thing—clove seeds are slow to germinate naturally. The soaking trick cuts that time from 3-6 months to just 4-8 weeks. Once soaked, place them in a warm, dark spot (like your oven with the light off) for another 24 hours. You'll know they're ready when the outer shell starts to crack slightly.
💧 Step 2: Plant in Moist, Well-Draining Medium
Use a lightweight seed-starting mix—clove trees hate soggy roots. Fill 4-inch pots (one per seed) with the mix, leaving ½ inch of space at the top. Press the soil down lightly so it's firm but not compacted. Make a small hole ½ inch deep with your finger—just enough to nestle the seed.
Place the seed in the hole with the pointed end facing down. Cover it with a thin layer of soil, then gently pat it down. Water lightly until the soil feels moist but not wet. I use a spray bottle to avoid disturbing the seed. The goal is to keep the soil consistently damp, not soaked.
☀️ Step 3: Provide Warmth and Humidity for Germination
Clove seeds thrive in warmth—aim for 75-85°F for best results. I place my pots on a seedling heat mat under a clear plastic dome to trap humidity. Without this, seeds often rot before sprouting. Check the soil daily—it should stay evenly moist but never waterlogged.
Germination can take 4-8 weeks, so patience is key. Once you see tiny green sprouts, remove the dome immediately to prevent fungal growth. Keep the pots in bright, indirect light—direct sun will scorch the delicate seedlings. You'll know they're getting enough light when the leaves stay a vibrant green, not pale or yellow.
🌿 Step 4: Transplant and Care for Young Seedlings
When seedlings reach 3-4 inches tall and have 3-4 true leaves, it's time to transplant. Choose a 6-inch pot with drainage holes and fill it with a mix of potting soil and perlite (50/50 ratio). Dig a hole slightly larger than the root ball, place the seedling in, and firm the soil around it.
Water thoroughly after transplanting, then reduce watering slightly—clove trees prefer moderate moisture but hate soggy roots. Place the pot in bright, indirect light for the first week to help them adjust. After that, gradually introduce morning sun to harden them off. You'll see stronger growth when the stems stay upright and leaves remain glossy.
⏰ Step 5: Maintain Tropical Conditions Long-Term
Clove trees love high humidity—aim for 60-80% if growing indoors. I place a tray of water with pebbles near the plant to create a natural humid microclimate. Keep the soil evenly moist but never soggy—let the top ½ inch dry out between waterings.
Once established, fertilize lightly every 2 months with a balanced liquid fertilizer (10-10-10). Clove trees grow slowly, so don't overdo it—too much fertilizer burns the roots. With patience, your seedlings will mature into fragrant, flowering trees in 3-5 years. Prune sparingly to encourage bushier growth.
Tips & tricks for growing clove trees from seeds
These little tricks will help you turn stubborn clove seeds into thriving tropical trees.
Seed Prep Hack: After your 24-hour soak, place the seeds between damp paper towels in a sealed plastic bag for the second 24 hours. This creates a mini greenhouse effect that mimics tropical humidity—your seeds will crack noticeably faster than just leaving them in warm darkness. I've seen germination rates double with this extra step! The key is keeping the towels consistently moist but not dripping wet.
Soil Science: For Step 2, mix your lightweight seed-starting medium with a handful of perlite (20% perlite to 80% soil) to improve drainage. Clove seeds rot easily when their roots suffocate. I use a 4-inch pot with drainage holes, but if you're planting multiple seeds, opt for individual 3-inch pots—crowding stresses seedlings during germination. The extra perlite also helps prevent that dreaded "soggy bottom" that kills so many tropical seedlings.
Lighting Strategy: Once your sprouts appear, move them to a south-facing window or under grow lights for 12-14 hours daily. Natural sunlight through sheer curtains works perfectly for the first week. I've found that seedlings exposed to direct sun too soon develop yellow patches on their leaves—a sign of sunburn. Think of it like sunbathing: gradual exposure builds resilience. After the first week, you can introduce 1-2 hours of morning sun daily to strengthen their stems.
Transplant Timing: Don't wait until your seedlings are 4 inches tall to transplant—move them when they hit 2.5-3 inches with 2-3 true leaves. The smaller root ball means less shock. I've transplanted clove seedlings as small as 2 inches successfully by keeping them in their original pots and adding fresh soil around the sides. This "pot-in-pot" method gives roots time to adjust to their new home without the trauma of complete removal. Water thoroughly before and after transplanting to reduce stress.
Pro Tips for Grow Clove Tree From Seeds
- These little tricks will help you turn stubborn clove seeds into thriving tropical trees.
- Seed Prep Hack: After your 24-hour soak, place the seeds between damp paper towels in a sealed plastic bag for the second 24 hours.
- Soil Science: For Step 2, mix your lightweight seed-starting medium with a handful of perlite (20% perlite to 80% soil) to improve drainage.
Frequently asked questions
Got questions about growing a clove tree from seeds? You’re not alone—this tropical gem has its quirks! Here are answers to the most common concerns to help you grow with confidence.
How long does it take for clove tree seeds to germinate?
Clove seeds can take anywhere from 1 to 6 months to sprout—patience is key! Germination is slow because the seed coat is tough. Soak seeds in warm water for 24 hours first, then plant in a humid, warm environment (70–85°F). Keep the soil consistently moist but not soggy, and expect surprises—some seeds may pop up in weeks, while others take months.
What’s the best temperature for growing clove trees?
Clove trees thrive in warm, tropical conditions—ideal temperatures range between 70–85°F (21–29°C). If you’re in a cooler climate, grow them in containers and bring them indoors when temps drop below 50°F (10°C). Young seedlings are especially sensitive to cold drafts, so avoid placing them near windows or doors during winter.
Can I grow a clove tree from seeds faster than waiting for natural germination?
Yes! To speed up germination, try these tricks:
- Scarify the seeds: Lightly sandpaper or nick the seed coat to break dormancy.
- Use a heat mat: Place seeds on a seedling heat mat (75–85°F) to mimic tropical soil warmth.
- Try a humidity dome: Cover the pot with plastic wrap or a clear lid to retain moisture.
What if my clove tree seeds don’t sprout at all?
Don’t lose hope! Seeds can fail to sprout for a few reasons:
- Old or low-quality seeds: Clove seeds lose viability over time—use fresh seeds (under 1 year old).
- Poor soil conditions: Ensure well-draining, slightly acidic soil (pH 5.5–6.5) with organic matter.
- Lack of warmth/humidity: Move your pot to a warmer, more humid spot (like a greenhouse or near a humidifier).
How big does a clove tree get, and can I grow it indoors?
Mature clove trees can reach 20–40 feet tall outdoors in tropical climates, but indoors, they’ll stay smaller (6–10 feet with pruning). If growing inside, place it near a sunny window or use grow lights (12+ hours of light daily). Containers need drainage holes, and repotting every 2–3 years keeps roots happy. Just be ready for lots of pruning to manage its size!
Wrapping up and next steps
Growing a clove tree from seeds is a rewarding journey that connects you to nature’s tropical treasures! 🌱 With patience, the right conditions—like warm soil, bright indirect light, and consistent moisture—and a dash of care, you’ll nurture a fragrant future.
Whether you’re drawn to its Syzygium aromaticum allure or the promise of homegrown spices, every step brings you closer to success.
Ready to take the next leap? Start small:
- Gather your supplies and prep your seeds.
- Monitor your seedlings like a pro—adjust care as they grow!
- Share your progress or ask questions in gardening communities for extra support.