
Size
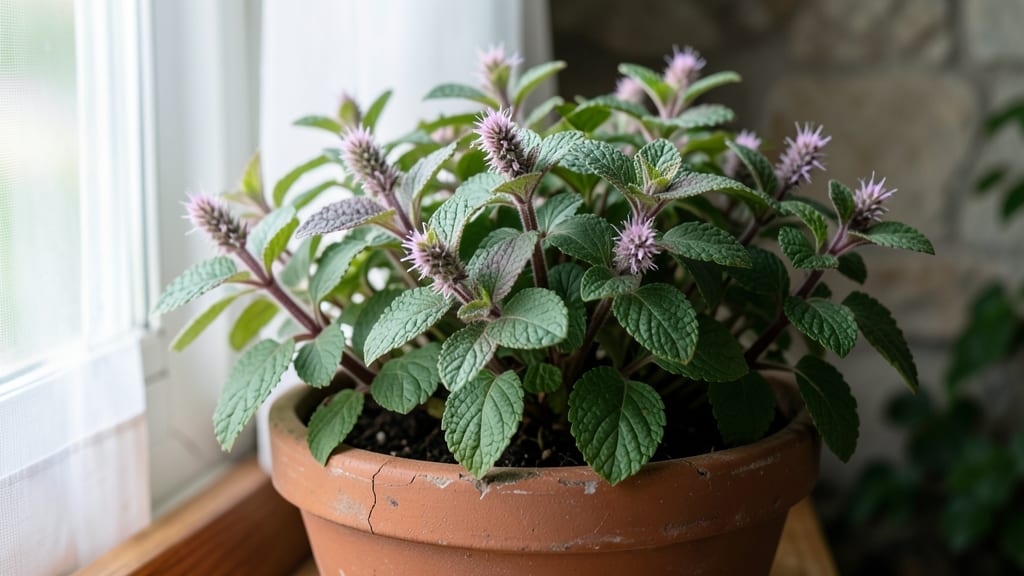
How to grow the chocolate mint herb—that first whiff of its scent sends me back to childhood, where warm cocoa and fresh air mingled in perfect harmony. 🌿 Growing chocolate mint isn’t just about pretty foliage; it’s about creating a sensory experience that makes your garden smell like a dessert shop. The secret? It thrives on neglect almost as much as it does on attention, but only if you give it the right start.
You’ll need a spot with partial sun (morning light, afternoon shade works best) and soil that drains well—chocolate mint hates soggy roots.
Most gardeners plant from cuttings rather than seeds (they’re easier to find and grow faster), but if you’re starting from seed, just be patient—it can take 3-4 weeks to germinate. The real challenge? Containing it.
This plant spreads like wildfire, so plan for a heavy-duty container or buried edging if you want it to stay put.
Once established, chocolate mint becomes a low-maintenance powerhouse. Snip leaves as needed for tea or cooking, and the plant will keep producing those rich, velvety leaves with that unmistakable cocoa scent.
Prune back in early spring to encourage bushier growth, and watch it bounce back stronger than ever. The best part? You’ll never buy chocolate-flavored anything again—just reach into your own garden.
Fair warning: this isn’t a plant for the faint of heart. If left unchecked, it’ll take over your garden like a minty green tsunami. But with the right containment strategy, you’ll have a fragrant, productive patch that’s as rewarding as it is delicious. Ready to dive in?
📚 In This Guide
- What you need
- Instructions
- Tips and common mistakes
- Wrapping up and next steps
What you need
- ● Chocolate mint plant: 1 live plant (from a nursery or garden center) or
- ● Seeds (5–10, for sowing) or
- ● 6-inch cuttings with healthy stems (from an established plant)
- ● Container or garden bed: 1+ 6-inch-deep pots (with drainage holes) or
- ● A sunny garden spot (6+ hours of light daily)
- ● Potting mix: 1 bag well-draining, peat-based mix (or add perlite/sand for aeration)
- ● Watering can or spray bottle (with a gentle nozzle)
- ○ Fertilizer: Balanced 10-10-10 liquid fertilizer (optional but helpful)
- ● Pruning shears (for trimming or propagating)
- ● Garden gloves (to protect hands from mint’s aggressive roots)
- ● Mulch (straw or shredded leaves to retain moisture)
- ● pH test kit (ideal soil pH: 6.0–7.0)
- ● Shade cloth (if growing in hot climates)
Step-by-step instructions for growing chocolate mint herb
This fragrant, velvety-leaved herb thrives with just a few key techniques—let’s get your chocolate mint growing strong and aromatic!
🌱 Step 1: Choose the Perfect Location and Prepare the Soil
Chocolate mint loves rich, moist soil with partial shade to full sun—4-6 hours of sunlight daily is ideal, especially in hotter climates. I always pick a spot with well-draining soil to prevent root rot, which can kill this delicate plant quickly. If your garden soil is heavy clay or sandy, amend it with 2-3 inches of compost mixed into the top 6-8 inches of soil.
This herb spreads aggressively, so contain it in a 12-inch deep container or designate a 2-foot-wide patch in the ground. I use a sturdy edging to keep it from overtaking nearby plants—chocolate mint will take over if left unchecked! Test the soil pH before planting; it prefers slightly acidic to neutral (6.0-7.0). If your soil is alkaline, add sulfur or peat moss to lower the pH gradually.
🌿 Step 2: Plant Chocolate Mint Cuttings or Seeds
Unlike many herbs, chocolate mint grows best from stem cuttings rather than seeds. Take 4-inch cuttings from a healthy plant, strip the lower leaves, and dip the ends in rooting hormone to encourage faster growth. Plant them 2 inches deep in moist soil, spacing them 8-10 inches apart in the ground or 3-4 inches apart in containers.
If starting from seed, sow them ¼ inch deep in well-draining seed-starting mix and keep the soil consistently moist until germination, which takes 10-14 days in 70-75°F soil. Once seedlings have 2-3 sets of true leaves, transplant them to their permanent spot. Avoid disturbing the roots—chocolate mint is sensitive to transplant shock.
💧 Step 3: Water and Fertilize for Lush Growth
Keep the soil evenly moist but never soggy—chocolate mint wilted leaves are a sure sign of underwatering, while yellowing or mushy stems mean overwatering. Water at the base of the plant in the morning to allow foliage to dry quickly, reducing fungal risks. Mulch around the base with 2 inches of organic mulch (like shredded bark) to retain moisture and suppress weeds.
Feed your chocolate mint every 4-6 weeks with a balanced liquid fertilizer (10-10-10) diluted to half-strength. Too much fertilizer leads to leggy growth and fewer aromatic leaves. I also add a handful of compost around the base in early spring to boost nutrient levels naturally. Watch for purple stems or yellowing leaves—these are signs of phosphorus or nitrogen deficiency, respectively.
✂️ Step 4: Prune and Harvest for Maximum Flavor
Regular pruning keeps chocolate mint bushy and encourages dense, fragrant foliage. Pinch back the tips of new growth when the plant reaches 6-8 inches tall to promote branching. Harvest leaves regularly—never take more than ⅓ of the plant at once—to maintain vigor. The best time to harvest is in the early morning after the dew has dried but before the sun intensifies.
To propagate more plants, take 4-inch tip cuttings in early summer and root them in water or moist soil. Chocolate mint spreads easily, so I always keep a few extra cuttings on hand for friends or backup plants. If your plant becomes too woody or leggy, cut it back by half in early spring—it’ll bounce back with fresh, tender growth within weeks.
☀️ Step 5: Overwinter and Protect from Frost
Chocolate mint is hardy in USDA zones 5-9, but it may die back in colder climates. In zones 4 or colder, dig up containers or mound 4-6 inches of mulch around the base to insulate the roots. I’ve found that covering plants with burlap or frost cloth on 25°F nights prevents winter damage while still allowing light penetration.
In spring, trim back any dead or damaged growth and fertilize lightly to encourage new shoots. Chocolate mint is perennial in warm climates but often treated as an annual in colder regions—so if you live where winters are harsh, plan to replant from cuttings each year. With the right care, your chocolate mint will reward you with velvety, cocoa-scented leaves all season long!
Tips & tricks for growing chocolate mint herb
A few game-changing insights will help you cultivate chocolate mint that's so aromatic, your garden will smell like a gourmet kitchen!
Sunlight Strategy: While chocolate mint thrives with 4-6 hours of sunlight daily, I've found that morning sun is most beneficial—it gives the plants gentle warmth without the intense heat of afternoon rays. In particularly hot climates, provide afternoon shade to prevent leaf scorch, which can turn those beautiful velvety leaves brown and crispy. A simple way to test your spot is to observe how quickly dew evaporates—if it's gone by mid-morning, your location likely has enough sunlight.
Soil Science: The 6.0-7.0 pH range is crucial, but don't stress if your soil test shows slight variations. I've had success amending alkaline soil by mixing in 1 part peat moss to 3 parts garden soil—this creates a buffer zone that gradually lowers the pH while still providing good drainage. For container growing, use a mix of 50% potting soil, 30% compost, and 20% perlite to mimic the ideal growing conditions. Remember, chocolate mint's roots are sensitive to waterlogging, so that well-draining soil requirement is non-negotiable!
Propagation Hack: When taking those 4-inch cuttings for propagation, I've discovered a little secret that boosts root development: after dipping in rooting hormone, place the cuttings in a glass of water at a 75°F angle (not straight up). The warmth from the water combined with the angle creates an ideal environment for roots to form in just 2-3 weeks. Once roots reach about 1 inch, transplant to soil. This method gives you ready-to-plant cuttings much faster than traditional soil propagation.
Winter Survival: For those in zones 4 or colder, I've perfected a winter protection system that works wonders. After mounding 4-6 inches of mulch around the base, I add an extra layer of straw or leaves on top—this creates an insulating blanket that protects roots from temperature swings. During particularly cold snaps (25°F or lower), I cover the entire plant with a clear plastic dome (like a large plastic container with the bottom removed) to trap heat while still allowing light penetration. This method has saved my chocolate mint through winters that would otherwise kill it!
Pro Tips for Grow Chocolate Mint Herb
- A few game-changing insights will help you cultivate chocolate mint that's so aromatic, your garden will smell like a gourmet kitchen!
- Sunlight Strategy: While chocolate mint thrives with 4-6 hours of sunlight daily, I've found that morning sun is most beneficial—it gives the plants gentle warmth without the intense heat of afternoon rays.
- Soil Science: The 6.0-7.0 pH range is crucial, but don't stress if your soil test shows slight variations.
Frequently asked questions
Got questions about growing chocolate mint? Here are answers to the most common ones—so you can grow this fragrant herb with confidence!
How long does it take for chocolate mint to grow?
Chocolate mint grows fast! From seed, expect sprouts in 10–14 days, and you can harvest leaves in 6–8 weeks. If you start with cuttings, you’ll see new growth in 2–3 weeks.
Can I grow chocolate mint in containers?
Chocolate mint thrives in 5–6 inch deep containers with drainage holes. Just ensure it gets 6+ hours of sunlight and water regularly. Pro tip: Use a pot with a tight lid to contain its spreading roots!
Why is my chocolate mint turning yellow?
Yellow leaves usually mean overwatering or poor drainage. Let the soil dry slightly between waterings, and ensure your pot has drainage. Check for pests too—aphids or spider mites can stress the plant.
Is chocolate mint invasive? Should I grow it in the ground?
Yes, chocolate mint spreads aggressively! If planting in the ground, use a container or plant it in a barrier-lined hole to prevent it from taking over your garden. It’s best for pots or controlled spaces.
Can I dry chocolate mint for later use?
Yes! Harvest leaves before flowering, tie them in bundles, and hang them upside down in a dark, dry place for 1–2 weeks. Store dried leaves in an airtight container for up to 6 months—perfect for teas and cooking!
Wrapping up and next steps
Growing chocolate mint is a rewarding journey that brings fragrant, velvety leaves right to your kitchen windowsill—or even your garden! With just a few simple steps, you’ll enjoy its rich cocoa aroma and versatile uses in teas, desserts, and cocktails. 🌱✨
Now that you’re equipped with the know-how, take the next step—whether it’s planting your first cutting, troubleshooting a tricky spot, or experimenting with recipes. Your garden (and taste buds) will thank you!