
How To
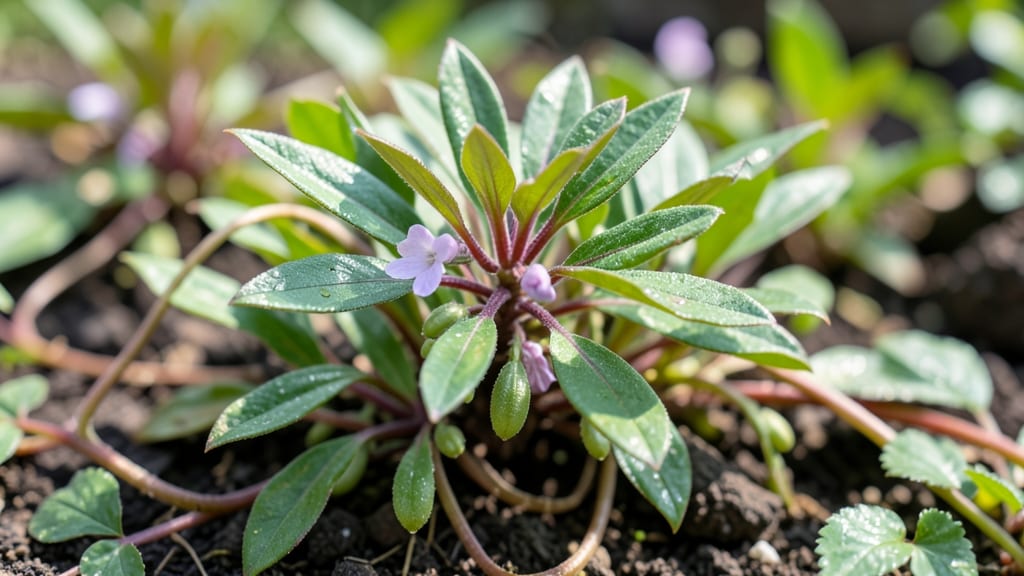
How to get rid of the stubborn spiderwort—this tenacious invader turns gardens into battlegrounds. 🌱 After three seasons of frustration, I finally cracked the code with a dig-and-repeat method that actually works, stopping those creeping vines in their tracks. This isn’t just pulling weeds; it’s a strategic attack on the root system to prevent regrowth.
The key is timing and persistence. Start when soil is moist but not soggy—spring or early fall gives you the best shot at catching every last root fragment. You’ll need a sturdy shovel, gloves, and a sharp eye for those sneaky rhizomes hiding just below the surface.
Miss even a small piece, and you’ll be back at square one in weeks.
By following this method, you’ll see your garden reclaim space within 2-3 weeks of consistent effort. The first dig removes the visible plants, but the real work happens when you inspect the soil for any remaining root pieces. Burn or bag all debris to prevent reinfestation—this isn’t a one-time job.
For long-term success, focus on the soil. Amend it with compost to discourage regrowth and plant competitive ground covers in treated areas. The payoff? A yard free of spiderwort’s aggressive spread, with healthier plants thriving in its place.
Root Causes Of Creeping Weeds
Spiderwort (Tradescantia spp.) isn’t just an unsightly invader—it’s a tenacious survivor that thrives due to a mix of environmental and biological factors. Understanding why it spreads so aggressively is the first step in reclaiming your yard or garden.
Below, we break down the key reasons behind its persistence, from soil conditions to human habits that inadvertently fuel its growth.
Spiderwort loves a good meal, and if your soil is packed with organic matter, nitrogen, or phosphorus, you’ve essentially handed it a growth spurt on a silver platter. Here’s why:
- Nitrogen boost: Fertilizer runoff or compost-heavy soil provides the nitrogen spiderwort craves for rapid leaf and stem production. A soil test revealing high nitrogen (above 0.2% by weight) can signal a feast for this weed.
- Phosphorus & potassium: These macronutrients encourage root development, helping spiderwort spread via underground runners. Balanced fertilizers (like 10-10-10) can inadvertently feed it.
- Decomposition hotspots: Areas with mulch, leaf litter, or decomposing plant debris create micro-environments rich in nutrients—perfect for spiderwort to take root.
Pro tip: 💡 If your lawn or garden has lush green grass or thriving plants nearby, spiderwort will see it as an invitation to move in. Consider soil amendments like sulfur or lime to balance nutrients and discourage its spread.
Spiderwort is a moisture-loving weed, and soggy soil is its ideal habitat. Here’s how water plays a role:
- Waterlogged areas: Low spots in your yard, clay-heavy soil, or regions with poor drainage retain excess moisture. Spiderwort’s roots thrive in these conditions, allowing it to outcompete other plants.
- Overwatering: Frequent irrigation or rainfall can create a damp environment that encourages spiderwort to spread via its creeping rhizomes. Even a 1-inch layer of standing water for more than 48 hours can trigger rapid growth.
- Shady, damp corners: Areas under trees, along fences, or in shaded garden beds often stay moist longer. Spiderwort exploits these spots to establish dense colonies.
Pro tip: 🌡️ Improve drainage by amending soil with sand or perlite, or redirect water away from problem areas with French drains or swales. Let the soil dry between waterings to starve out spiderwort.
Spiderwort is a master of exploiting disruptions in the soil ecosystem. Whether it’s foot traffic, construction, or even gardening activities, it capitalizes on gaps in the ground cover. Here’s how:
- Foot traffic & erosion: Walking on lawns or gardens can compact soil, creating cracks and spaces where spiderwort seeds or rhizome fragments can lodge and sprout.
- Construction or landscaping: Digging, tilling, or installing hardscapes (like patios or walkways) can uproot existing plants and expose bare soil—an open invitation for spiderwort to invade.
- Thinning plant beds: Removing competing plants (like grass or ground covers) leaves empty niches that spiderwort fills quickly, thanks to its fast growth rate.
Pro tip: 🎯 To prevent disturbances, use mulch (like wood chips or straw) to protect soil and suppress weeds. If you must dig, remove all rhizome fragments and dispose of them in sealed bags.
Spiderwort spreads like wildfire when it’s not competing with other plants. Here’s why it dominates in low-competition zones:
- Thin or weak grass: Lawns with bare patches or struggling turf provide the perfect entry point for spiderwort. A dense, healthy lawn (with 70-80% ground cover) naturally suppresses weeds.
- Monoculture gardens: Planting the same species repeatedly (e.g., ornamental grasses or perennials) creates uniform conditions that spiderwort exploits to fill gaps.
- Newly planted areas: Gardens or landscapes still establishing themselves lack the root networks to outcompete aggressive weeds like spiderwort.
Pro tip: 💪 Boost competition by planting dense ground covers (like clover or creeping thyme) or overseeding lawns with fine fescue. Healthy, diverse plantings leave little room for spiderwort to take hold.
Sometimes, the problem isn’t the plant itself—it’s how we move it around. Spiderwort spreads easily through human actions:
- Gardening tools: Shovels, rakes, and mowers can carry rhizome fragments or seeds to new locations. Even a small piece of root can regrow into a full plant.
- Compost & mulch: Using untreated compost or mulch contaminated with spiderwort fragments can introduce it to clean areas.
- Water runoff: Irrigation or rainwater can transport seeds or rhizomes to neighboring yards or garden beds.
Pro tip: ⏰ Clean tools with bleach or rubbing alcohol after use, and inspect mulch/compost for weed fragments before applying. When removing spiderwort, bag and dispose of debris—don’t compost it!
Targeted Fixes for Stubborn Spiderwort
Now that you understand why spiderwort invades your garden, let’s tackle it head-on with practical, step-by-step solutions tailored to the root causes. Whether it’s spreading from roots, seeds, or hidden clumps, these methods will help you eliminate spiderwort for good—without resorting to harsh chemicals.
Plus, we’ll share prevention tips to keep it from creeping back.
Spiderwort thrives because its fibrous roots spread aggressively. The best way to stop it? Dig it out completely—roots and all.
Step-by-Step Dig-Out Method:
- 🔥 Time It Right
- Dig when the soil is moist but not soggy (early spring or fall works best).
- Avoid hot, dry weather—roots will be harder to extract.
- 👨🍳 Loosen the Soil
- Use a garden fork or trowel to pry up the plant, working in small sections (1–2 ft at a time).
- Look for white, stringy roots—these are spiderwort’s telltale sign.
- 🔪 Pull Every Last Root
- Check for regrowth after 1–2 weeks. If you see new shoots, dig deeper—even a 1-inch root fragment can resprout.
- Pro Tip: Wear gloves—some gardeners report spiderwort sap can irritate skin.
- 🗑️ Dispose of Debris Properly
- Do NOT compost spiderwort—it’ll just regrow.
- Bag and trash the entire plant (roots + all).
If spiderwort covers a big area, digging every plant is tedious. Instead, cut it off at the base and smother it to starve the roots.
How to Smother Spiderwort:
- 🌿 Mow or Cut It Down
- Trim the foliage 1–2 inches above ground to weaken the plant.
- Repeat every 2–3 weeks to prevent regrowth.
- 📦 Cover with Cardboard or Black Plastic
- Lay thick cardboard or landscape fabric over the area.
- Secure with rocks or bricks to block sunlight.
- Leave for 4–6 weeks—this depletes root energy and kills the plant.
- ☀️ Solarization (For Hot Climates)
- Use clear plastic sheeting in sunny weather (70°F+).
- Trap heat under the plastic for 4–8 weeks to cook the roots.
- 💡 Pro Tip:
- After smothering, test the soil—if you feel resistance, dig deeper to ensure all roots are dead.
For small patches or stubborn individual plants, natural herbicides can work—but they’re not foolproof.
Option A: Vinegar Spray (Fast but Temporary)
- Mix 1 gallon white vinegar + 1 cup salt + 1 tbsp dish soap.
- Spray directly on leaves (avoid desirable plants—vinegar burns foliage).
- Repeat weekly until the plant wilts and dies.
- ⚠️ Warning: Vinegar won’t kill roots—dig up what’s left afterward.
Option B: Boiling Water (For Accessible Plants)
- Pour boiling water directly on the base of the plant.
- Best for: Cracked driveways or walkways where digging isn’t possible.
- Works fastest in direct sunlight (enhances heat effect).
Even after removal, spiderwort can sneak back. Here’s how to keep it from returning:
| Prevention Method | How It Works | Best For |
|---|---|---|
| 🌱 Mulch Thickly | Blocks sunlight to starve new sprouts. Use wood chips or straw (3+ inches). | Garden beds, borders |
| 🚜 Regular Mowing | Keeps plants weak and shallow-rooted. Mow weekly in growing season. | Lawns, meadows |
| 🌿 Plant Competitors | Shade-tolerant plants (hostas, ferns, ajuga) crowd out spiderwort. | Shady gardens |
| 🛡️ Landscape Fabric | Install under mulch to block root spread. | Newly cleared areas |
| 🔍 Inspect New Plants | Before buying, check for spiderwort in potted plants or soil. | Nursery purchases |
If you prefer nature’s help, try:
- 🐞 Encourage Nematodes – Beneficial root-knot nematodes can weaken spiderwort (apply in early spring).
- 🐞 Ladybugs & Beetles – Some natural predators feed on spiderwort seedlings (check local suppliers).
Final Reminder: Spiderwort is persistent, so patience and persistence are key. Combine digging + smothering + prevention for the best results. Once you’ve removed the roots and blocked regrowth, your garden will stay spiderwort-free! 🚀
Frequently asked questions
Why does spiderwort keep coming back even after I pull it?
Spiderwort spreads through rhizomes—underground stems that can regenerate from even tiny fragments. If you leave behind even a 1-inch root piece, it’ll sprout new plants in 2-3 weeks. Always dig deep and check for hidden roots after pulling.
Can I use herbicide to kill spiderwort without harming my garden?
Selective herbicides like glyphosate can work, but they kill all plants they touch. For targeted removal, spot-treat with vinegar + salt solution (1 gallon vinegar + 1 cup salt + 1 tbsp dish soap). Reapply weekly until dead, then dig up remaining roots. Test on a small area first!
How do I know if I’ve removed all the roots?
Wait 1-2 weeks after removal and check for new shoots. If you see any, dig deeper—rhizomes can extend 12+ inches deep. For stubborn areas, use cardboard smothering for 4-6 weeks to ensure complete eradication.
Will mulch help prevent spiderwort from spreading?
Yes! Apply 3+ inches of wood chips or straw mulch to block sunlight and suppress regrowth. Just ensure mulch is weed-free first—contaminated mulch can spread spiderwort. Replenish mulch annually for best results.
Can I compost spiderwort after removing it?
Never compost spiderwort—even small root fragments will regrow. Instead, bag and trash all plant material (roots + stems). For large quantities, check local waste regulations for green waste disposal options.