
Pests
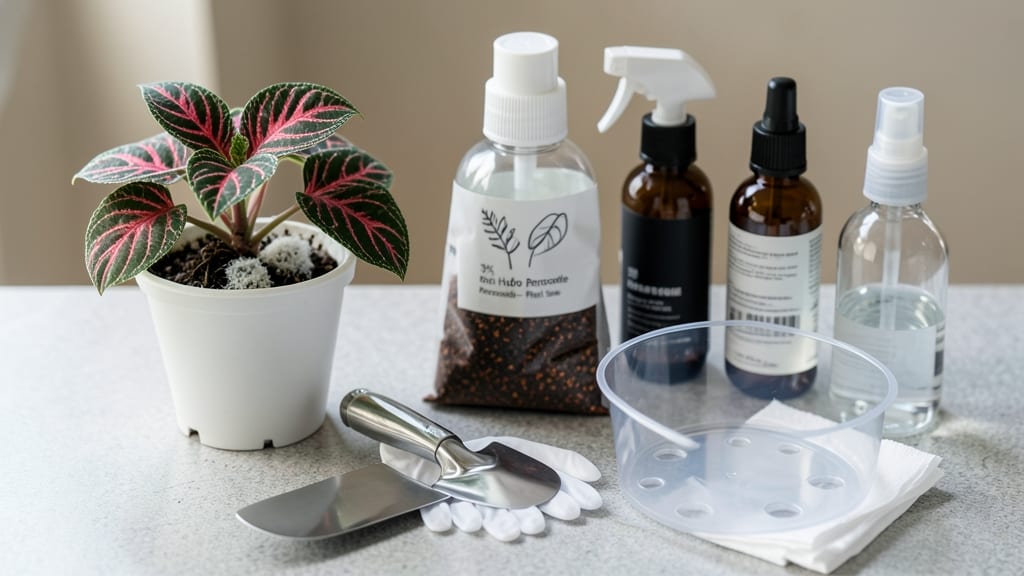
How to get rid of the mushrooms sprouting from your houseplant soil—it’s simpler than you think. That fuzzy growth isn’t a sign of a healthy home; it’s a red flag for overwatering, poor drainage, or rotting organic matter. The good news? This problem fixes faster than you’d think, and with the right steps, your plant can bounce back stronger than ever.
First, stop watering until the top inch of soil feels dry. Those mushrooms thrive in soggy conditions, so let the soil dry out completely before touching it again. Next, remove the top layer of soil (where the mushrooms are growing) and replace it with fresh, sterile potting mix.
This cuts off the food source for the fungi while giving your plant’s roots a chance to recover.
For stubborn cases, a simple vinegar soak can work wonders. Mix 1 part white vinegar with 3 parts water, then gently pour it over the soil (avoiding the leaves).
The acidity disrupts fungal growth without harming your plant. Repeat weekly until the mushrooms disappear—and keep an eye out for improved root health in just a few weeks.
Prevention is all about balance: water less frequently, use pots with drainage holes, and avoid letting organic debris (like fallen leaves) sit in the soil.
If the infestation spreads or your plant looks severely stressed, it might be time to consult a local nursery pro—they can help diagnose if root rot has set in.
Root Causes Of Fungal Growth
Fungal growth in houseplants—especially those mysterious mushrooms sprouting from soil—is rarely a coincidence. It’s usually a sign your plant’s environment has become the perfect fungal buffet. Understanding the why behind these unsightly (and often harmful) fungi is the first step to preventing them.
Let’s break down the most common triggers, backed by science, so you can address the root of the problem—literally.
Fungi thrive in wet, oxygen-deprived conditions. When you overwater houseplants, excess moisture lingers in the soil, creating a damp, anaerobic (low-oxygen) zone—ideal for fungal spores to germinate. Here’s why it happens:
- Compacted or heavy soil: Clay or peat-heavy mixes retain water like a sponge, suffocating roots and starving them of oxygen. Fungi like Rhizoctonia or Pythium (which can cause mushrooms) love this environment.
- No drainage holes: Pots without exits trap water at the bottom, turning the soil into a fungal breeding ground. Even "self-watering" pots can backfire if overused.
- Watering schedule mismatches: Some plants (like ferns or calatheas) need frequent moisture, but others (like succulents or cacti) dry out between waterings. Guessing leads to soggy soil.
Actionable insight: Stick your finger 1-2 inches into the soil before watering. If it’s damp, wait. If your pot lacks drainage, upgrade to one with holes—or use a cache pot (a decorative outer pot with a saucer to catch excess water).
Mushrooms don’t just appear out of nowhere—they’re often feeding on decaying matter. When plant material breaks down, it releases nutrients that fungi (including mushroom-forming species like Coprinellus) use to grow. Common culprits:
- Dead roots or leaves: As roots rot, they become a smorgasbord for fungi. If your plant has been repotted recently or is struggling, dead roots may already be present.
- Old mulch or compost: Fresh mulch can introduce fungal spores, while over time, it breaks down into a nutrient-rich sludge—perfect for mushrooms.
- Pests or damage: Insects (like fungus gnats) or physical trauma (like broken stems) create entry points for fungi to colonize.
Actionable insight: When repotting, sterilize your tools and remove all dead or mushy roots. Replace old soil with a fresh, sterile mix (or bake it at 200°F for 30 minutes to kill spores). Avoid over-mulching—stick to a thin layer.
Fungi spread via spores, which float in the air and land on moist surfaces. If your home is humid and poorly ventilated, those spores have a field day. Here’s the science:
- Humidity >60%: Most houseplants prefer 40-50% humidity. Above this, fungal spores germinate faster. Bathrooms, kitchens, and basements are hotspots.
- No airflow: Stagnant air traps spores near plants. Crowded shelves or sealed terrariums accelerate fungal growth.
- Condensation on leaves: Misty leaves (from overhead watering or humidity) create a film where fungi like Botrytis (gray mold) can take hold.
Actionable insight: Use a hygrometer to monitor humidity. Keep it below 60% with a dehumidifier or AC. Space plants apart for airflow, and water at the base (not overhead) to avoid leaf moisture. A small fan on low can also disrupt spore buildup.
While fungi need organic matter to grow, some soils become too rich in nitrogen or phosphorus, fueling fungal explosions. Here’s how it happens:
- Fresh manure or compost: Raw organic matter is a fungal magnet. It breaks down quickly, releasing heat and ammonia—both of which encourage spore germination.
- Over-fertilizing: Too much synthetic fertilizer (especially high in nitrogen) can weaken roots, making them susceptible to fungal invasion.
- pH imbalances: Most fungi prefer slightly acidic to neutral soil (pH 6.0-7.0). If your soil is too alkaline (pH >7.5), it can stress plants, leaving them vulnerable.
Actionable insight: Use aged compost (at least 6 months old) or worm castings for slow-release nutrients. Test your soil’s pH with a kit and adjust with sulfur (to lower pH) or lime (to raise it) if needed. Never fertilize a stressed or waterlogged plant—wait until it’s recovered.
Fun fact: Some mushrooms in houseplants (like Psathyrella species) are actually saprophytic, meaning they feed on dead organic matter—not your living plant. But even these can signal poor soil health or drainage issues!
Quick Fixes for Fungal Overgrowth
Now that you know why mushrooms pop up in your houseplants, let’s tackle the problem head-on with practical, plant-safe solutions tailored to the root cause.
Whether it’s overwatering, poor drainage, or a hidden pest party, these fixes will help you restore your greenery to its fungus-free glory—without losing your sanity (or your plants).
Mushrooms thrive in soggy, oxygen-deprived soil. If your plant’s roots are drowning, it’s time for a drainage overhaul and a drying-out routine.
🔥 Step 1: Remove the Plant & Assess the Damage - Gently take the plant out of its pot and inspect the roots.
Healthy roots are firm and white; mushy, brown, or black roots are a red flag. - If mushrooms are growing on the roots, they’re feeding on decaying organic matter—time to trim the affected areas.
🍳 Step 2: Trim the Mushrooms & Rotten Roots
- Use sterilized scissors or pruning shears (wipe with rubbing alcohol) to snip off all visible mushrooms and any mushy, discolored roots.
- Do not compost infected soil or plant debris—it’ll just reinfect your garden.
Toss it in the trash instead.
👨🍳 Step 3: Repot with Fresh, Well-Draining Soil - Choose a pot with drainage holes (if it doesn’t have them, drill some!).
Terracotta pots are ideal—they wick away moisture. - Use a light, airy potting mix (cactus/succulent mix works for many plants) or amend your current soil with: - Perlite or pumice (20-30%) for aeration - Orchid bark or coconut coir (10-20%) for structure - Avoid garden soil—it’s too dense and retains too much moisture.
🥘 Step 4: Adjust Your Watering Habits - Let the top 1-2 inches of soil dry out completely before watering again.
Stick your finger in the soil—if it’s damp past your first knuckle, wait. - Water deeply but infrequently: Drench the soil until water runs out the drainage holes, then empty the saucer.
This mimics natural rainfall and prevents soggy roots. - Pro Tip 💡: Group plants with similar water needs together and water them at the same time. Overwatering one plant often means neglecting another!
⏰ Step 5: Boost Air Circulation - Move your plant to a brighter spot (but avoid direct sun, which can stress it).
Good airflow helps soil dry faster. - If your plant is in a humid bathroom or kitchen, consider a small fan on low setting nearby to keep air moving.
If mushrooms are sprouting around your plant (not on the roots), they’re likely feeding on decomposing organic matter in the soil or mulch.
🔪 Step 1: Remove All Infected Soil & Mulch
- Scoop out the top 2-3 inches of soil where mushrooms are growing. If the entire pot is contaminated, repot the plant entirely.
- Discard the old soil—do not reuse it.
🌡️ Step 2: Sterilize the Pot (If Reusing It)
- Wash the pot with hot, soapy water, then rinse and dry.
- For extra protection, sanitize with a 10% bleach solution (1 part bleach to 9 parts water), rinse thoroughly, and let it dry in the sun.
🎯 Step 3: Replace with Sterile Potting Mix
- Use fresh, sterile potting soil (avoid garden soil or homemade compost, which may contain fungal spores).
- Optional: Add a fungicide like hydrogen peroxide (3%) to the soil mix (1 part peroxide to 4 parts water) to kill lingering spores.
✨ Step 4: Prevent Future Fungus with Barrier Methods
- Top-dress with gravel or coarse sand (¼ inch thick) to create a barrier between the soil and any compost or mulch underneath.
- Use a breathable mulch like orchid bark or pine needles instead of shredded bark or wood chips, which can trap moisture.
If mushrooms appeared after a pest infestation (like mealybugs, scale, or root rot), you’ll need to treat the pests first before addressing the fungus.
🔥 Step 1: Identify & Eliminate Pests
- Inspect leaves, stems, and soil for signs of pests (sticky residue, tiny webs, or white cottony clusters).
- Wipe leaves with a soapy water solution (1 tsp mild dish soap + 1 quart water) or use neem oil spray (1 tsp neem oil + 1 tsp dish soap + 1 quart water).
- For root pests, soak roots in vinegar solution (1 part white vinegar to 3 parts water) for 10 minutes, then rinse.
🍳 Step 2: Revive the Plant with Fungal Control
- Vinegar soak (for roots): Mix 1 part white vinegar with 3 parts water, submerge the roots for 10-15 minutes, then repot in fresh soil.
- Baking soda spray (for leaves): Mix 1 tsp baking soda + 1 quart water + a drop of dish soap, spray lightly on leaves (avoid overuse—it can harm some plants).
- Cinnamon treatment (natural fungicide): Sprinkle cinnamon powder around the soil surface (it’s antifungal and smells great!).
👨🍳 Step 3: Strengthen the Plant’s Defenses
- Fertilize lightly with a balanced, water-soluble fertilizer (½ strength) to help the plant recover.
- Avoid over-fertilizing—too much nitrogen can encourage more fungal growth.
Once you’ve banished the mushrooms, keep them from coming back with these long-term strategies:
- ✅ Water wisely: Always check soil moisture before watering. When in doubt, don’t!
- ✅ Use the right pot: Terracotta or pots with drainage holes are your best friends.
- ✅ Avoid over-potting: If your plant is too snug, roots can’t breathe—and neither can the soil.
- ✅ Quarantine new plants: Keep newly purchased plants separate for 2-4 weeks to monitor for pests or fungus.
- ✅ Rotate your plants: Give them a 180° turn every few weeks so all sides get equal light and airflow.
- ✅ Clean up debris: Remove dead leaves, fallen flowers, and old mulch regularly—they’re fungus buffets.
Remember: Patience is key! Some plants may take a few weeks to bounce back, but with the right care, they’ll thrive mushroom-free once again. 🌿✨
Frequently asked questions
Are mushrooms in houseplants always harmful?
Not necessarily! Some mushrooms feed on dead organic matter (like decomposed leaves) rather than living roots. However, they still indicate poor soil conditions or overwatering. If they're growing near healthy roots, they can signal hidden root rot or compacted soil that needs aeration.
Can I save my plant if mushrooms are growing on the roots?
Yes, but act fast! Trim all visible mushrooms and mushy roots with sterilized scissors, then repot in fresh, well-draining soil. Soak roots in a 1:3 vinegar-water solution for 10 minutes to kill lingering spores before replanting. Monitor closely for 2 weeks—if new growth appears, repeat the process.
Will baking soda really kill fungal growth?
It can help as a preventative measure! Mix 1 teaspoon baking soda with 1 quart water and a drop of dish soap, then lightly spray the soil surface (avoid leaves). The alkaline properties disrupt fungal spores, but it won't eliminate established mushrooms. For active infestations, combine with soil replacement and improved drainage for best results.
How often should I sterilize my plant pots?
Sterilize pots every 6-12 months or whenever you notice fungal growth. Wash with hot, soapy water, then sanitize with a 10% bleach solution (1 part bleach to 9 parts water). Rinse thoroughly and dry in sunlight. For terracotta pots, occasional baking at 200°F for 30 minutes kills spores without chemicals.
Are there any houseplants more prone to fungal growth?
Yes! Plants with thick, dense foliage (like monstera or philodendron) or those that prefer high humidity (like calatheas) are more susceptible. Succulents and cacti are less prone due to their drought tolerance, while tropical plants often need extra airflow to prevent fungal issues. Rotate plants regularly to ensure even light exposure and airflow.