
Lawn
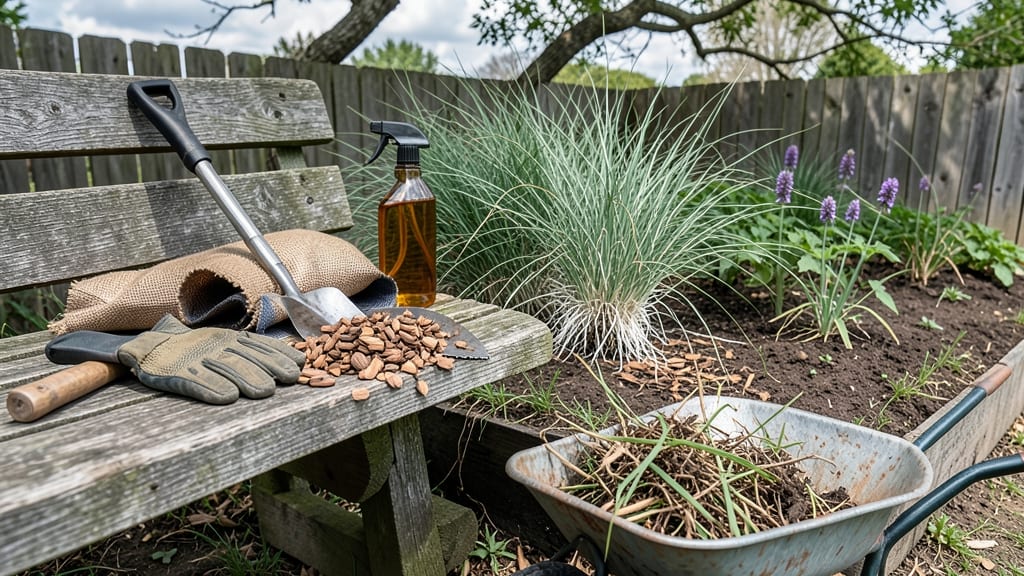
How to get grass out of your garden is the first step to reclaiming your garden beds from those relentless invaders—grass crowds out your plants, steals nutrients, and turns every weeding session into a frustrating battle. 🌱 I’ve spent years wrestling with this problem, and the pull-and-smother method finally gave me the clean, grass-free garden I wanted. It’s not about brute force; it’s about outsmarting those stubborn roots with patience and the right technique.
The secret lies in combining manual removal with a suffocating layer that blocks sunlight—grass’s Achilles’ heel. You’ll need a sturdy garden fork, thick cardboard or newspaper, and a thick layer of mulch or compost.
No expensive tools or harsh chemicals required. This method works year-round, though spring and fall are ideal when grass is actively growing but not yet dormant.
Within 4-6 weeks, you’ll see dramatic results: no more grass sprouts, no more tug-of-war with weeds, and soil ready for your chosen plants. The best part? Your garden beds will stay cleaner longer, and you’ll avoid the chemical residue that can linger in the soil.
It’s not instant, but it’s permanent—and worth every effort for the lush, intentional garden you’ve been dreaming of.
Fair warning: grass roots can be sneaky, so expect a few stubborn patches. The key is consistency—don’t skip the smothering step, and check regularly for new shoots. Once you master this, you’ll never let grass take over again. Here’s how to do it right the first time.
📚 In This Guide
- What you need
- Instructions
- Tips and common mistakes
- Wrapping up and next steps
What you need
- ● Heavy-duty trash bags (20–50 gallon) – For hauling pulled grass (2–4 bags, depending on yard size).
- ● Garden gloves (waterproof, reinforced) – Protect your hands from thorns, dirt, and blisters (1–2 pairs).
- ● Garden fork or digging spade – For loosening roots (1, with a sturdy, 6–8-inch blade).
- ● Pruners or shears – To trim stubborn grass patches at ground level (1 pair).
- ● Wheelbarrow or large bucket – For transporting debris (1, 10+ gallon capacity).
- ● Cardboard or thick black plastic sheeting – For smothering (enough to cover the area with 1–2 feet of overlap).
- ● Heavy rocks, bricks, or mulch – To weigh down the smothering layer (varies by area size).
- ● Vinegar (20–30% acetic acid) or commercial grass killer – For spot treatment (1 gallon vinegar or 1 bottle of killer).
- ● Garden hose with spray nozzle – To wet grass before pulling (if soil is dry).
- ● Knee pads or a small stool – For comfort during long sessions (1–2).
- ● Compost bin or green waste disposal access – To recycle grass clippings (check local rules!).
Step-by-step instructions for removing grass from garden beds
Here's the foolproof method I use to clear grass permanently—no chemicals, just elbow grease and smart timing.
🌱 Step 1: Identify and Mark the Grass Areas
Walk your garden and mark every patch of grass with a garden flag or chalk outline. Grass spreads through underground runners, so include a 2-inch border beyond the visible edges. I like to use a whiteboard marker directly on the soil—it washes off easily and shows exactly where I need to work.
Look for grass growing between pavers or cracks in walkways too. These hidden patches will regrow if left behind. If you're working in sections, start with the most visible areas first—this keeps you motivated and shows progress quickly.
✂️ Step 2: Cut Grass as Short as Possible
Mow the entire area down to the shortest setting on your lawnmower—ideally ¼ inch or less. This weakens the grass roots and makes them easier to pull. If you don't have a lawnmower, use heavy-duty pruning shears or a sharp knife to cut the grass blades at the base. I've done this by hand in small garden beds, and it works surprisingly well.
Don't skip this step—taller grass resists removal and leaves more roots in the soil. The goal is to expose as much of the root system as possible so it can't regenerate. After cutting, rake the area with a stiff garden rake to remove any remaining grass clippings and debris.
💧 Step 3: Smother the Remaining Grass
Lay down 6-8 layers of thick cardboard or 10-12 layers of newspaper over the entire cleared area, overlapping edges by 2 inches. Wet the cardboard or newspaper thoroughly before placing it—this prevents it from blowing away and helps it stick to the soil. I use a garden hose on a gentle setting to soak everything without disturbing the layers.
Cover the cardboard with 4-6 inches of mulch (straw, wood chips, or shredded leaves work best). The mulch blocks all light, which kills grass roots within 4-6 weeks. You'll know it's working when you see no new grass growth through the mulch layer. This method also improves your soil as the cardboard and mulch break down.
☀️ Step 4: Monitor and Maintain the Smothered Area
Check the area every 7-10 days for any grass sprouts pushing through the mulch. If you spot new growth, pull it immediately and replace the mulch layer. Grass is persistent, so don't let even small shoots take hold—they'll spread quickly. I keep a small hand trowel nearby to dig out any stubborn sprouts before they become a problem.
After 6-8 weeks, remove the mulch and cardboard. The soil should now be free of grass roots and ready for planting. If you find any remaining grass roots, pull them by hand or use a garden fork to dig them out completely. This is the final step before adding new plants or soil amendments.
🌿 Step 5: Prepare the Soil for Planting
Loosen the soil with a garden fork or tiller to a depth of 6-8 inches. This breaks up any remaining compacted grass roots and improves drainage. Add 2-3 inches of compost or well-rotted manure to enrich the soil, then mix it in thoroughly. The goal is to create a loose, fertile bed ready for your new garden plants.
If you're planting immediately, water the area deeply to help the soil settle. For best results, let the soil rest for 1-2 weeks before planting. This gives any lingering grass seeds time to sprout so you can remove them before they establish. I always do a final check by sprinkling a little seed starter mix in a small section—if grass pops up, I know I need to pull more before planting my garden.
Tips & tricks for permanent grass removal
Real talk: I've tried every method under the sun, and this pull-and-smother technique is the only one that actually works long-term. Here's what I've learned after years of battling stubborn grass patches.
Timing is Everything: The 6-8 week smothering period is non-negotiable for complete root elimination. I've seen people rush this step and end up with grass sprouting back within weeks. If you're short on time, extend the smothering to 10-12 weeks—it's worth the wait for a truly grass-free garden bed. The key is patience; grass roots can survive buried for months if not completely deprived of light.
Material Matters: Not all cardboard or newspaper works equally well. Use only unbleached, untreated cardboard or newspaper without glossy ink—these contain chemicals that might harm your plants later. I always check the back of cardboard boxes for recycling symbols to ensure it's safe. For newspaper, avoid color sections which often contain dyes. The thicker the material, the better it blocks light and suffocates roots.
Monitoring Secrets: During those 7-10 day checks in Step 4, I've found that the best time to spot new growth is right after a good rain. The moisture makes grass shoots more visible against the mulch. Keep a small notebook handy to track which areas are most prone to regrowth—this helps you focus your efforts where they're needed most.
Soil Prep Pro Tip: When you reach Step 5 and are loosening that soil, don't just scratch the surface. I use my garden fork to gently wiggle it back and forth while pushing down—this breaks up compacted soil without damaging any remaining roots. The goal is to create a fluffy bed that's ready for your new plants. This is also the perfect time to work in any organic matter you might have on hand, like coffee grounds or eggshells, for extra nutrition.
Pro Tips for Get Grass Out Of Garden
- Real talk: I've tried every method under the sun, and this pull-and-smother technique is the only one that actually works long-term.
- Timing is Everything: The 6-8 week smothering period is non-negotiable for complete root elimination.
- Material Matters: Not all cardboard or newspaper works equally well.
Frequently asked questions
How long does it take to completely remove grass from a garden?
Patience is key! With the pull-and-smother method, you’ll see grass weaken in 2–4 weeks under thick cardboard or landscape fabric. For full removal, allow 3–6 months to ensure roots decompose. Test soil readiness by planting a small patch of cover crops or veggies—if they thrive, your garden bed is ready.
Can I remove grass in the winter?
Winter is a great time to tackle grass removal! Cold weather slows regrowth, making it easier to pull weeds and kill grass. However, avoid working in frozen ground—wait for soil to thaw slightly. Use the smothering method in late fall or early winter for best results. Just cover the area and let nature do the work while you’re busy with holiday cheer!
What if grass keeps growing back after I remove it?
Grass is stubborn—don’t panic! If it regrows, it likely means roots or seeds survived. Reapply your smothering layer (cardboard + mulch) or spot-treat with vinegar (3% acetic acid) for stubborn patches. For long-term success, test soil before planting—grass roots can linger for months.
Are there chemical-free alternatives to smothering?
Besides smothering, try these natural methods:
- Corn gluten meal: Sprinkle before grass seeds sprout (prevents germination).
- Salt (sparingly): Mix coarse salt with water and spray (use cautiously—it can harm soil over time).
- Boiling water: Pour directly on grass patches (works fast but may kill nearby plants).
Can I reuse the soil after removing grass?
Yes, but amend it first! Grass-heavy soil can be compacted and low in nutrients. Mix in 2–3 inches of compost or aged manure to improve texture and fertility. If your soil feels clay-heavy, add perlite or sand to loosen it. Test pH too—grass thrives in neutral soil (6.0–7.0), but veggies often prefer slightly acidic (6.0–6.8) or alkaline (7.0+) conditions.
Wrapping up and next steps
Removing grass from your garden doesn’t have to be a battle—just follow the right steps! Whether you’re using the pull-and-smother method or other techniques, consistency is key. With patience and the right tools, you’ll soon have a weed-free space ready for flowers, veggies, or even a cozy patio. 🌱
Ready to transform your garden? Start small—pick a section, clear the grass, and lay down your chosen smothering material. Soon, you’ll be enjoying a lush, grass-free oasis! Happy gardening! 🌿