
Propagation
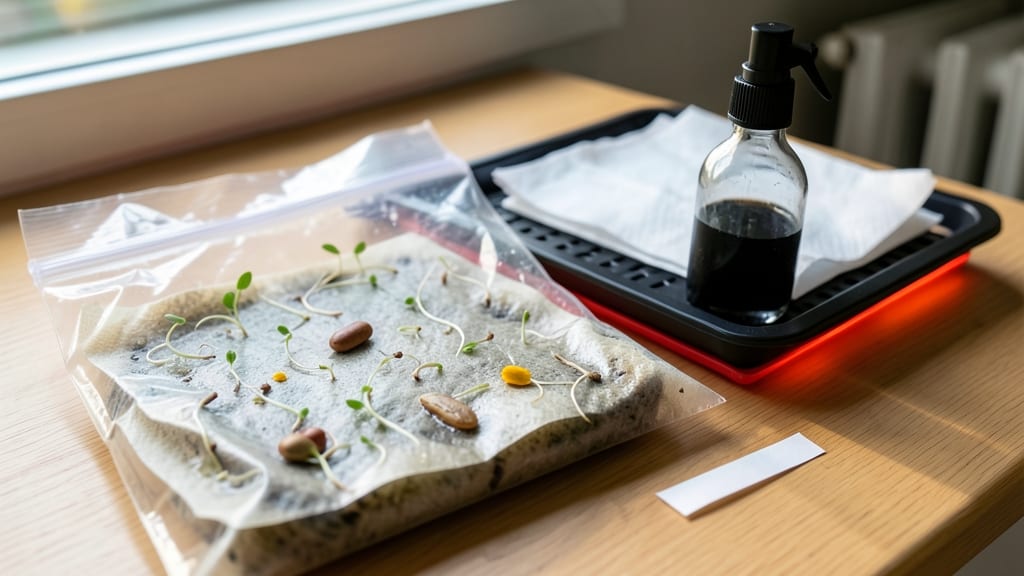
Germinating seeds in a bag cuts weeks off your growing season. ✨ I used to wait forever for those first sprouts—now I see tiny green hooks breaking through in just 3-5 days with this method.
The secret? Controlled humidity and warmth, all contained in something you probably already have at home.
You only need 3 supplies: a plastic bag (ziplock or gallon size), a damp paper towel, and your seeds. Fold the towel into quarters, sprinkle seeds evenly, mist until damp (not soggy), then seal the bag.
Place it in a warm spot—on top of the fridge or near a sunny window—where it stays between 70-80°F. Check daily for sprouts without opening the bag.
The payoff is immediate: faster germination, easier monitoring, and seedlings ready to transplant with minimal shock. No more peeking every hour or struggling with uneven moisture. By the time you’re ready to plant, your seedlings will be sturdy and weeks ahead of store-bought starts.
Works for almost any seed—veggies, flowers, even herbs—but skip this for large seeds like beans or peas. The bag method shines with tiny seeds that need consistent moisture to wake up. Ready to try it? Let’s get those sprouts growing!
📚 In This Guide
- What you need
- Instructions
- Tips and common mistakes
- Wrapping up and next steps
What you need
- ● Seeds: Choose high-quality, fresh seeds (check the packet for viability dates). Aim for 1–2 seeds per bag for most varieties.
- ● Ziploc or resealable plastic bags: Use quart-sized (32 oz) or gallon-sized (16 oz) bags—one per seed type or variety.
- ● Paper towels or germination mats: Cut into 2–3 layers to fit the bag (paper towels work, but mats retain moisture better).
- ● Spray bottle with water: A fine-mist setting ensures even hydration without over-saturating.
- ● Scissors or knife: For trimming paper towels/mats to size.
- ● Permanent marker: Label bags with seed type and date (trust us, this saves headaches!).
- ● Heat mat or warm location (e.g., near a sunny window or on top of a fridge): Speeds up germination for seeds like peppers or tomatoes.
- ● Planting medium (e.g., coconut coir or seed-starting mix): Transfer sprouts to soil once roots appear (2–7 days).
- ● Rubbing alcohol or hydrogen peroxide (3% solution): Lightly wipe seeds to boost germination rates by removing inhibitors.
- ● Clear tape or labels: For a polished look (and to hide messy handwriting 😉).
Step-by-step instructions for germinating seeds in a bag
This method cuts germination time nearly in half while keeping everything contained and organized.
🌱 Step 1: Prepare Your Seeds and Moistened Paper Towels
Lay out a clean paper towel on a flat surface and lightly mist it with warm water until damp but not dripping. You want it to hold moisture without becoming soggy—think of a wrung-out sponge. Spread 10-15 seeds (for 4 servings) evenly across the towel, spacing them about 1 inch apart. This prevents overcrowding once they sprout.
Here's the thing—some seeds have hard outer shells that slow germination. For these (like beans or peas), I soak them in lukewarm water for 12 hours first. You'll see the shells soften noticeably. For delicate seeds (like lettuce or basil), skip the soaking and place them directly on the damp towel.
💧 Step 2: Fold and Seal in a Plastic Bag
Fold the paper towel over the seeds, enclosing them completely. Place the folded towel into a quart-sized zip-top plastic bag, leaving about 2 inches of air space at the top. Seal the bag but don't squeeze out all the air—you want a slight cushion to prevent crushing the seeds.
Squeeze the bag gently to redistribute moisture, then lay it flat on a counter or seedling heat mat. The trapped warmth and humidity create the perfect greenhouse environment. Place the bag in a spot where the temperature stays between 70-75°F. If your home runs cooler, a sunny windowsill or small heat mat will speed things up.
⏰ Step 3: Monitor Daily for Sprouting
Check the bag every 24 hours for signs of germination. You'll notice tiny white roots emerging first, followed by the seed coat splitting open. Once 50% of seeds have sprouted (usually 3-7 days depending on the variety), it's time to transfer them to soil.
Don't skip this checkpoint—waiting too long lets roots grow too long and weak. When you see those first cotyledons (seed leaves) poking through, your seedlings are ready for their next phase. I like to work with them when the roots are about ½ inch long—long enough to anchor but not so long they'll break easily.
🌿 Step 4: Transplant Sprouted Seeds to Soil
Fill small 2-3 inch pots with moistened seed-starting mix. Make a tiny hole with your finger—just deep enough to cradle the seedling's roots without bending them. Gently lift each sprout from the paper towel by its roots (not the stem!) and nestle it into the hole.
Press the soil lightly around the base to secure the seedling, then water gently with a spray bottle. The roots are delicate now, so avoid pouring water directly over them. Place the pots in bright, indirect light for the first 24 hours to help them recover from the transplant shock.
☀️ Step 5: Provide Ideal Growing Conditions
After transplanting, move seedlings to a location with 12-14 hours of light daily. A south-facing window or grow light works best. You'll see new true leaves (the second set after cotyledons) appear in 7-10 days—this is your signal that the seedlings are thriving.
Water when the top inch of soil feels dry to the touch, but avoid oversaturating. The bag method gives you a head start, but consistency now prevents leggy growth. If stems stretch toward the light, your seedlings need more intensity or closer placement to the light source.
Tips & tricks for perfect speed-sprouting in bags
This method isn't just fast—it's a game-changer for impatient gardeners like me who want to see results without waiting weeks.
Moisture Management: The dampness of your paper towel should feel like a wrung-out sponge—if water pools at the bottom of the bag, gently blot it with another dry towel. Too much moisture causes mold, while too little slows germination. I've ruined batches by skipping this step, so don't make my mistake! The 12-hour soak for tough seeds (like beans) is non-negotiable—it softens those stubborn outer shells that would otherwise block water absorption.
Temperature Control: That 70-75°F range is critical because it mimics springtime conditions. If your home runs cooler, prop the bag on a small heating pad set to low (never high!) or place it on top of your fridge. I've seen germination times double when seeds sit in a 65°F kitchen—patience isn't a virtue when you're racing against time. For faster results, move the bag to a warm spot like near a sunny window during the day, then bring it back to room temperature at night.
Light Exposure: Here's what nobody tells you—your sealed bag doesn't need light during germination. The roots will grow toward moisture, not light, so keep it in darkness until transplanting. Once you see those first cotyledons in Step 3, move the bag to indirect light to prevent leggy seedlings. I use a simple LED desk lamp on low setting 12-14 hours daily, which works perfectly without breaking the bank.
Transplant Timing: The moment you see 50% sprouting (usually 3-7 days), don't wait another minute! Long roots mean fragile seedlings that break easily during transplant. I like to work with roots about ½ inch long—they're sturdy enough to handle but not so long they'll snap. Use a butter knife to gently lift each seedling by its roots (never the stem!) to avoid damaging the delicate growing point.
Pro Tips for Germinate Seeds In A Bag
- This method isn't just fast—it's a game-changer for impatient gardeners like me who want to see results without waiting weeks.
- Moisture Management: The dampness of your paper towel should feel like a wrung-out sponge—if water pools at the bottom of the bag, gently blot it with another dry towel.
- Temperature Control: That 70-75°F range is critical because it mimics springtime conditions.
Frequently asked questions
Got questions about bag germination? You’re not alone—this method is game-changing but can feel tricky at first. Here’s what readers ask most often, plus quick answers to keep your sprouts thriving!
Can I use any bag for seed germination?
Not all bags work! Opt for breathable materials like paper towels, dampened coffee filters, or seed-starting kits (often made of mesh). Avoid plastic—it traps too much moisture and can cause mold. If repurposing, choose thin, porous fabrics like cotton or even a clean, unbleached tea towel.
How long until seeds sprout in a bag?
Timing varies by seed type, but most sprouts appear in 3–7 days. Fast growers like radishes or lentils sprout in 3–4 days, while slower seeds (e.g., sunflower) may take up to 10–14 days. Check daily—keep the bag in a warm, dark spot (like a cabinet) until you see tiny roots or green shoots!
What if my seeds aren’t sprouting—am I doing it wrong?
Don’t panic! First, check moisture—your bag should feel damp like a wrung-out sponge, not soggy. If seeds aren’t sprouting after 10 days, they might be old or damaged. Try soaking them in warm water for 4–6 hours first, or test a few on a paper towel (no bag) to isolate the issue.
Can I reuse the bag for another batch of seeds?
Yes! Clean and sanitize the bag between uses to prevent mold or bacteria. Rinse with vinegar or hydrogen peroxide, let it dry completely, and store it in a dry place. Avoid reusing bags with visible mold—toss those instead. For hygiene, dedicate one bag per seed type if growing different plants.
Is this method eco-friendly compared to soil?
Bag germination uses 90% less water and no soil, reducing waste. Plus, you can compost the bag (if organic) or repurpose it. It’s also space-efficient—perfect for apartments or small growers. Just skip plastic bags to keep it fully sustainable!
Wrapping up and next steps
Germinating seeds in a bag is a game-changer—it’s simple, efficient, and perfect for busy gardeners! With just a few supplies and a little patience, you’ll watch tiny sprouts emerge in days instead of weeks. 🌱
Now that you’re armed with the know-how, go ahead and try it—whether you’re growing herbs, veggies, or flowers. Once your seeds sprout, the real fun begins: transplanting them into soil and nurturing them into thriving plants. Happy sprouting!