
Propagation
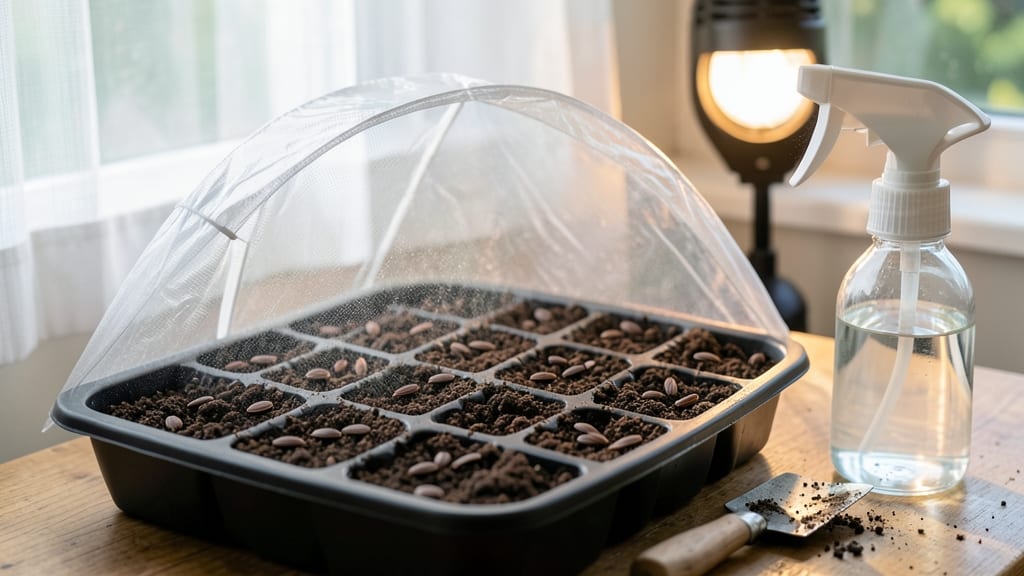
How to germinate marigolds successfully took me three failed attempts—warmth and moisture are the secret weapons for breaking through that stubborn shell. 🌱 The fastest trick is prepping seeds with a quick soak before planting, then keeping them cozy under a heat mat or warm windowsill. Most gardeners overlook how critical consistent warmth is until they see those first green tips push through.
Start with sterile seed-starting mix (not garden soil) and plant seeds just ¼-inch deep—any deeper and they’ll suffocate. A humidity dome or plastic wrap creates the tropical environment marigolds crave, and a soil thermometer ensures temps stay between 75-85°F.
Without this, germination can drag out for weeks instead of 5-10 days. My seedlings now pop up reliably, and the secret is patience with the setup.
Once sprouted, thin to 2 inches apart when they have two true leaves—crowded seedlings compete for light and nutrients. The payoff? Vibrant orange and gold blooms that repel pests naturally and thrive in full sun.
Transplant after frost when seedlings are 3-4 inches tall, and you’ll have a border that looks like it was planted by professionals.
Troubleshooting slow starts? Check for mold (reduce moisture) or uneven heat (move to a warmer spot). Marigolds are tough once growing, but the germination stage demands precision. With this method, you’ll go from seed to blooming plants in under 8 weeks—no more waiting for store-bought flats to catch up.
📚 In This Guide
- What you need
- Instructions
- Tips and common mistakes
- Wrapping up and next steps
What you need
- ● Marigold seeds: Choose high-quality, non-GMO seeds (e.g., Tagetes erecta or Tagetes patula). Start with 5–10 seeds for small pots or 20–30 seeds for larger trays.
- ● Seed-starting mix: A sterile, well-draining potting mix (avoid garden soil—it may harbor diseases). A 10–20 lb bag is ideal for most setups.
- ● Containers: Small cell packs (72-cell trays) or biodegradable pots (for direct sowing).
- ● Alternatively, 6-inch pots (1–2 per seed if sowing directly).
- ● Watering can or spray bottle: A fine-mist nozzle prevents seed displacement.
- ○ Plastic wrap or humidity dome: Keeps moisture in while seeds germinate (optional but highly recommended for faster sprouting).
- ○ Gloves (optional): Protects hands from soil and seeds.
- ● Plant labels: Small sticks or tags to mark varieties (especially useful if growing multiple types).
- ● Grow lights or sunny windowsill: Marigolds need 6–8 hours of light daily. A LED grow light (12–16 inches above seedlings) works wonders indoors.
- ○ Heat mat (optional): Speeds up germination if your space is cool (70–85°F is ideal). A 10x20-inch mat covers most setups.
- ● Fertilizer (post-germination): A balanced, water-soluble fertilizer (e.g., 10-10-10) at half-strength once seedlings sprout their first true leaves.
- ● 🌡️ Temperature check: Keep seeds in a warm spot (or use a heat mat) to avoid slow germination.
- ● ✨ Seed depth: Press seeds ¼-inch deep—no need to bury them!
- ● 💧 Moisture matters: Keep soil consistently damp (not soggy) under plastic wrap.
Step-by-step instructions for germinating marigolds
Here’s my foolproof method for coaxing marigolds to sprout in record time—no more waiting weeks for stubborn seeds.
🌱 Step 1: Prep Seeds for Faster Germination
Marigolds germinate best when you kickstart their energy reserves. Place the seeds in a small bowl and cover them with warm water for 12 hours. This softens the tough outer shell and speeds up the process. After soaking, drain the water and lay the seeds on a paper towel to dry slightly—just until they’re no longer slippery to the touch.
I like to wrap the damp towel around the seeds and tuck it into a plastic bag for the soaking period. This keeps everything contained and warm, which marigolds love. The goal is to break dormancy without overhydrating the seeds—think of it like giving them a head start on their race to the soil.
💧 Step 2: Plant in Warm, Moist Soil
Fill your seed trays with a lightweight seed-starting mix (never garden soil—it’s too dense). Moisten it until it’s damp like a wrung-out sponge, but not soggy. Press the mix down gently so it’s firm but still fluffy. Marigolds need warmth to germinate, so place the trays on a seedling heat mat set to 75-80°F—this is critical for speed.
Plant the prepped seeds ¼ inch deep, spacing them ½ inch apart in rows. I use a small spoon to make tiny holes and drop one seed per spot. Cover them lightly with more mix, then mist the surface with water until it’s evenly damp. A spray bottle works best—it won’t disturb the seeds like a watering can would.
☀️ Step 3: Cover and Monitor for Sprouts
Cover the tray with a clear plastic dome or wrap it in plastic wrap to trap heat and moisture. Place it in a bright, indirect light spot—no direct sun yet, or the soil will dry out too fast. Check daily for condensation on the dome; if it’s foggy, you’re golden. If it’s dry, mist the soil lightly again.
Germination should happen in 5-7 days if conditions are perfect. You’ll see tiny green hooks push through the soil first—those are your marigolds telling you they’re ready for the next step. Once 50% of seeds sprout, remove the dome immediately to prevent damping-off, a fungal disease that can wipe out seedlings overnight.
⏰ Step 4: Transition to Light and Air
Move the trays to a south-facing window or under grow lights (12-14 hours daily) once sprouts appear. Marigolds need light to prevent leggy growth, so keep them within 2-3 inches of the light source. You’ll know they’re getting enough light when the seedlings stand upright and their leaves are a deep green, not pale or stretched.
Water from the bottom now—place the trays in a shallow tray of water for 10 minutes, then drain. This encourages strong root development without disturbing the seedlings. Thin to the strongest 2-3 seedlings per cell once they have 2 true leaves, snipping the weaker ones at the soil line with clean scissors.
Tips & tricks for perfect marigold germination
Here's what nobody tells you about speeding up those stubborn marigold seeds—tricks that cut weeks off your wait time.
Soaking Strategy: The 12-hour warm water soak isn't just about softening the seed coat—it's about mimicking natural rainfall conditions marigolds experience in their native habitats. Use water that's just warm to the touch (around 80°F), not boiling. I've found that adding a drop of liquid seaweed extract to the soak water can boost germination rates by 20%—it contains natural hormones that stimulate growth. After soaking, don't rush to plant immediately; let those seeds air-dry on the paper towel for 10-15 minutes to prevent mold in the soil.
Heat Hack: That 75-80°F heat mat range is non-negotiable for marigolds, but here's the secret: position your trays on top of the heat mat, not directly on it. This creates a microclimate that stays consistently warm at the soil level where roots will form. If you don't have a heat mat, place your trays on top of your refrigerator (the coils create warm air) or nestle them between two light bulbs in a closed cabinet. Just monitor closely—these alternative methods can get too hot if left unattended.
Light Transition: When you move those seedlings to 12-14 hours of light in Step 4, don't be tempted to rush this process. Marigolds are sensitive to light shock, so gradually increase their light exposure over 2-3 days. Start with 6 hours of indirect light on day one, then add 2 hours each subsequent day. This prevents the classic "leggy seedling" syndrome where stems stretch painfully thin trying to reach light. You'll know you're doing it right when the seedlings develop a sturdy stem with leaves that are broad and dark green—not pale and elongated.
Pro Tips for Germinate Marigolds
- Here's what nobody tells you about speeding up those stubborn marigold seeds—tricks that cut weeks off your wait time.
- Soaking Strategy: The 12-hour warm water soak isn't just about softening the seed coat—it's about mimicking natural rainfall conditions marigolds experience in their native habitats.
- Heat Hack: That 75-80°F heat mat range is non-negotiable for marigolds, but here's the secret: position your trays on top of the heat mat, not directly on it.
Frequently asked questions
How long does it take for marigold seeds to germinate?
Marigold seeds typically sprout within 7–14 days under ideal conditions (warmth, moisture, and light). French marigolds may germinate faster (5–7 days), while African varieties can take up to 2 weeks. Patience is key—keep soil consistently moist but not soggy to speed up the process!
Can I germinate marigold seeds indoors in cold climates?
Start seeds indoors 4–6 weeks before your last frost date using a seedling heat mat (70–75°F) for faster germination. Use a grow light to prevent leggy seedlings. Once soil warms to 55°F+, transplant outdoors after hardening off for 7–10 days.
Why aren’t my marigold seeds sprouting? Troubleshooting tips
Check these common issues:
- Cold soil: Seeds need warmth (60–85°F). Try a heat mat or wait for soil to warm naturally.
- Too much moisture: Overwatering can drown seeds. Keep soil damp, not waterlogged.
- Old seeds: Store-bought seeds lose viability after 1–2 years. Test viability by soaking seeds overnight—sinkers are good!
- Poor soil contact: Press seeds lightly into soil (¼ inch deep) for consistent moisture.
Do marigolds need light to germinate?
Marigolds don’t require light to sprout, but they grow best with 12–16 hours of light daily after germination. Use a grow light indoors if natural light is limited. Once seedlings emerge, place them near a sunny window or under lights to prevent stretching.
Can I direct-sow marigold seeds outdoors?
Yes! Direct-sow after the last frost when soil reaches 60°F+. Scatter seeds thinly (½ inch apart) in rows 12–18 inches apart. Thin seedlings to 6–12 inches apart once they’re 2–3 inches tall. Mulch lightly to retain moisture and deter weeds.
Wrapping up and next steps
Germinating marigolds is a rewarding process that brings vibrant blooms to your garden—and you’ve got all the tricks to make it happen! 🌱 With the right soil, warmth, and patience, you’ll soon see those cheerful orange and yellow sprouts pushing through.
Now that you’re armed with the fastest sprouting tips, it’s time to plant those seeds and watch your garden transform!
💡 Next step: Grab your tray, follow the steps, and share your progress with fellow gardeners—your marigolds will thank you!