
Flowers
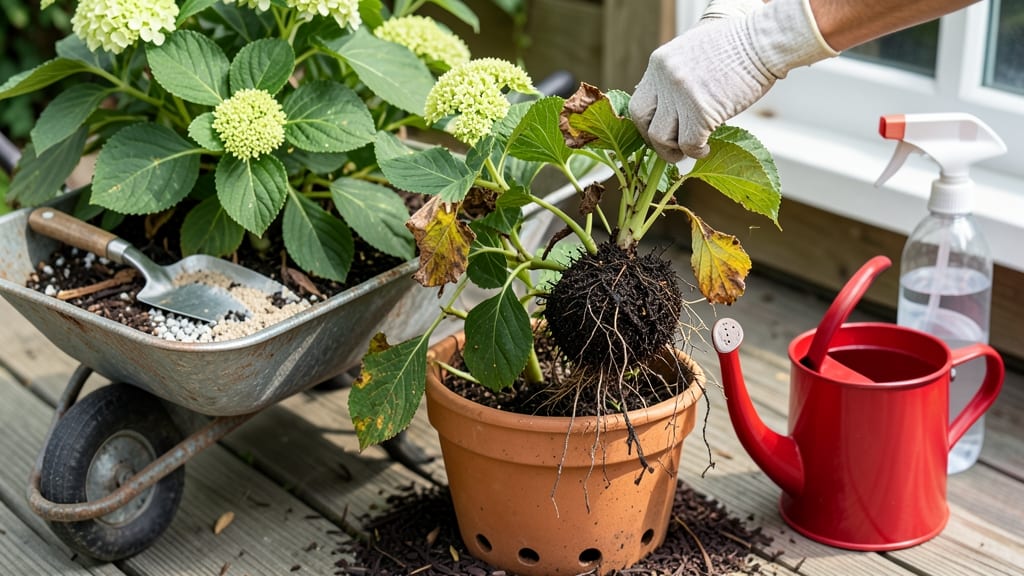
How to fix an overwatered hydrangea—your drooping leaves and mushy stems aren’t a death sentence, just a cry for help. 💧 I've nursed back more overwatered hydrangeas than I'd like to admit, and the key is acting fast before root rot sets in. The first step is stopping all watering immediately and letting the soil dry out completely, even if it means wilting for a few days.
You'll need a few simple tools: a trowel for checking soil moisture, some perlite or sand to improve drainage, and sharp pruners for cleanup. The goal is to create an environment where roots can breathe again—think fluffy, well-draining soil that sheds excess water.
Most people overcomplicate this, but it's really about fixing two things: water and air.
Within a week, you should see new signs of life—firm stems, perky leaves, and maybe even fresh growth. The plant will need consistent care after revival: water only when the top 2 inches of soil feel dry, and prune away any blackened or mushy stems.
This isn't just about saving the plant; it's about teaching it to thrive with proper care.
For long-term success, consider repotting into a container with better drainage or amending your in-ground soil with organic matter. Hydrangeas are surprisingly resilient once you get their water needs right—my once-wilted plant now produces football-sized blooms every summer. Here's how to make that happen for yours.
📚 In This Guide
- What you need
- Instructions
- Tips and common mistakes
- Wrapping up and next steps
What you need
- ● Well-draining potting mix or garden soil: 2–3 bags (1–2 cubic feet each) of a peat-free, moisture-wicking blend (e.g., 50% perlite/pumice + 50% compost or coconut coir).
- ● Large container or pot: 1–2 (depending on plant size), with drainage holes (1–2 gallons for small hydrangeas, 3–5 gallons for mature plants).
- ● Gloves: 1 pair of gardening gloves (nitrile or leather) to protect your hands from soil and sharp tools.
- ● Pruning shears: 1 pair of sterilized, sharp shears (bypass pruners work best).
- ● Trowel or small shovel: 1 for digging and repotting.
- ● Watering can or hose with a gentle nozzle: 1 for controlled watering (avoid heavy streams).
- ○ Mulch (optional but helpful): 1 bag of organic mulch (pine bark, straw, or shredded leaves) to retain moisture without suffocating roots.
- ● Rooting hormone: 1 small tube to boost recovery if roots are severely damaged.
- ● Fungicide (for soggy soil issues): 1 bottle of copper-based or neem oil fungicide to prevent rot.
- ● Moisture meter: 1 to monitor soil dampness accurately (prevents future overwatering!).
- ● Support stake or trellis: 1 for large hydrangeas to stabilize them post-pruning.
Step-by-Step instructions for reviving overwatered hydrangeas
Here's how I bring hydrangeas back from soggy roots—no drama, just smart adjustments.
💧 Step 1: Stop Watering Immediately and Assess the Soil
First, halt all watering. Overwatered roots can't breathe, and more moisture just speeds up rot. Let the soil dry out naturally for 24-48 hours before doing anything else. This gives roots a chance to recover from the shock.
Dig around the base with your fingers—1-2 inches deep. If the soil feels cold, heavy, or smells sour, you're dealing with severe waterlogging. Healthy soil should feel slightly damp but not wet, with a faint earthy scent. If roots look mushy or black, they're rotting and need urgent attention.
✂️ Step 2: Prune Damaged Foliage and Improve Airflow
Snip off any yellow, brown, or wilted leaves with clean bypass pruners. Dead foliage can trap moisture and invite fungal infections. Cut back to healthy green growth—this reduces the plant's water demands while it recovers.
Thin out crowded branches to 30-40% of their original density. Better airflow prevents future rot. If stems feel soft or hollow when squeezed, prune them completely. You'll see new, firmer growth emerge in 2-3 weeks as the plant focuses energy on recovery.
🪴 Step 3: Adjust the Planting Environment for Better Drainage
Move your hydrangea to a spot with morning sun and afternoon shade—too much direct sun stresses already weakened roots. If it's in a container, choose one with drainage holes and raise it on pot feet to prevent water pooling.
Amend the soil with 1-2 inches of coarse sand or perlite mixed into the top 6 inches of soil. This breaks up compacted areas and encourages drainage. Water lightly only when the top 2 inches of soil feel dry—overwatering is the last thing you want now.
☀️ Step 4: Monitor and Gradually Restore Watering Routine
Wait 5-7 days before resuming watering. When you do, water deeply but infrequently—aim for 1 inch of water per week, delivered in one long session rather than frequent sprinkles. This encourages roots to grow deeper and stronger.
Check the soil weekly by sticking your finger 2 inches down. If it's dry, water; if it's still damp, wait. You'll know you're on the right track when new leaves appear bright green and firm—not yellow or limp. Over 4-6 weeks, your hydrangea should bounce back with vibrant blooms.
Tips & tricks for reviving overwatered hydrangeas
Here's what nobody tells you about bringing hydrangeas back from the brink—these tricks make all the difference.
Soil Assessment Secret: When checking soil moisture in Step 1, focus on the 1-2 inch depth mentioned in the instructions. Healthy soil should feel like a damp sponge—not a dripping wet rag. If you see tiny bubbles when squeezing soil, that's air pockets, which means roots can breathe again. This is your green light to proceed with pruning.
Pruning Precision: In Step 2, when thinning branches to 30-40% of original density, aim for removing every other branch rather than just trimming ends. This creates instant airflow while keeping the plant's structure intact. Use bypass pruners to make clean cuts at a 45-degree angle—this prevents water from pooling on cut surfaces.
Drainage Upgrade: For Step 3's soil amendment, mix the 1-2 inches of coarse sand or perlite thoroughly into the top 6 inches of soil. I like to use a garden fork to create small air pockets as I work. This isn't just about drainage—it's about giving struggling roots room to expand without competition from compacted soil.
Watering Reset: The 5-7 day wait before resuming water in Step 4 is critical—don't rush it! During this time, cover the soil with 2-3 inches of mulch (optional but helpful) to prevent evaporation and protect roots from temperature swings. This gives your hydrangea a fighting chance to establish new root growth before you reintroduce water.
Pro Tips for Fix Overwatered Hydrangea
- Here's what nobody tells you about bringing hydrangeas back from the brink—these tricks make all the difference.
- Soil Assessment Secret: When checking soil moisture in Step 1, focus on the 1-2 inch depth mentioned in the instructi...
- Pruning Precision: In Step 2, when thinning branches to 30-40% of original density, aim for removing every other bran...
Frequently asked questions
Got questions about reviving your soggy hydrangeas? Here are some of the most common concerns—plus quick fixes to get those blooms back on track!
How soon will my hydrangea show signs of recovery after fixing overwatering?
With proper drainage and reduced watering, you’ll likely see improvement in 2–4 weeks. New leaves may appear within 1–2 weeks if roots aren’t severely damaged. Patience is key—hydrangeas are resilient but need time to bounce back!
Can I save a hydrangea that’s completely mushy with rot?
If the roots are soft, black, or smell foul, prune away the damaged sections and repot in fresh, well-draining soil. For severely affected plants, propagation from healthy stems (cuttings) may be your best bet. Act fast—delaying risks total loss!
Should I wait to fertilize until after fixing overwatering?
Yes! Wait until 4–6 weeks after adjusting watering and improving drainage. Overwatered plants are stressed, and fertilizer can worsen root damage. Start with a balanced, low-nitrogen formula once new growth appears.
What if my hydrangea is in a pot with no drainage holes?
Drill holes in the bottom immediately and repot using a mix of potting soil and perlite (or orchid bark). If repotting isn’t possible, add a thick layer of gravel at the bottom to prevent future sogginess. Drainage is non-negotiable!
Will pruning help if my hydrangea is already drooping?
Pruning alone won’t fix overwatering, but it can redirect energy to healthy growth. Cut back dead or yellowed stems to the nearest node, and avoid heavy pruning until roots recover. Focus first on drainage and watering adjustments!
Wrapping up and next steps
Reviving an overwatered hydrangea is totally doable—just take it step by step! 🌿 By improving drainage, pruning wisely, and giving your plant time to recover, you’ll help those roots bounce back strong. Remember: patience and consistency are key—your hydrangea will thank you with vibrant blooms soon!
Now that you’re armed with the know-how, head outside and give your plant some TLC! Check the soil moisture weekly and adjust your watering routine to keep those roots happy and healthy. Your green thumb is about to shine! 🌸