
Planting
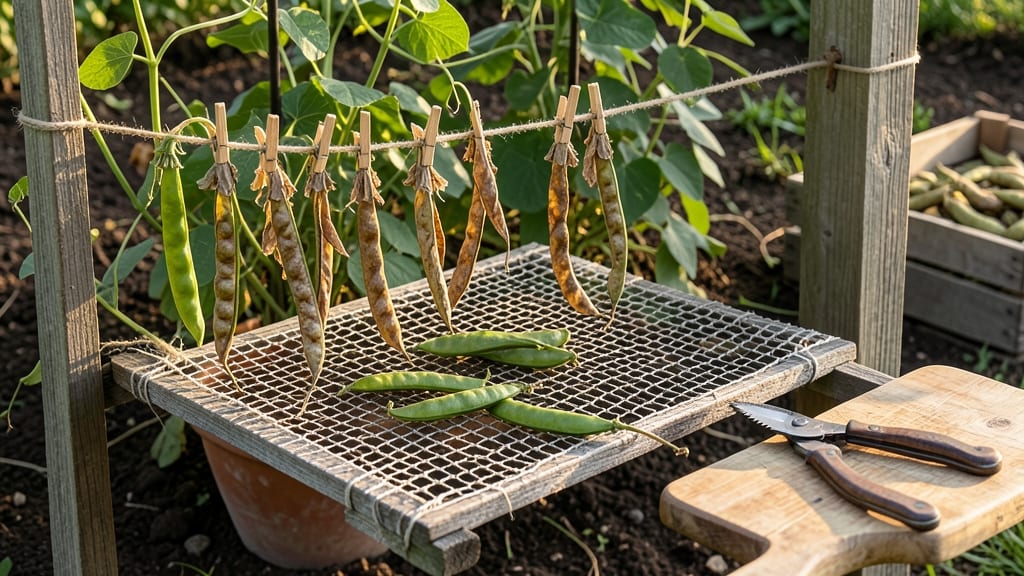
How to dry peas means never buying them again. 🌱 The key is timing—harvest when pods are fully plump but still firm, just before they split open. This simple process transforms your garden harvest into pantry staples that last for months, saving money and supporting future planting.
You’ll need fresh peas, clean pods, and either a well-ventilated space or a dehydrator set to 135°F. Air-drying works best for small batches, while dehydrators speed up the process for larger harvests.
The goal is to reduce moisture without cooking the peas—think crisp, dry pods that snap when bent, not brittle or discolored.
Store dried peas in airtight containers away from light and humidity. Properly dried peas keep for 6-12 months, making them a cost-effective way to enjoy your garden’s bounty year-round. Plus, the seeds remain viable for planting, ensuring you can grow next season’s crop from your own stash.
Watch for uneven drying or mold—these signal moisture issues that can ruin your harvest. With the right technique, you’ll end up with peas that taste fresher than store-bought and give you the satisfaction of knowing exactly where they came from.
📚 In This Guide
- What you need
- Instructions
- Tips and common mistakes
- Wrapping up and next steps
What you need
- ● Fresh peas: 1–2 lbs (about 450–900g) of shelled, clean, and dry peas (avoid peas with blemishes or soft spots).
- ● Dehydrator: A food dehydrator with adjustable temperature settings (ideal for even drying). OR
- ● Oven: A conventional oven preheated to 140°F (60°C) or lower (use the lowest setting to prevent burning).
- ● Baking sheets: 2–3 large, flat trays lined with parchment paper or silicone mats (if using an oven).
- ● Fine-mesh screen or colander: For sorting and cleaning peas before drying.
- ● Kitchen twine or rubber bands: To bundle dried peas for storage.
- ● Air-tight containers: Glass jars, Mylar bags, or vacuum-sealed bags with oxygen absorbers (for long-term storage).
- ● Food-grade silica gel packets: To absorb moisture in storage containers.
- ● Digital thermometer: To monitor dehydrator/oven temperature for precision.
- ● Pea pod scissors or knife: For quickly shelling peas if not pre-shelled.
- ● Humidity indicator: A small device to check if your storage area is dry enough.
Step-by-step instructions for drying peas at home
Here's my foolproof method for turning fresh peas into shelf-stable treasures.
🌱 Step 1: Harvest and Prepare Fresh Peas
Pick peas when pods are fully plump but still tender—squeeze gently to test. The pods should yield slightly but not feel mushy. Snap off stems cleanly at the vine to avoid damaging the plant. I always harvest on a dry morning after the dew has evaporated; wet peas develop mold faster during drying.
Shell peas immediately after harvesting. Lay pods on a clean cutting board and use a small knife to slice open the seams. Gently roll the peas out into a bowl. Discard any discolored or shriveled peas—they won't dry properly. Rinse the shelled peas in cool water and drain thoroughly using a colander. Pat them dry with a clean kitchen towel or paper towels.
⏰ Step 2: Choose Your Drying Method
You have two reliable options: dehydrator or oven. For dehydrator drying, spread peas in a single layer on dehydrator trays lined with parchment paper. Leave about ½ inch between each pea to ensure even air circulation. Set the dehydrator to 125°F—any hotter risks burning them.
For oven drying, preheat your oven to its lowest setting, usually 170°F. Line a baking sheet with parchment paper and arrange peas in a single layer, spacing them ¼ inch apart. Place the sheet on the middle rack where heat circulates evenly. Leave the oven door slightly ajar (1-2 inches) to allow moisture to escape.
💧 Step 3: Dry Peas Until Completely Moisture-Free
Check peas every 1-2 hours during the first phase of drying. They're ready when they lose 80% of their moisture—test by gently pressing a pea between your fingers. It should feel dry to the touch with no give, and the skin should crackle slightly when bent. This typically takes 4-6 hours in a dehydrator or 6-8 hours in the oven.
For extra assurance, use a food dehydrator with a moisture probe or an instant-read thermometer. Insert the probe into a pea—it should read below 10% moisture. If using the oven method, remove the tray and let peas cool completely before checking. Store them in an airtight container immediately to prevent reabsorption of moisture from the air.
🪴 Step 4: Store Dried Peas Properly
Transfer dried peas to clean, airtight glass jars or vacuum-sealed bags. I like to label each jar with the date and variety—this helps track freshness. Store in a cool, dark place like a pantry or cupboard. When properly dried and stored, peas will keep for up to 1 year without losing quality.
Before using, soak dried peas in warm water for 8-12 hours (or overnight) to rehydrate. This restores their texture and flavor. For quick use, simmer in boiling water for 2-3 hours until tender. Don't skip soaking—it's the key to perfect texture in your dishes.
Tips & tricks for perfectly dried peas
Preserving your garden harvest takes patience—and these little tricks will help you avoid common pitfalls while keeping your peas perfectly preserved.
Harvest Timing: The key to great dried peas starts in the garden. Pick pods when they're fully swollen but still tender—you should hear that satisfying rattle when you shake them. Overripe peas will be tough and mealy when dried, while underripe ones won't develop full flavor. I always harvest on a dry morning when dew has evaporated, as moisture on the pods can encourage mold during drying.
Dehydrator Setup: When using your food dehydrator at 135°F, arrange peas in a single layer with about ¼-inch between each pea. This airflow is crucial—the peas should never touch each other. I like to use the dehydrator trays with mesh screens for even better circulation. If you notice any peas sticking together during the 4-6 hour process, gently separate them with a clean chopstick to prevent uneven drying.
Sun Drying Safety: For the sun drying method, I recommend using a screen mesh tray rather than regular plastic containers. The screen allows air to circulate on all sides, preventing moisture buildup that could lead to mold. Place the tray on a clean, elevated surface like a picnic table to keep it off damp ground. If you live in a humid climate, consider adding a small fan nearby to improve airflow without disturbing the peas directly.
Storage Secrets: After your peas pass the finger test and rattle when shaken (the ultimate doneness indicators!), transfer them to airtight glass jars immediately. The key to long-term storage is eliminating all oxygen—leave no air gap in the jar. For extra protection, place a small piece of parchment paper over the peas before sealing, then label with both the date and drying method used. This helps you track which batches are freshest when flavor peaks within 6 months.
Pro Tips for Dry Peas
- Preserving your garden harvest takes patience—and these little tricks will help you avoid common pitfalls while keeping your peas perfectly preserved.
- Harvest Timing: The key to great dried peas starts in the garden.
- Dehydrator Setup: When using your food dehydrator at 135°F, arrange peas in a single layer with about ¼-inch between each pea.
Frequently asked questions
Got questions about drying peas? You’re not alone! Here are answers to the most common concerns to help you master the process like a pro.
How long do dried peas last once stored properly?
With the right conditions—cool (below 60°F), dark, and dry—properly dried peas can last 1–2 years. Check for moisture or pests every few months. If they smell musty or look discolored, it’s time to use them up!
Can I dry peas in the sun instead of an oven or dehydrator?
Yes! Sun-drying works in warm, dry climates (60°F+ with low humidity). Spread peas on a clean screen or mesh in full sun for 3–5 days, stirring daily. Cover at night to protect from dew or pests. Test for doneness by bending a pea—it should snap, not bend.
Why did my peas turn dark or moldy during drying?
Darkening can happen if peas are overcooked or exposed to heat too long. Mold occurs from excess moisture or poor airflow. To prevent this, dry peas at low heat (115–135°F) and ensure even spreading. Store in airtight containers with a silica gel packet for extra protection.
How do I know when dried peas are fully cooked?
Fully dried peas should be hard, dry, and light in color. Test by trying to bend one—it should crack like a dry seed, not feel soft or pliable. If they’re still damp inside, return them to the dehydrator or oven for another 1–2 hours.
Can I dry peas with the pod still on?
No—always shell peas before drying. Leaving pods on can trap moisture, leading to spoilage. Shelling also speeds up drying time and makes peas easier to store and cook later. Save the pods for compost or homemade pea soup broth!
What’s the best way to store dried peas long-term?
Use airtight, food-grade containers (glass jars or Mylar bags with oxygen absorbers work best). Label with the date and store in a cool, dark pantry. For extra shelf life, freeze-dried peas in vacuum-sealed bags for up to 5 years.
Wrapping up and next steps
Drying peas at home is a rewarding way to savor your garden’s bounty long after the harvest season! With just a few simple steps—proper cleaning, thorough drying, and careful storage—you’ll unlock a pantry staple that’s nutritious, versatile, and budget-friendly.
Whether you’re prepping for soups, salads, or split pea dishes, your freshly dried peas will be ready to shine whenever you need them.
Now that you’re equipped with the know-how, give it a try! Start small with a batch of peas from your garden or a local farm, and soon you’ll be the proud keeper of a homemade treasure. Happy drying—and enjoy the taste of summer all year round! 🌱✨