
Companion Plants
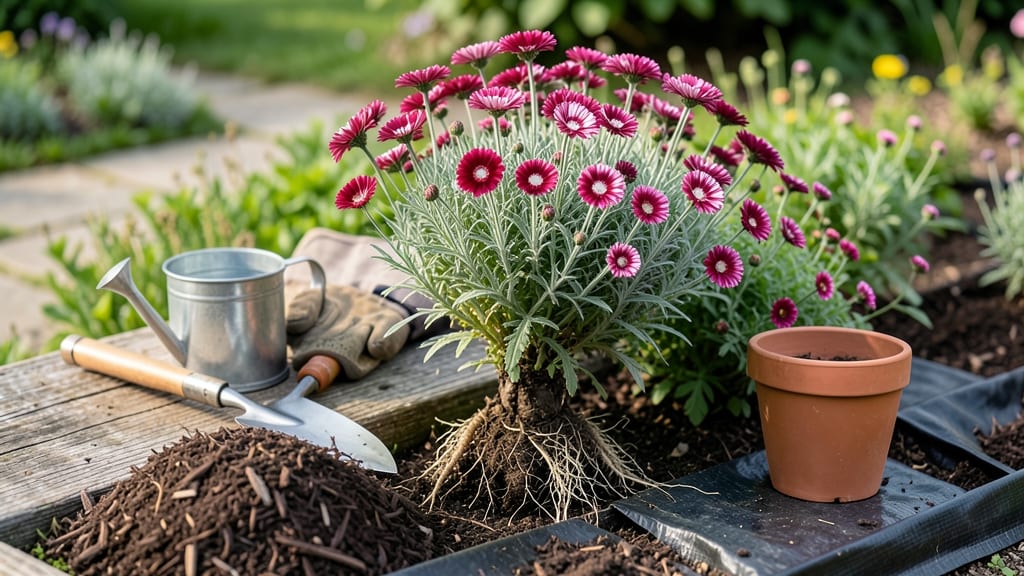
Dividing dianthus plants doubles your blooms in just 30 minutes. ✨ The secret timing—early spring or fall—makes all the difference between thriving clumps and struggling divisions.
I’ve split my toughest dianthus patches this way, and the results are always lush, compact plants with bursts of pink and magenta by summer.
You’ll need sharp pruners, a 5-gallon bucket for water, and a fork to loosen roots. Avoid dividing when plants are flowering—wait until the foliage looks crowded but healthy.
The key is working when soil is cool and moist, not baking hot or frozen. My first attempt in July left divisions struggling for weeks.
After dividing, you’ll see new shoots within weeks, with full blooms by next season. The plants stay compact, flower longer, and resist disease better than overcrowded clumps. Just keep them watered for the first two weeks, and avoid fertilizing until new growth appears.
Works for all dianthus varieties—perennial, annual, or hybrid. Even if your plants look tired, dividing rejuvenates them. Here’s how to do it without stressing the roots or the plant. Let’s get started!
📚 In This Guide
- What you need
- Instructions
- Tips and common mistakes
- Wrapping up and next steps
What you need
- ● Sharp bypass pruners or clean garden shears – Must be sterilized with rubbing alcohol to prevent disease spread.
- ● Garden fork or trowel – A heavy-duty fork (for loosening roots) or a sturdy trowel (for precision digging).
- ● Gloves – Garden or work gloves to protect hands from thorns and soil.
- ● Watering can or hose with a gentle spray nozzle – For thorough hydration before and after division.
- ● Compost or well-aged manure – 1-2 gallons to enrich planting holes.
- ○ Mulch (optional but recommended) – 2-3 inches of pine bark or straw to retain moisture.
- ● Rooting hormone – Speeds up recovery for cuttings or divided sections.
- ● Plant labels – To track varieties post-division.
- ● Wheelbarrow or bucket – For transporting divided plants to new spots.
- ● Disinfectant spray – To clean tools between divisions if working with multiple plants.
- ● Choose a cool, overcast day to minimize transplant shock.
- ● Ensure plants are 3-5 years old (younger Dianthus won’t benefit from division).
- ● Water plants 1-2 days before dividing to soften the soil.
Step-by-step instructions for dividing dianthus plants
Here's my foolproof method for splitting dianthus clumps—timed perfectly for maximum blooms next season.
🌱 Step 1: Choose the Right Time to Divide
Divide dianthus in early spring or early fall when temperatures hover around 50-60°F. This gives roots time to establish before summer heat or winter freeze. I always check the forecast for a stretch of 5-7 days with no rain—wet soil makes roots slippery and hard to handle.
Look for plants that have grown crowded with multiple stems at the base. If you see fewer than 3-4 healthy stems per section, wait another year. The goal is to create 3-4 inch divisions with 3-5 stems each—this ensures each new plant has enough energy to bloom.
✂️ Step 2: Prepare Tools and Workspace
Gather your sharp clean pruners and a sterilized spade—dull tools crush roots and spread disease. I soak my tools in 1 part bleach to 9 parts water for 10 minutes between plants to prevent fungal transfer. Lay down cardboard or old newspapers to protect surrounding plants from flying soil.
Water the dianthus deeply the day before dividing. This softens the soil and makes roots easier to see. Avoid working in direct midday sun—morning or late afternoon keeps plants and you comfortable. I like to wear gloves too; dianthus roots can be surprisingly sharp.
🪴 Step 3: Carefully Lift and Separate the Clump
Use your spade to cut a 1-2 inch wide trench around the outer edge of the clump, going deep enough to sever roots but not so deep you nick the crown. Gently rock the plant back and forth while pulling upward—resist the urge to yank. Dianthus roots are brittle and break easily.
Once lifted, shake off excess soil to reveal the root structure. Look for natural divisions where stems separate cleanly. Use your pruners to cut between sections, making sure each piece has at least 3 stems and a healthy root ball. Discard any woody, mushy, or hollow stems—these won't regrow properly.
💧 Step 4: Replant Divisions Immediately
Dig holes slightly wider than each division's root ball and deep enough so the crown sits just below soil level—burying too deep causes rot, leaving it exposed invites disease. Mix compost into the native soil for better drainage (dianthus hates soggy roots).
Space divisions 12-18 inches apart in full sun—they need 6+ hours daily to thrive. Water deeply right after planting, then again in 3-4 days to encourage root growth. Avoid overhead watering for the first week; it can wash away soil and expose roots.
☀️ Step 5: Maintain for Strong First Season
Keep newly divided dianthus well-watered but not soggy—water when top 1 inch of soil feels dry. Fertilize lightly with balanced 10-10-10 once new growth appears in 4-6 weeks, but avoid heavy feeding. Too much nitrogen makes plants leafy instead of flowering.
Deadhead faded blooms regularly to encourage more flowers. By next spring, your divisions should be bushier and more prolific than the original plant. If any division looks weak after a year, give it another season to recover before dividing again.
Tips & tricks for perfect dianthus division
A few simple tricks will help you avoid common mistakes and ensure your dianthus divisions thrive for years to come.
Timing Secret: The 5-7 day dry spell before dividing is non-negotiable. I've learned this the hard way—wet soil turns to mud, making roots impossible to see and handle. If you must divide during rain, work in the driest part of your yard or wait until the forecast clears. The roots need to be firm enough to handle without falling apart.
Tool Prep Matters: That 10-minute bleach soak for your tools isn't just for cleanliness—it's disease prevention. I once skipped this step and ended up with fungal spots on my divisions. Mix 1 part bleach to 9 parts water, soak tools completely, then rinse well before using. Sterilization prevents transferring pathogens between plants.
Root Handling Technique: When you're cutting that 1-2 inch trench around the clump, think "precision surgery" not "digging." Use the spade to sever roots cleanly—don't saw back and forth. Dianthus roots are like glass fibers; they break easily when forced. Once lifted, gently tease apart natural divisions rather than forcing them. Each section should have 3-5 stems and a healthy root ball.
Replanting Depth: The crown should sit just below soil level—this is critical. I've seen beginners bury crowns too deep (leading to rot) or leave them exposed (inviting disease). Make the hole slightly wider than the root ball, then mound soil around it so the top of the root ball is level with the surrounding soil. Press gently to eliminate air pockets.
Pro Tips for Divide Dianthus Plants
- A few simple tricks will help you avoid common mistakes and ensure your dianthus divisions thrive for years to come.
- Timing Secret: The 5-7 day dry spell before dividing is non-negotiable. I've learned this the hard way—wet soil turns...
- Tool Prep Matters: That 10-minute bleach soak for your tools isn't just for cleanliness—it's disease prevention. I on...
Frequently asked questions
Got questions about dividing your dianthus? You’re not alone! Here are answers to the most common concerns—so you can tackle this task with confidence and keep those blooms thriving.
When is the best time to divide dianthus?
Divide your dianthus in early spring (just as new growth begins) or early fall (before the first frost). Avoid dividing in summer—heat stress can slow recovery. If you must divide in late summer, water deeply afterward to help roots establish faster. Pro tip: Morning divisions give plants time to recover before evening heat sets in!
How do I know if my dianthus needs dividing?
Divide dianthus when the plant looks crowded, leggy, or stops blooming as vigorously. Check for a dense center with few leaves or roots growing outward in a tight circle. If the plant is 3+ years old, it’s likely time—older dianthus often benefit from rejuvenation. Watch for: Smaller flowers, sparse foliage, or a "woody" base.
What if I divide at the wrong time?
Dividing in mid-summer or winter stresses dianthus. Summer divisions risk heat shock and pest attacks, while winter divisions may not recover before cold snaps. If you miss the ideal window, opt for fall division (September-October) and protect divided plants with mulch. Troubleshooting: Wilting? Keep soil moist but not soggy—roots need time to regrow.
Can I divide dianthus from seedlings or cuttings instead?
While you can’t divide from seedlings, you can propagate dianthus via stem cuttings (take 3–4 inch tips in early summer, dip in rooting hormone, and pot in sand/perlite mix). For established plants, division is easier—it preserves the parent plant’s vigor and ensures identical blooms. Alternative: Buy new varieties if you want fresh genetics!
How do I care for divided dianthus afterward?
After dividing, water deeply and avoid fertilizer for 4–6 weeks to prevent root burn. Keep divided sections in partial shade for a week to reduce transplant shock, then gradually reintroduce sun. Watch for: Yellow leaves (overwatering) or crispy edges (underwatering). Mulch lightly to retain moisture. Blooms may return next season!
Wrapping up and next steps
Dividing your dianthus plants doesn’t have to be intimidating—with the right timing, tools, and care, you’ll soon enjoy bushier blooms and healthier growth. Whether you’re refreshing an overcrowded patch or expanding your garden, the key is patience and precision.
Now that you’re equipped with the know-how, grab those gloves and get ready to transform your garden into a vibrant, thriving display!
🌱 Next step: Mark your calendar for early spring or fall, prep your tools, and give those dianthus roots the TLC they deserve. Happy gardening!