
Watering
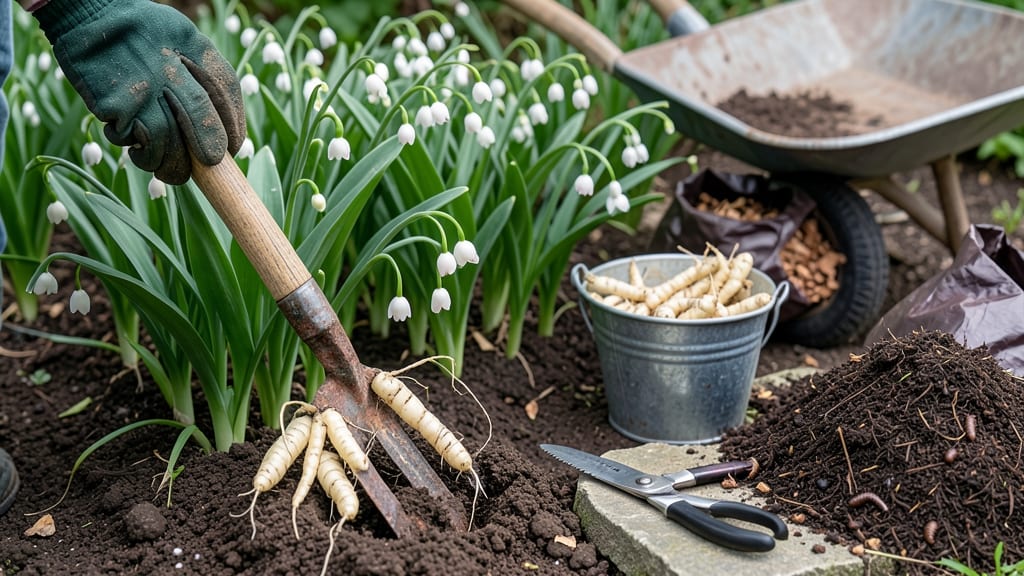
Digging up lily of the valley feels like handling a delicate treasure. 🌿 The wrong move can damage those sprawling roots, but with patience, you can transplant them successfully—even if they’ve been in one spot for years.
Timing matters most: aim for late summer or early fall, after the flowers fade but before winter dormancy sets in.
You’ll need a sharp spade, gloves, and a wheelbarrow for hauling. The secret is working in small sections—lily of the valley spreads aggressively, so dig just a few clumps at a time.
Keep the roots intact; even a broken rhizome can mean fewer blooms next spring. Water them lightly before digging to loosen the soil gently.
After transplanting, mulch with 2-3 inches of organic matter to retain moisture and shield the roots from temperature swings. The first year might be quiet—no flowers, just lush foliage—but by year two, you’ll see those classic bell-shaped blooms return. Just avoid moving them in spring; they need time to settle.
This method works for dividing overgrown patches too. Space new plants 12-18 inches apart in partial shade, and they’ll thrive for decades with minimal care. The key? Be patient—lily of the valley rewards gentle handling with years of fragrant blooms.
📚 In This Guide
- What you need
- Instructions
- Tips and common mistakes
- Wrapping up and next steps
What you need
- ● Garden fork or digging spade – A heavy-duty, 12-inch garden fork or a sharp, wide-edged spade (preferably stainless steel) to minimize root damage.
- ● Garden gloves – A pair of durable, breathable gloves (e.g., nitrile-coated or leather) to protect your hands from thorns and soil.
- ● Pruners or sharp scissors – Bypass pruners (clean and sterilized) to trim dead or overgrown foliage post-digging.
- ● Buckets or containers – 2-3 large, sturdy buckets (5+ gallons each) to hold dug-up plants and roots temporarily.
- ● Watering can or hose with a gentle nozzle – For light watering before and after transplanting to reduce shock.
- ○ Newspaper or burlap sacks – To wrap and cushion roots during transport (optional but helpful for longer moves).
- ● Root stimulator or mycorrhizal fungi – A gentle rooting hormone (like RootOne) to encourage faster regrowth in the new location.
- ● Mulch (pine straw or shredded bark) – To protect roots after replanting from extreme temperatures.
- ● Wheelbarrow – If moving multiple plants or covering long distances.
- ● Knee pads or a small stool – For comfort during extended digging sessions!
Step-by-Step instructions for digging up lily of the valley
Here's how I carefully lift these delicate perennials without damaging their sprawling roots.
🌱 Step 1: Choose the Right Time and Conditions
Timing makes all the difference with lily of the valley. I always dig in early fall when the foliage starts yellowing but before hard frost—this gives roots time to establish before winter. Choose a cool, overcast day to prevent stress from heat or drying winds. Water the area 2-3 days beforehand to soften the soil and make roots more pliable.
Look for plants that have finished blooming but still have some green leaves—this indicates they've stored enough energy in their roots for transplanting. Avoid digging when the soil is frozen or waterlogged, as roots will tear easily. The ideal soil temperature should be between 50-60°F for minimal shock.
💧 Step 2: Loosen the Soil and Lift the Plants
Use a sharp spade or garden fork to make vertical cuts 3-4 inches away from the plant clumps, working your way around in a circle. This prevents slicing through delicate roots. I angle the blade slightly to create clean edges rather than jagged ones. Once the soil is loosened, gently rock the spade back and forth to separate the root ball from surrounding soil.
Lift the entire clump carefully by grasping the base of the stems. You'll see a dense network of white, fibrous roots radiating outward—this is why lily of the valley spreads so aggressively. Shake off excess soil to inspect for damage. Any broken roots can be trimmed with clean scissors, but keep cuts to 1-2 inches to minimize stress. Real talk: this is where most beginners make mistakes by pulling too hard and tearing roots.
✂️ Step 3: Divide and Prepare the Roots
Place the root clump on a tarp or flat surface to work. Use your hands or a clean knife to separate the roots into smaller sections, each with 3-5 healthy shoots. I look for sections with both roots and green growth—this ensures each division can establish quickly. Avoid splitting through the center crown, as this is where new growth emerges.
Trim any mushy or blackened roots immediately with sterilized pruners. Healthy roots should be firm and white with a slight sheen. Soak the divisions in lukewarm water for 10-15 minutes to rehydrate them before replanting. This step is crucial—it helps them recover from the shock of being dug up and gives them a head start in their new home.
🪴 Step 4: Transplant to the New Location
Dig holes in the prepared site that are twice as wide as the root ball but only as deep as the original planting depth. Lily of the valley prefers partial shade and moist, well-draining soil. I always add a 2-inch layer of compost to the bottom of each hole for nutrients. Space divisions 12-18 inches apart to allow for future growth without overcrowding.
Place each division in its hole and backfill with soil, pressing gently to eliminate air pockets. Water immediately after planting to settle the soil and remove any air gaps around the roots. The first watering should be deep enough to reach 4-6 inches down—this encourages roots to grow downward rather than staying shallow. Mulch with 2-3 inches of organic material to retain moisture and regulate soil temperature.
Tips & tricks for perfect lily of the valley transplanting
These little-known tricks will help you handle lily of the valley roots like a pro—without the stress or damage.
Timing Secret: That 2-3 day watering ahead of time in Step 1 is non-negotiable. I learned this the hard way after digging up clumps with dry soil that crumbled like dust—roots tore apart when I tried to lift them. Watering softens the soil enough that you can work cleanly around those delicate white roots without resistance. Think of it like pre-soaking clay before sculpting.
Tool Technique: In Step 2, I can't emphasize enough how critical that 3-4 inch spacing is when making vertical cuts. I've seen people try to dig right next to the plants, and it's a disaster—the roots get sliced like spaghetti. Use your spade like a compass: make your first cut, then rotate around the clump while maintaining that distance. The slight angle on the blade helps too—it creates clean edges that won't shred when you lift.
Root Rescue Strategy: When you're trimming damaged roots in Step 3, don't just chop randomly. Look for the healthy white sections with that slight sheen—they're your gold. Cut just above where the root turns brown or mushy, and always use sterilized tools. I keep a small bottle of rubbing alcohol handy to wipe my pruners between cuts—it prevents spreading any potential pathogens from one root to another.
Planting Precision: That 2-inch layer of compost in Step 4 is where the magic happens for establishing new roots. Don't skimp! The compost provides immediate nutrients while the roots adjust to their new home. And when you're pressing soil around the roots, think "snowball" rather than "packing dirt." You want gentle pressure to eliminate air pockets, not compaction that could suffocate those tender roots.
Pro Tips for Dig Up Lily Of The Valley
- These little-known tricks will help you handle lily of the valley roots like a pro—without the stress or damage.
- Timing Secret: That 2-3 day watering ahead of time in Step 1 is non-negotiable.
- Tool Technique: In Step 2, I can't emphasize enough how critical that 3-4 inch spacing is when making vertical cuts.
Frequently asked questions
Got questions about digging up lily of the valley? You’re not alone!
Here are answers to the most common concerns—from timing to troubleshooting—so you can tackle this task with confidence.
When is the best time to dig up lily of the valley?
The ideal window is early spring (March–April) or after flowering (May–June), before the plant sets seed. Avoid digging in extreme heat or frost—roots are most resilient when the plant is dormant or actively growing. If you must transplant in summer, water deeply 2–3 days beforehand to reduce stress.
How do I tell if I’ve damaged the roots while digging?
Healthy roots are white or light tan and firm to the touch. If you see dark, mushy, or broken roots, trim them with clean pruners (sterilized with rubbing alcohol) and replant immediately. Overly dry or brittle roots may signal underwatering—soak the clump in water for 1–2 hours before transplanting to revive it.
Can I divide and transplant lily of the valley in containers?
Yes! Use large pots (12+ inches deep) with drainage holes and a well-draining soil mix (add perlite or sand). Choose shady spots and water consistently—containers dry out faster. Repot every 2–3 years, as roots outgrow the space. Pro tip: Add a layer of mulch to retain moisture and mimic forest-floor conditions.
What if my lily of the valley isn’t thriving after transplanting?
Common issues include leaf scorch (too much sun), yellowing (overwatering), or slow regrowth (root shock). Adjust care by:
- Moving to partial shade if leaves brown.
- Watering only when the top inch of soil is dry.
- Applying a balanced fertilizer (10-10-10) lightly in spring.
Are there non-invasive alternatives to digging up lily of the valley?
If you love the look but want to control spread, try these low-effort methods:
- Barriers: Bury plastic edging or landscape fabric 6 inches deep around the perimeter to block rhizomes.
- Mowing: Regularly trim foliage to weaken the plant (though it’s not foolproof).
- Shade competition: Plant dense ground covers (like hostas or ferns) to outcompete it.
Wrapping up and next steps
Digging up lily of the valley doesn’t have to be intimidating—with the right tools, timing, and care, you can successfully relocate these delicate perennials to brighten a new spot in your garden.
Ready to give your garden a fresh start? Mark your calendar for next year’s transplanting season and enjoy the process—one shovel’s worth at a time! 🌱✨