
How To
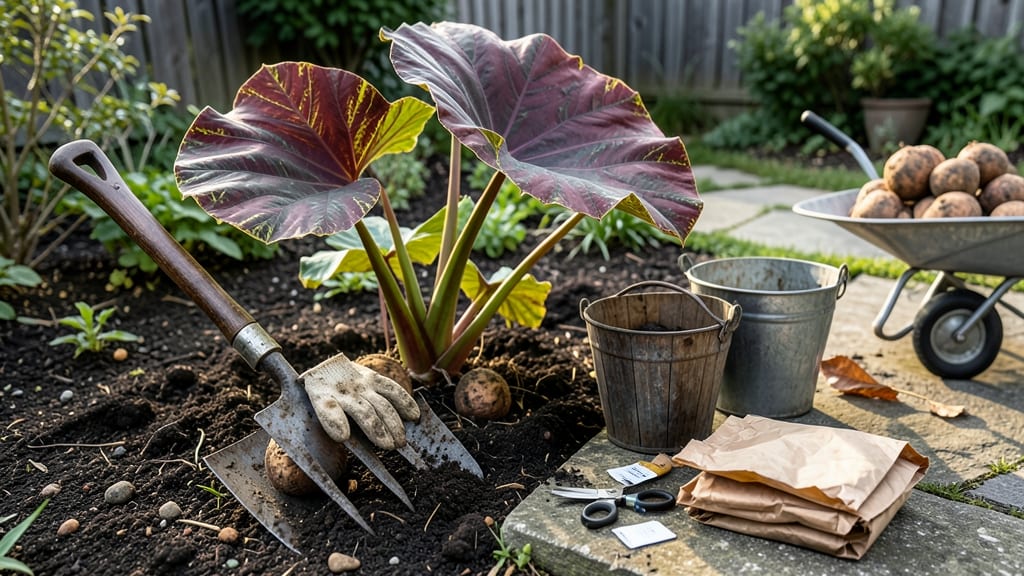
How to dig up elephant ears in fall—your tubers won’t survive winter in the ground unless you act before the first frost. 🌿 I’ve learned the hard way that leaving these tropical beauties outside means muddy, rotting tubers by spring. The secret? Timing, gentle handling, and knowing exactly when to stop digging. You’ll need a fork, gloves, a wheelbarrow, and a dry, shaded spot for storage. Most gardeners rush this step, but taking 30 minutes now saves hours of cleanup later. The goal is to preserve those thick, starchy roots so they’ll sprout fresh leaves next season. Once dug, let the tubers cure in a cool, dark place for 2-3 weeks. They’ll shrink slightly and develop a papery skin—this protects them from rot during storage. Store them in peat moss or vermiculite, and check monthly for soft spots (that’s rot knocking). Warmer climates? You might get away with leaving them in milder winters, but even then, digging extends their lifespan. Here’s the foolproof method that’s worked for me across three zones.
📚 In This Guide
- What you need
- Instructions
- Tips and common mistakes
- Wrapping up and next steps
What you need
- ● Garden fork or digging fork – A sturdy, heavy-duty fork with 4-6 tines, 18-24 inches long (helps loosen soil without damaging roots).
- ● Garden shovel – A broad, flat-edged shovel (12-14 inches wide) for slicing through soil and lifting the plant.
- ● Gloves – Heavy-duty, waterproof garden gloves (to protect hands from sharp soil, debris, and sap).
- ● Pruners or sharp knife – For trimming dead or damaged foliage before digging (sterilize with rubbing alcohol).
- ● Wheelbarrow or large bucket – To transport dug-up tubers and soil (at least 5 gallons capacity).
- ● Burlap sack or plastic tarp – For wrapping tubers during transport (prevents bruising).
- ● Hose or watering can – To pre-moisten the soil (makes digging easier and reduces root damage).
- ● Knee pads – For comfort if you’re digging for extended periods.
- ● Soil knife or dandelion digger – For precision around tight or rocky areas.
- ● Disinfectant spray – To clean tools between uses (prevents disease spread).
- ● Labeling tags or markers – If storing tubers long-term (note variety and planting date).
- ● Compost bin or wheelbarrow liner – To collect excess soil for reuse.
Step-by-step instructions for digging up elephant ears in fall
Here's how to save your prized tuberous begonia roots without stressing the plant or yourself.
🌿 Step 1: Time It Right for Perfect Root Recovery
Dig up elephant ears 2-3 weeks before your first frost date when nighttime temperatures dip to 50-55°F. This gives roots time to heal before winter storage. You'll know it's time when foliage starts yellowing—nature's signal to prepare for dormancy. Avoid digging after frost; frozen roots won't survive storage.
Choose a dry day to work. Wet soil sticks to roots and makes cleanup harder. If rain is forecast, schedule your digging for the morning so roots have all day to dry before storage. I always check the weather app the night before to plan accordingly.
✂️ Step 2: Cut Back Foliage and Lift Roots Carefully
Use clean, sharp pruners to cut back stems to 1-2 inches above the soil line. This reduces moisture loss and prevents disease during storage. Wear gloves—elephant ear leaves can irritate skin. Gently loosen soil around the plant's base with a spade, working in a circle 6-8 inches from the stem to avoid damaging roots.
Lift the entire root ball from the ground. If roots break during removal, don't worry—elephant ears regenerate easily. Brush away excess soil with your hands or a soft brush. Healthy roots should be firm, plump, and free of soft spots. Any mushy areas indicate rot and should be trimmed away immediately with sterilized pruners.
💧 Step 3: Clean and Cure Roots Before Storage
Rinse roots gently under lukewarm water to remove all soil. Let them air-dry completely for 24-48 hours in a shady, well-ventilated area. Spread roots on a clean towel or newspaper in a single layer. Proper drying prevents mold during storage. I place mine on a wire rack in my garage where it stays dry but not too warm.
After drying, inspect roots for any remaining foliage or soft spots. Trim away any remaining stems or damaged areas with sterilized pruners. Healthy roots should feel firm and papery when dry. Store them in paper bags or mesh sacks—plastic traps moisture and causes rot.
🪴 Step 4: Store Roots for Winter Revival
Place the dried roots in a cool, dark location with 40-50°F temperatures and 50-60% humidity. A basement, garage, or unheated crawl space works well. Avoid refrigerators—temperature fluctuations can damage roots. Check roots monthly and remove any that show signs of mold or softening.
In late winter (about 8-10 weeks before last frost), inspect roots for signs of sprouting. When you see tiny buds breaking through, it's time to repot and bring them back indoors. I always mark my calendar with the storage date so I don't forget when to check for sprouts.
Tips & tricks for perfect elephant ear root revival
Between us, I've dug up more elephant ears than I can count—and I've learned these tricks the hard way. Here's what nobody tells you about keeping those roots thriving through winter.
Timing Secret: That 2-3 week window before frost is non-negotiable. I learned this after losing a batch of roots that were dug too late. Check your local frost date and mark your calendar—those roots need time to heal before storage. If you're unsure when to dig, watch for foliage yellowing as your first clue. The plant is basically telling you it's time to go dormant!
Root Handling Technique: When lifting those roots, work gently but firmly—think of it like handling a newborn baby, not a sack of potatoes. The 6-8 inch circle around the stem is perfect for loosening soil without damaging roots. And if they break? No stress—elephant ears are tougher than they look. Just trim any damaged areas with sterilized pruners immediately to prevent rot. I keep a small bottle of rubbing alcohol handy to wipe my pruners between cuts.
Drying Strategy: That 24-48 hour drying period is your best defense against mold. I've seen too many gardeners rush this step and end up with mushy roots in storage. Spread them out in a single layer on a clean towel or newspaper—this airflow is crucial. If your garage gets too warm, move them to a cooler spot like a basement. The goal is to get them dry enough to feel papery, not damp and clingy.
Storage Wisdom: Paper bags or mesh sacks are your friends here—plastic is the enemy. I've lost entire batches to mold because I used plastic containers that trapped moisture. The 40-50°F range is ideal, but don't stress if you can't hit it exactly. Just avoid refrigerators—the temperature swings will wake those roots up too early. I store mine in a cardboard box with a few holes for airflow in my unheated garage.
Pro Tips for Dig Up Elephant Ears In Fall
- Between us, I've dug up more elephant ears than I can count—and I've learned these tricks the hard way. Here's what n...
- Timing Secret: That 2-3 week window before frost is non-negotiable. I learned this after losing a batch of roots that...
- Root Handling Technique: When lifting those roots, work gently but firmly—think of it like handling a newborn baby, n...
Frequently asked questions
Got questions about digging up elephant ears (Colocasia) in fall? You’re not alone—this task can feel tricky, especially if you’re new to tropical tubers. Below, we’ve rounded up the most common concerns and troubleshooting tips to help you tackle the job with confidence.
What’s the best time to dig up elephant ears in fall?
Dig when frost threatens or after the first light freeze (typically late October to November, depending on your climate zone). Wait until the leaves yellow or brown—this signals the plant is storing energy in its roots. If dug too early, roots may still be growing; too late, and they risk frost damage.
How deep should I dig for elephant ears tubers?
Dig 12–18 inches deep around the plant, using a spade or fork to loosen soil. Tubers grow horizontally, so gently tease them out—don’t yank! Look for knobby, corm-like roots (3–6 inches long) connected to the stem. Wear gloves; some varieties have sharp edges.
Can I leave elephant ears in the ground over winter?
Only in USDA zones 8–11! In colder climates (zones 7 and below), tubers won’t survive in the ground. Mulch heavily (with straw or leaves) for marginal hardiness, but dig and store them indoors for reliability. Pro tip: Label tubers before storing to avoid mix-ups next spring!
What if my elephant ears tubers rot during storage?
Rot usually stems from moisture or temperature swings. Store tubers in a cool (50–60°F), dry place (like a garage or basement) with good airflow. Wrap them in paper towels or peat moss, and check monthly for soft spots. If you spot mold, discard the tuber immediately—it won’t revive.
Are there alternatives to digging up elephant ears every fall?
Yes! In zones 8–11, mulch heavily (6+ inches) with straw or pine needles to insulate roots. For container-grown plants, move pots to a sheltered spot (like a garage) before frost. Just remember: Overwintering outdoors risks disease—digging remains the safest bet in colder areas.
How do I tell if a tuber is still viable after digging?
Healthy tubers are firm, plump, and free of soft spots. Gently squeeze—if it feels mushy or hollow, it’s rotten. Discard any tubers with dark bruises, mold, or a foul odor. Store only firm, dry tubers in a paper bag (not plastic) for 3–4 months until spring planting.
Wrapping up and next steps
Digging up elephant ears (Colocasia) in fall doesn’t have to be stressful—just follow these steps to revive their roots and set them up for next year’s growth! 🌱 With the right tools, timing, and care, you’ll keep your tropical favorites thriving.
Now that you’re armed with pro tips and answers to common questions, it’s time to take action.
Start by gathering your supplies, mark your calendar for late fall, and give those tubers the gentle treatment they deserve.
Once you’ve stored them properly, you’ll be ready to plant them again in spring—fresh, happy, and ready to bloom! 🌿 Want to learn how to replant them for maximum success?