
Propagation
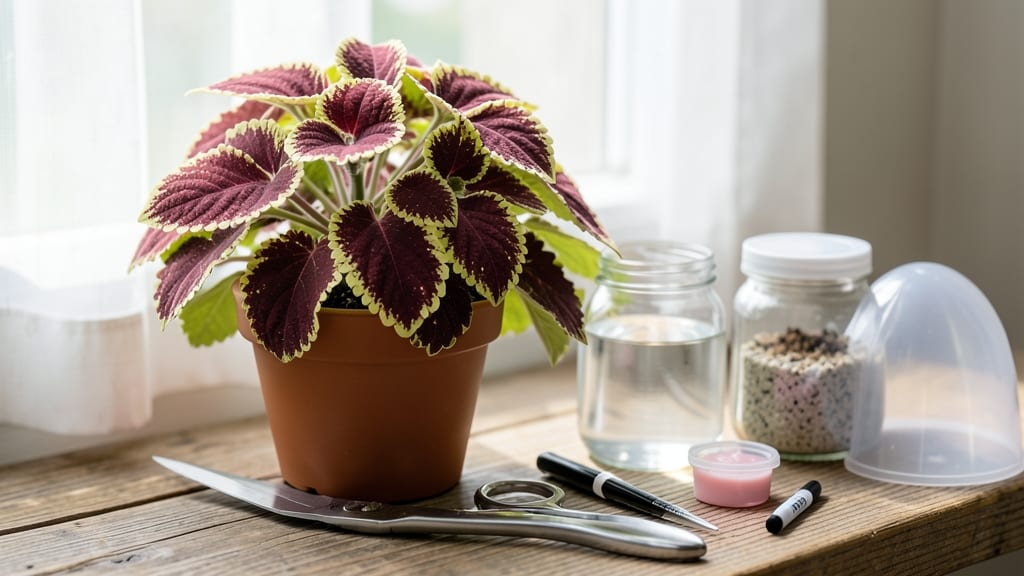
Your favorite houseplant just doubled—without buying a new one. ✂️ Taking cuttings is how I turned a single coleus into a shelf full of vibrant plants, and you can too. The best part? No fancy tools or chemicals needed—just sharp scissors, patience, and the right timing.
Start with healthy stems (4-6 inches long) from plants like mint, pothos, or succulents—they root easiest. Snip just below a leaf node where roots naturally form, then strip the lower leaves to expose the stem.
The magic happens in water or moist soil, kept warm and humid (a plastic bag works).
Within 2-4 weeks, you’ll see tiny roots forming—proof your cutting is thriving. Transplant carefully once roots hit 1-2 inches, and treat it like a baby plant until it’s strong enough to handle regular care.
Mistakes happen (overwatering, poor lighting), but even failed cuttings teach you what works next time. This method works for 90% of common houseplants, and the payoff? Free plants that outperform store-bought seedlings.
📚 In This Guide
- What you need
- Instructions
- Tips and common mistakes
- Wrapping up and next steps
What you need
- ● Healthy parent plant: Choose a non-flowering, disease-free stem (4–6 inches long, with at least 2–3 leaf nodes).
- ● Sharp pruning shears or clean knife: Sterilize with rubbing alcohol (70% or higher) to prevent contamination.
- ○ Rooting hormone (optional but helpful): Powder, gel, or liquid (e.g., Clonex or Rootone).
- ● Well-draining potting mix: 50% perlite/pumice + 50% peat moss or coconut coir (sterilized). Avoid garden soil!
- ● Small pots or propagation trays: 2–4 inches in diameter (one per cutting). Clear plastic or plastic with drainage holes works best.
- ● Clear plastic bag or humidity dome: To retain moisture (e.g., a ziplock bag with holes or a propagation hood).
- ● Spray bottle: Filled with room-temperature water for misting.
- ● Labeling tags: Pencil + small sticks or plant labels to track varieties.
- ● Heat mat: Set to 70–75°F to speed up rooting (especially for tropical plants).
- ● Grow lights: LED or fluorescent for 12–16 hours/day if natural light is weak.
- ● Fungicide (e.g., hydrogen peroxide 3%): Dab on cuts to prevent bacterial/fungal infections.
- ● Water propagation container: Jar with water + pebbles (for stem cuttings like pothos or mint).
- ● Notebook: Log dates, plant types, and rooting progress for future reference!
Step-by-step instructions for taking plant cuttings successfully
Here's the foolproof method I've used to propagate everything from herbs to shrubs—no rooting hormones needed.
🌿 Step 1: Select Healthy Stems for Cuttings
Choose stems that are 4-6 inches long with at least 2-3 sets of leaves. Look for new growth—these stems are full of energy for rooting. Avoid flowering stems or wood that's older than a year; they root poorly. The best candidates are semi-hardwood cuttings, which are firm but still green at the tip.
Use clean, sharp scissors or pruners to make a 45-degree angle cut just below a leaf node. This angled cut increases surface area for better root formation. Dip the cut end in water to check for sap flow—if it bleeds heavily, the plant is too young or stressed. That's a sign to pick another stem.
✂️ Step 2: Prepare Cuttings for Planting
Remove the lower leaves, leaving only the top 2-3 sets intact. Too many leaves mean the cutting will lose too much moisture before roots form. Trim any remaining leaves in half to reduce water loss. This is where most beginners go wrong—they leave too many leaves and the cutting wilts before it can root.
For herbaceous plants like mint or coleus, you can plant immediately. For woody plants like rosemary or lavender, let the cut ends dry and callus over for 1-2 hours first. This prevents rot when you plant. Just lay them on a paper towel in a dry, shaded spot while you prepare the rooting medium.
💧 Step 3: Create the Ideal Rooting Environment
Fill a clean container with moistened perlite or sand—these materials drain well but hold enough moisture to support root growth. I like to mix equal parts perlite and vermiculite for a balance of aeration and moisture retention. Moisten the mix until it's damp but not soggy; squeeze a handful to check—water should drip out slowly.
Make holes with your finger or a pencil, then insert the cuttings about 2 inches deep. Space them 2-3 inches apart to prevent overcrowding. Gently firm the medium around each cutting to eliminate air pockets. The goal is firm but not compacted soil—roots need good contact with the medium.
☀️ Step 4: Provide Proper Light and Humidity
Place the container in a location with bright, indirect light. Direct sun will dry out the cuttings too quickly, while too little light slows root growth. A north-facing window or under grow lights works best. Keep the humidity high by covering the container with a clear plastic bag or humidity dome—this mimics the moist conditions cuttings need to root.
Check the medium every 2-3 days and mist lightly if the surface feels dry. You'll know moisture is right when the top inch feels damp but not wet. Avoid soaking the medium—waterlogged conditions cause rot. In about 3-4 weeks, you'll see new growth at the top, signaling successful root formation.
🌱 Step 5: Transplant Established Cuttings
Once you notice new growth and the cuttings have developed a small root system (usually after 4-6 weeks), it's time to transplant. Gently remove each cutting from the rooting medium, being careful not to damage the delicate roots. Shake off excess perlite or sand and inspect for root growth—you should see fine white roots about 1-2 inches long.
Plant the cuttings in individual pots with well-draining potting mix, burying them to the same depth they were in the rooting medium. Water lightly and place them in a shaded spot for 1 week to help them adjust. After that, gradually introduce them to brighter light and normal care routines. With patience, these cuttings will grow into strong, independent plants.
Tips & tricks for perfect plant propagation
Avoid these common pitfalls—and watch your cuttings thrive like a pro. I've learned these tricks after losing more than a few plants to impatience and poor technique.
Timing is Everything: The 1-2 hour callusing period for woody plants is non-negotiable. This drying time prevents rot by allowing the cut end to form a protective layer. I've tried skipping it with rosemary cuttings, and every single one developed black rot within days. Trust me, this step makes all the difference between success and failure.
Medium Matters: While perlite and sand work well, you can also use a mix of coconut coir and perlite for better moisture retention. The key is maintaining that perfect balance—damp but never soggy. I test by squeezing a handful: if water drips out slowly, it's just right. Too much moisture leads to rot, while too little causes the cuttings to dry out before roots form.
Light Strategy: Bright indirect light is crucial, but don't overlook the importance of positioning. East-facing windows provide perfect morning sun without the harsh afternoon rays. If using artificial lights, LED grow lights work best—keep them about 6 inches above the cuttings and on for 12-14 hours daily. Too little light causes leggy, weak growth, while too much can scorch tender new leaves.
Transplanting Cues: When checking for roots in Step 5, gently tug on the cutting—if it resists slightly, roots have formed. You should also see tiny white tendrils at the base when you carefully remove the cutting from the medium. Don't rush this step; waiting until you see these signs ensures your plants will establish properly in their new pots.
Pro Tips for Cuttings
- Avoid these common pitfalls—and watch your cuttings thrive like a pro.
- Timing is Everything: The 1-2 hour callusing period for woody plants is non-negotiable.
- Medium Matters: While perlite and sand work well, you can also use a mix of coconut coir and perlite for better moisture retention.
Frequently asked questions
Got questions about taking plant cuttings? You’re not alone! Here are answers to the most common concerns—from timing to troubleshooting—to help you propagate like a pro.
What’s the best time of year to take cuttings?
The ideal window is late spring to early summer when plants are actively growing. For indoor plants, you can propagate year-round with proper lighting. Avoid winter dormancy periods—your cuttings need energy to root!
How long does it take for cuttings to root?
Most cuttings root in 2–6 weeks, depending on the plant type. Tropicals (like pothos) root faster (1–2 weeks), while woody plants (like rosemary) may take 4–8 weeks. Patience is key—check roots by gently tugging the cutting (resistance = success!).
Should I use water or soil for rooting?
Both work! Water is great for monitoring progress (like a science experiment ), but soil retains moisture better for delicate cuttings. For humidity-loving plants (e.g., ferns), soil + a plastic bag creates a mini greenhouse.
Why are my cuttings turning yellow or mushy?
Yellowing = overwatering or low light; mushy stems = rot from excess moisture. Adjust by reducing water, improving airflow, or moving to brighter (but indirect) light. Snip off damaged areas and replant healthy cuttings in fresh, sterile medium.
Can I root cuttings without hormones or chemicals?
Many plants (succulents, mint, coleus) root easily without hormones. For stubborn types, try willow water (soak willow branches in water for 24 hours, then use the liquid) or cinnamon powder on cuts to prevent infection.
Wrapping up and next steps
Mastering the art of plant cuttings is a rewarding journey that lets you grow your garden for free—no chemicals or fancy tools required!
Whether you’re multiplying herbs, succulents, or flowering plants, the key lies in patience, the right technique, and a little green thumb love. 🌱 With these proven steps, you’re now equipped to propagate like a pro and expand your plant family effortlessly.
Ready to dive deeper? Start with your easiest-to-root plant—like pothos or mint—and practice! Soon, you’ll be sharing cuttings with fellow plant enthusiasts or even selling your greens. Happy propagating! 🌿