
Propagation
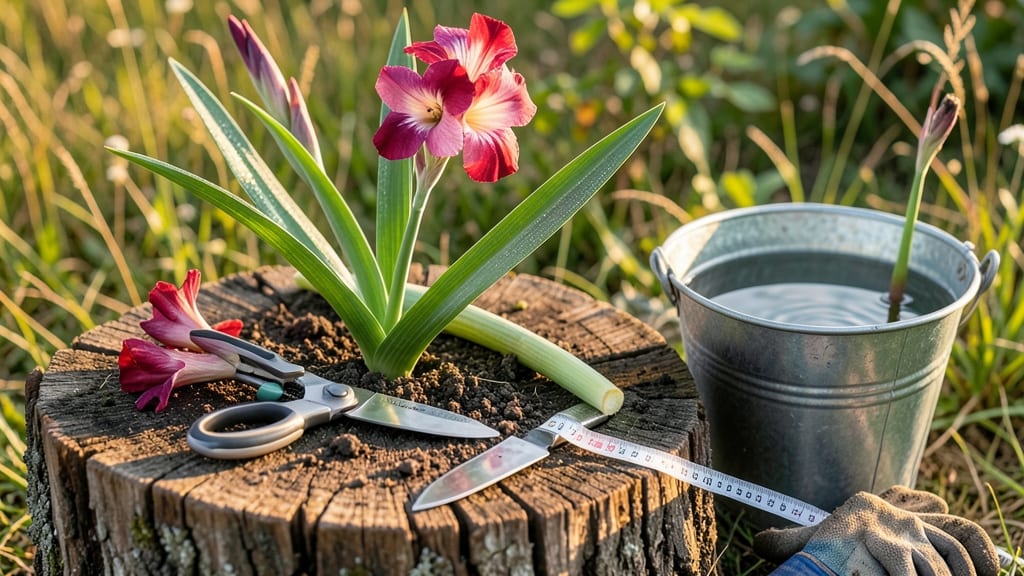
How to cut gladiolus for vase life longer than a weekend? ✨ The secret starts in the garden—not with fancy tools, but with sharp scissors and perfect timing when the buds are just beginning to swell. Cut too early, and you’ll get limp stems; too late, and the blooms won’t last at all.
You’ll need just three simple tools: clean, sharp pruners (or scissors), a bucket of water, and a vase. The real magic happens in the 45-degree angle cut just above a leaf node—never straight across.
This angle lets stems drink water better, keeping blooms fresh for up to 10 days in the vase.
After cutting, strip off the lower leaves (they rot in water) and recut stems under running water to remove blocked vessels. Store stems overnight in a cool, dark place—this hydrates them before arranging. The result? Blooms that stay vibrant, not wilting, long after they’re cut.
This method works for any gladiolus variety, from bold reds to delicate whites. Whether you’re arranging for a centerpiece or a quick bouquet, these steps turn garden cuttings into showstopping displays. Let’s make those blooms last!
📚 In This Guide
- What you need
- Instructions
- Tips and common mistakes
- Wrapping up and next steps
What you need
- ● Fresh gladiolus blooms: 6–12 stems (or more, depending on your vase size). Choose fully opened or nearly opened buds for the best vase life.
- ● Sharp pruning shears or clean kitchen scissors: A must-have for clean cuts—dull blades crush stems and shorten vase life. 🔪
- ● Bucket or large container: Fill with lukewarm water (about 2–3 inches deep) to hydrate stems before arranging.
- ● Vase or floral arrangement container: Any size works, but ensure it can hold enough water to submerge at least 2–3 inches of stem.
- ○ Floral preservative (optional but recommended): A packet like Floralife or homemade mix (1 tsp bleach + 1 tsp sugar per quart of water) to extend bloom life.
- ● Hydrogen peroxide (3%): Add 1 capful to vase water to prevent bacterial growth and keep stems crisp.
- ● Floral foam or chicken wire: For securing stems in tight spaces or DIY arrangements.
- ● Decorative elements: Greenery, pebbles, or ribbon to elevate your centerpiece.
- ● Newspaper or towel: To protect surfaces while working.
Step-by-step instructions for cutting gladiolus for vase arrangements
Here’s how to harvest and prep gladiolus stems for the longest-lasting bouquets—no fancy tools needed.
✂️ Step 1: Choose the Right Blooms
Pick stems when the bottom flower bud is just starting to open but the rest remain tightly closed—this ensures freshness. Avoid cutting stems that already have open flowers or show signs of wilting. I look for buds that feel firm to the touch and have vibrant color. The best time to cut is early morning when the stems are fully hydrated.
Use clean, sharp pruning shears or a knife to make a clean cut at a 45-degree angle about 2 inches below the lowest bud. This angled cut increases the surface area for water absorption, which keeps stems hydrated longer. If you’re cutting multiple stems, I like to work in batches of four to keep everything organized.
💧 Step 2: Strip and Condition the Stems
Once cut, immediately strip the lower leaves and any damaged foliage, leaving only the top 6-8 inches of stem attached. This reduces bacterial growth in the water and helps the stems focus energy on opening the blooms. Use your fingers or a small knife to gently remove leaves—don’t tear them, as this can bruise the stem.
Place the stems in a bucket of lukewarm water for about 30 minutes before arranging. This rehydration step helps revive the stems after cutting and prevents wilting. If you’re short on time, even 10 minutes in water makes a noticeable difference. Avoid cold water, as it can shock the stems and shorten their vase life.
☀️ Step 3: Trim and Arrange for Maximum Freshness
Before placing stems in the vase, recut the bottom ½ inch of each stem at an angle while submerged in water. This fresh cut opens up the stem’s vascular system, allowing it to drink up water more efficiently. I like to do this step right before arranging to ensure the stems stay hydrated.
Fill your vase with room-temperature water and add a commercial floral preservative or a homemade mix of 1 teaspoon sugar + 1 teaspoon bleach per quart of water to prevent bacterial growth. Arrange the stems loosely—don’t overcrowd the vase, as this can cause stems to compete for water and shorten their lifespan. Change the water every 2-3 days for the longest-lasting blooms.
🌿 Step 4: Maintain Blooms for Extended Life
Keep your gladiolus arrangement in a spot with bright, indirect light—direct sunlight can cause the blooms to wilt faster. Avoid placing the vase near heat sources like radiators or drafty areas, as temperature fluctuations stress the stems. I like to mist the blooms lightly with water every few days to keep them hydrated from the outside as well.
Watch for signs of wilting, such as drooping petals or yellowing leaves. If you notice this, trim the stems again under water and refresh the vase solution. With proper care, your gladiolus bouquet can last 7-10 days—far longer than store-bought arrangements. Enjoy the vibrant colors and sweet fragrance while they last!
Tips & tricks for perfect gladiolus stem prep
Here's what nobody tells you about keeping those gorgeous gladiolus blooms fresh for days—these little details make all the difference.
Timing is Everything: That 30-minute lukewarm water soak in Step 2 isn't just a suggestion—it's the secret to reviving stems after cutting. I've seen stems that looked wilted immediately perk up after this step. If you're really short on time, even 10 minutes makes a noticeable difference, but don't skip it completely. The stems need that hydration boost to open their buds properly. Trust me, the difference between a droopy bouquet and one that lasts a week often comes down to this single step.
Cutting Technique Matters: When you make that initial 45-degree cut in Step 1, imagine you're creating a little water intake port for each stem. The wider the cut, the more surface area there is for water absorption. I like to use a sharp knife rather than scissors because it gives me better control over that angle. And here's a pro move: if you're cutting multiple stems, work in batches of four—it keeps everything organized and prevents stems from drying out while you finish.
The Final Trim Secret: That little ½-inch recut you do right before arranging in Step 3 is crucial—it's like giving your stems a fresh start. Make sure you do this while the stems are submerged in water to prevent air bubbles from blocking the vascular system. I've found that stems recut this way will drink up water like never before, which is why they last so much longer in the vase. Don't skip this step even if the stems look perfect—it's the difference between 5 days and 10 days of fresh blooms.
Lighting Location: The bright, indirect light mentioned in Step 4 is non-negotiable. Direct sunlight can cause the petals to wilt faster, while too little light prevents the buds from opening fully. I've had the best results placing arrangements near an east-facing window where they get morning light but are protected from harsh afternoon sun. And that little misting trick? It's not just for show—it helps maintain the humidity these tropical-looking flowers love.
Pro Tips for Cut Gladiolus For Vase
- Here's what nobody tells you about keeping those gorgeous gladiolus blooms fresh for days—these little details make all the difference.
- Timing is Everything: That 30-minute lukewarm water soak in Step 2 isn't just a suggestion—it's the secret to reviving stems after cutting.
- Cutting Technique Matters: When you make that initial 45-degree cut in Step 1, imagine you're creating a little water intake port for each stem.
Frequently asked questions
Got questions about cutting gladiolus for your vase? You’re not alone! Here are answers to the most common queries to help you create stunning, long-lasting bouquets with ease.
When is the best time to cut gladiolus for a vase?
Cut gladiolus when half the lower buds have opened but the top buds are still tightly closed. This ensures the flowers will bloom gradually in your vase, extending their lifespan. Avoid cutting fully open blooms—they’ll wilt faster!
How do I cut the stems properly to maximize vase life?
Use a sharp knife or pruners to make a 45-degree angle cut about 2 inches from the base. This increases water absorption. Remove any lower leaves that’ll sit in water to prevent bacterial growth. Pro tip: Recut stems every few days for fresh water uptake!
What’s the secret to keeping cut gladiolus fresh longer?
Change the vase water every 2–3 days and add a flower food packet (or a mix of sugar + bleach) to fight bacteria. Place stems in cool water (not cold) and avoid direct sunlight, which can cause wilting. A splash of vinegar (1 tsp per quart) also helps!
Can I cut gladiolus from my garden and still have them rebloom?
Yes! Leave at least 3–4 healthy leaves on the stalk after cutting to fuel regrowth. If you cut too many stems, the plant may not rebloom. For best results, harvest no more than 1/3 of the stems per plant.
What if my cut gladiolus wilt quickly? Troubleshooting tips.
- Check the stems: If they’re mushy or slimy, they’ve absorbed bacteria—trim them again and change the water.
- Ethylene gas: Keep gladiolus away from fruits (like apples) or other flowers, as ethylene speeds up wilting.
- Heat stress: Avoid placing them near heat sources (radiators, sunny windowsills).
Wrapping up and next steps
Cutting gladiolus stems for your vase is simpler than you think—and the results are worth it! With the right tools, a sharp trim, and a little patience, you’ll enjoy vibrant blooms that last for weeks.
Remember: timing, clean cuts, and proper hydration are your secret weapons for long-lasting beauty.
Now that you’re ready to showcase your gladiolus like a pro, why not take it a step further? Experiment with different vase arrangements or try preserving your blooms for even longer enjoyment. Happy arranging! 🌸✨