
Propagation
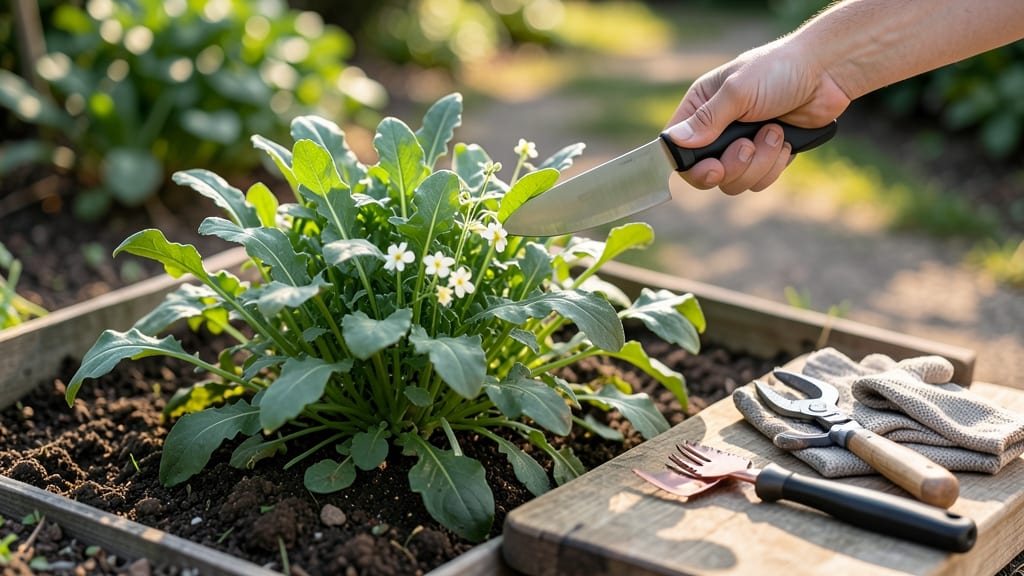
Cutting arugula wrong can turn your peppery harvest into sad, stunted plants. ✂️ The right technique keeps your greens thriving for weeks of fresh cuts—no bolting, no bitter leaves, just steady regrowth. I’ve learned the hard way that timing and tools make all the difference.
You only need two things: sharp scissors (or clean pruners) and a sunny morning. Avoid dull blades—they crush stems, inviting rot. Harvest when leaves reach 3-4 inches, cutting just above the lowest set of leaves to encourage new growth. Never pull leaves; this damages roots and stresses the plant.
With each cut, you’ll see fresh leaves sprouting within 5-7 days, as long as you avoid harvesting more than ⅓ of the plant at once. The secret? Cutting stems at a 45-degree angle lets water run off, preventing fungal issues. This method works for both container-grown and in-ground arugula.
Pro tip: Harvest outer leaves first to protect the center. If your arugula bolts (goes to seed), you’ve waited too long—next time, watch for flower stalks and cut them off immediately. This keeps your plants producing tender leaves for 6-8 weeks in ideal conditions.
📚 In This Guide
- What you need
- Instructions
- Tips and common mistakes
- Wrapping up and next steps
What you need
- ● Fresh arugula: 1 bunch (about 5–7 oz) or a pre-packaged container (check for firm stems and vibrant leaves).
- ● Sharp chef’s knife: 6–8 inches long (a serrated edge works best for clean cuts).
- ● Cutting board: A large, stable board (12x18 inches) to prevent slipping. Wood or plastic with a non-slip mat is ideal.
- ● Paper towels or clean kitchen towel: For blotting excess moisture.
- ○ Small bowl or colander: To hold trimmed leaves (optional but handy for rinsing or storing).
- ● Kitchen shears: For quick trimming if you’re in a hurry.
- ● Food-safe sanitizer spray: To disinfect the cutting board and knife.
- ● Salad spinner: If you plan to rinse the leaves post-cutting.
- ● Glass storage container: For keeping trimmed arugula fresh in the fridge.
Step-by-step instructions for cutting arugula like a pro
Harvesting arugula properly keeps your plants thriving and your greens at peak flavor.
✂️ Step 1: Wait for the Right Time to Harvest
Cut arugula when the leaves reach 3-4 inches tall—this is when they're most tender and packed with flavor. Younger leaves taste milder, while older leaves can turn bitter. I like to check my plants every 3-4 days in spring and summer, as they grow fast in warm weather.
Look for bright green, crisp leaves with no yellowing at the edges. If you see flowers starting to form (those pretty white or yellow blooms), it's time to harvest—those leaves will get tough and bitter fast. The best time to cut is in the morning, right after the dew dries but before the heat of the day sets in.
✂️ Step 2: Choose the Right Cutting Method
For continuous harvests, use the stem-to-leaf method: hold the base of the plant with one hand and cut just above the soil line with clean, sharp scissors or shears. This encourages new growth from the stem and keeps your plant producing for 4-6 weeks before it bolts (goes to seed).
If you prefer larger leaves, snip individual leaves at their base with scissors. This method is gentler on the plant but won’t stimulate as much regrowth. Always use clean scissors—dirt or old sap can introduce diseases. I like to wipe the blades with rubbing alcohol between cuts to keep everything sanitized.
🌿 Step 3: Harvest Strategically for Longevity
Never cut more than one-third of the plant at once—this prevents shock and keeps your arugula producing. If you're harvesting for a recipe, pick the outer leaves first, leaving the inner, younger leaves to keep growing. These inner leaves stay tender longer and give you a steady supply.
Watch for signs of stress like yellowing leaves or wilting after cutting. If this happens, your plant needs a break—skip a harvest cycle and let it recover. In hot weather, arugula bolts quickly, so frequent small harvests keep it productive longer. I’ve had plants last 6-8 weeks with proper care, even in summer.
💧 Step 4: Post-Harvest Care for Regrowth
After cutting, water the plant deeply at the base to help it recover. Avoid wetting the leaves, as this can cause fungal issues. Arugula thrives in cool weather (50-65°F) and struggles in heat—if temps rise above 75°F, it bolts fast. Mulch around the base with 1-2 inches of straw to retain moisture and keep roots cool.
Fertilize lightly with balanced liquid fertilizer (10-10-10) every 2-3 weeks after harvesting to replenish nutrients. Over-fertilizing can lead to bitter leaves, so dilute it to half-strength. If your arugula starts looking leggy or sparse, it’s time to replant—these greens grow quickly, so succession planting every 2 weeks ensures a steady supply.
⏰ Step 5: Store Harvested Arugula Properly
Wash harvested arugula right before use—it holds up best unwashed in the fridge. Place it in a sealed container with a paper towel to absorb moisture, then store it in the crisper drawer for up to 5-7 days. For longer storage, wrap the leaves in a damp paper towel, place them in a bag, and refrigerate.
If you’re not using it immediately, blanch and freeze for later: Dip leaves in boiling water for 30 seconds, then plunge into ice water to stop cooking. Drain, dry, and pack into freezer bags. Frozen arugula keeps for 3 months and works great in soups or smoothies. Fresh-cut arugula holds its peppery kick best when used within 2-3 days.
Tips & tricks for perfect arugula harvesting
Here's what nobody tells you about keeping your arugula thriving after each harvest.
Timing is Everything: The morning after dew dries but before 9 AM is ideal for harvesting—this is when arugula's peppery flavor is most intense. I've noticed that leaves harvested at this time stay crisp longer and hold their bright green color for up to 2 days in the fridge. In summer, harvest every 3-4 days to prevent bolting, while in cooler months, you can stretch to 5-6 days between harvests.
The Stem-to-Leaf Method Secret: When using the stem-to-leaf method in Step 2, make your cuts at a 45-degree angle just above the soil line. This creates a larger surface area for water absorption, helping the plant recover faster. I've found that making straight cuts can actually prevent new growth from emerging properly. Also, always use pruning shears or clean scissors—dull blades crush stems and invite disease.
Heat Management: Arugula thrives in temperatures between 50-65°F. When your area hits 75°F or above, it's time to switch to shade cloth or harvest more frequently. I've had success growing arugula in summer by providing afternoon shade—this can extend your harvest window by 2-3 weeks. Watch for yellowing leaves as your first sign of heat stress, and respond immediately by moving plants to cooler conditions.
Strategic Storage: For maximum freshness after harvesting, store arugula in a sealed container with a paper towel to absorb moisture—this mimics its natural environment and keeps leaves crisp for the full 5-7 days. I've found that wrapping leaves in a damp paper towel before refrigerating actually extends freshness by an extra day. When freezing, the 30-second blanch is critical—it preserves color and texture while stopping enzyme activity that causes freezer burn.
Pro Tips for Cut Arugula
- Here's what nobody tells you about keeping your arugula thriving after each harvest.
- Timing is Everything: The morning after dew dries but before 9 AM is ideal for harvesting—this is when arugula's peppery flavor is most intense.
- The Stem-to-Leaf Method Secret: When using the stem-to-leaf method in Step 2, make your cuts at a 45-degree angle just above the soil line.
Frequently asked questions
Got questions about cutting arugula? You’re not alone! Here are answers to the most common queries—from timing to troubleshooting—to help you master the art of harvesting this peppery green like a pro.
Do I need to cut arugula stems, or can I just snip the leaves?
While you can harvest just the leaves, cutting stems (about 1 inch above the base) encourages regrowth and keeps the plant healthy. For a full harvest, aim to trim ⅓ of the plant at a time, leaving enough foliage for future growth. If you’re using it all, snipping leaves is fine—but stems taste milder and add texture!
How often should I cut arugula for continuous harvest?
Harvest arugula every 2–3 weeks for the best balance of flavor and yield. If you’re growing it in warm weather, more frequent trims (every 1–2 weeks) prevent bolting (flowering). Pro tip: Morning harvests yield the crispest leaves, as daytime heat can make them wilt faster.
What’s the best way to store cut arugula to keep it fresh?
Wrap stems in a damp paper towel, place in a sealed container, and refrigerate for up to 5–7 days. For longer storage, blanch and freeze leaves (toss in ice water, dry, then freeze in a bag). Don’t wash before storing—excess moisture speeds up spoilage!
Can I regrow arugula after cutting it multiple times?
Yes! Arugula is a cut-and-come-again green. After each harvest, water well and fertilize lightly (use a balanced 10-10-10 or compost tea). Avoid cutting more than ⅓ of the plant at once, or you’ll stunt regrowth. Most varieties tolerate 3–4 harvests per season before bolting.
Why does my arugula turn bitter after cutting?
Bitter flavor usually means the plant is bolting (flowering) due to heat or age. To prevent this, harvest young leaves frequently and keep plants in cool (50–65°F) conditions. If it’s already bitter, mix it with sweeter greens (like spinach) or pair with rich flavors (balsamic, nuts, or cheese) to balance the taste.
What’s the quickest way to cut arugula for salads?
For salads, stack leaves and roll them tightly, then slice diagonally with a sharp knife. This creates uniform ribbons and minimizes waste. Bonus: Use a mandoline (with caution!) for ultra-thin, restaurant-style cuts. Always cut on a cutting board to protect your knife!
Wrapping up and next steps
Mastering how to cut arugula is a game-changer for any home gardener or chef—it keeps your greens fresh, flavorful, and ready for meals in no time! 🌱 Whether you’re harvesting from your garden or prepping store-bought leaves, the key is precision and patience.
Now that you’ve got the step-by-step guide, go ahead and try it with confidence—your salads, sandwiches, and stir-fries will thank you!
Ready to level up? Experiment with different recipes—try blending arugula into pesto, tossing it into grain bowls, or even fermenting it for a tangy twist. Happy harvesting! 🌿