
Propagation
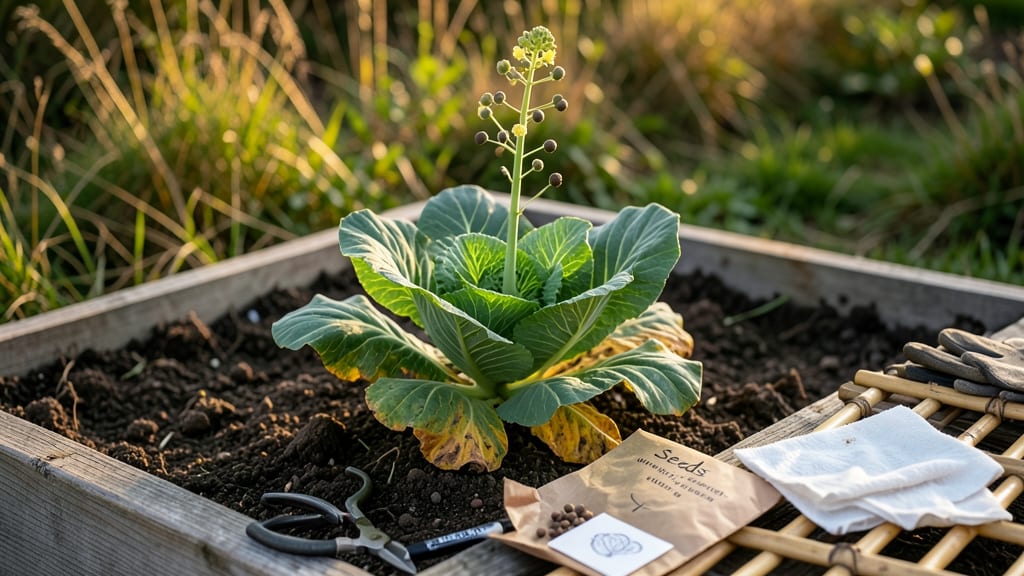
Collecting cabbage seeds from your garden saves money and preserves heirloom varieties. 🌱 The process starts with letting plants bolt—yes, that means letting them flower—before harvesting the mature seed pods. Most gardeners skip this step, but those dried pods hold the key to next year's harvest.
You'll need patience and a dry, well-ventilated spot to work. Once the seed pods turn brown and papery (usually 6-8 weeks after flowering), carefully twist them off the stems. Avoid green pods—they won't be ready. Store pods in a paper bag until fully dry to prevent mold.
After drying, crack open the pods to reveal tiny black seeds. These are your future cabbage plants! Properly stored in a cool, dark place, they'll stay viable for 3-5 years. The payoff? Fresh, homegrown cabbage that tastes better than anything you've ever bought.
Here's the catch: cabbage cross-pollinates easily, so save seeds only from plants you want to repeat. If growing multiple varieties, isolate them by at least 500 feet to maintain purity. Now grab those pods—your seed-saving journey starts here!
📚 In This Guide
- What you need
- Instructions
- Tips and common mistakes
- Wrapping up and next steps
What you need
- ● Mature cabbage plants: Choose healthy, disease-free plants with fully formed seed heads (bolting plants). Aim for at least 3-5 plants to ensure a good seed yield.
- ● Pruning shears or sharp scissors: For cleanly harvesting seed heads. A sterilized tool prevents contamination.
- ● Paper bags or breathable seed-saving envelopes: Use 1-2 bags per plant, labeled with the variety name and date (e.g., "January 2025"). Avoid plastic—it traps moisture!
- ● Drying rack or mesh screen: A flat, elevated surface (like a wooden rack or even a window screen) to air-dry seeds. Ensure it’s in a dry, well-ventilated spot.
- ● Fine-mesh strainer or sieve: For separating seeds from chaff. A #20 or #30 mesh works best.
- ○ Small containers (optional for storage): Airtight jars or envelopes with desiccant packets to keep seeds dry.
- ● Labeling tags: Write variety names and harvest dates directly on bags or containers for easy organization.
- ● Fan or dehumidifier: Speeds up drying in humid climates. Place near your drying rack for faster results.
- ● Magnifying glass: Helps inspect seeds for purity and viability before storage.
- ● Seed catalog or notebook: Track germination rates and notes on each variety for future reference.
Step-by-Step instructions for collecting cabbage seeds
Here's how to save seeds from your best cabbage plants—no fancy tools needed.
🌱 Step 1: Select the Right Cabbage Plants
Choose the healthiest, most productive cabbage plants in your garden—these will yield the best seeds for next year. Look for plants that show no signs of disease, pests, or stress. I always pick the ones that matured earliest, as they tend to pass on those traits. Avoid hybrid varieties (they often don’t produce true seeds), and stick to open-pollinated types like ‘Golden Acre’ or ‘January King.’
Let the selected plants mature fully on the stalk. You’ll know they’re ready when the cabbage head turns yellow and dries out completely, almost like a papery husk. This process usually takes 4-6 weeks after harvesting the main head. Don’t rush—wait until the entire head is crispy and brown before proceeding.
☀️ Step 2: Harvest the Seed Pods
Once the dried head is fully brown, carefully cut it from the stalk and place it in a paper bag (plastic traps moisture and encourages mold). Hang the bag upside down in a dry, well-ventilated spot like a shed or garage. This lets the seed pods inside the head open naturally over the next 2-3 weeks. The pods will split open, releasing small, dark brown seeds.
Shake the bag gently every few days to help loosen any seeds that haven’t fallen out yet. If you miss this step, the seeds might scatter on the floor—so keep an eye on it! I like to use a second bag lined with a screen to catch stray seeds while allowing airflow.
🪴 Step 3: Clean and Dry the Seeds
Once the pods are fully open, pour the seeds and debris onto a clean towel or screen. Gently sift through them to remove any chaff, stems, or empty pods. Cabbage seeds are tiny and dark brown, so take your time—you’ll spot the good ones as they’re plump and uniform. Discard any seeds that look shriveled or discolored.
Spread the clean seeds in a single layer on a paper towel or mesh screen in a warm, dry place (around 70-75°F). Let them dry for 1-2 weeks, stirring occasionally to prevent clumping. You’ll know they’re ready when they’re completely dry to the touch—no moisture left at all. Store them in a sealed envelope or airtight container labeled with the variety and year.
⏰ Step 4: Store Seeds Properly
Place the dried seeds in a cool, dark location (like a refrigerator or seed vault) where the temperature stays below 50°F. Cabbage seeds stay viable for 3-5 years under these conditions, though germination rates drop after year 2. I always include a silica gel packet in the container to absorb any lingering moisture.
Before replanting, do a quick germination test: Moisten a paper towel, place 10 seeds on it, and fold it up. Keep it in a warm spot for 5-7 days. If at least 80% sprout, your seeds are still good to go. If fewer than half sprout, consider saving them for microgreens instead of full plants.
Tips & tricks for perfect cabbage seed collection
Here's what nobody tells you about getting the most from your cabbage seed harvest.
Patience is Key: In Step 1, those 4-6 weeks waiting for the head to fully dry out might feel long, but rushing leads to poor seed quality. I've learned the hard way—green or partially dried heads yield seeds that won't germinate well. Check daily after week 4, running your fingers through the outer leaves. They should crumble easily when completely dry.
Bagging Strategy: The paper bag in Step 2 isn't just about catching seeds—it's about airflow. I've found that adding a few small holes in the bag (about pencil-sized) actually helps prevent mold while still allowing seeds to fall out. Just don't make them too big, or you'll lose seeds to drafts. Place the bag in a spot where temperature stays between 65-75°F for optimal seed release.
Seed Selection: During the cleaning in Step 3, focus on uniformity. The good seeds will be plump, dark brown, and about the size of a pinhead. I use a fine mesh strainer to separate seeds from chaff, then do a final inspection under good lighting. Discard any seeds with white spots—they're likely to be empty or damaged. For extra assurance, float test them in water: good seeds sink while empty ones float.
Storage Secrets: When storing your seeds in Step 4, don't just rely on the refrigerator. I've had best results using small, labeled glass jars with tight-sealing lids in the back of my freezer (below 32°F). The cold helps preserve viability longer than just fridge temps. Add a tiny packet of rice or silica gel to absorb any moisture that might sneak in during the 3-5 year storage period.
Pro Tips for Collect Cabbage Seeds
- Here's what nobody tells you about getting the most from your cabbage seed harvest.
- Patience is Key: In Step 1, those 4-6 weeks waiting for the head to fully dry out might feel long, but rushing leads ...
- Bagging Strategy: The paper bag in Step 2 isn't just about catching seeds—it's about airflow. I've found that adding ...
Frequently asked questions
Got questions about saving cabbage seeds? You’re not alone! Here are some of the most common concerns—and their easy answers—to help you master the process like a pro.
How do I know when cabbage seeds are fully mature and ready to harvest?
Cabbage seeds are ready when the seed pods turn brown, dry, and papery—usually 4–6 weeks after flowering. If you squeeze a pod and it crinkles instead of squishing, it’s time to harvest! Avoid waiting too long, or the pods may burst open and scatter seeds.
Can I collect seeds from store-bought cabbage, or do I need heirloom varieties?
Store-bought cabbage is often hybridized (F1), meaning its seeds won’t grow true to the parent plant. For reliable results, use heirloom or open-pollinated varieties labeled for seed saving. Check seed packets for a “OK for seed saving” note!
What’s the best way to dry cabbage seeds to prevent mold or spoilage?
Spread seeds on a paper towel or mesh screen in a cool, dry, well-ventilated spot (like a shelf or cardboard box with holes). Avoid direct sunlight or humidity—ideal conditions are 60–70°F (15–21°C). Stir them gently every few days to speed drying (usually 1–2 weeks).
How long can I store cabbage seeds, and how do I test their viability?
Properly stored cabbage seeds last 3–5 years in a cool, dark place (like a sealed jar in the fridge or freezer). To test viability, plant a few seeds in moist paper towels—if 50%+ sprout within 7–10 days, your seeds are good to go! Pro tip: Label seeds with the variety and date for easy tracking.
What should I do if my cabbage plants bolt (go to seed) too early?
Bolting often happens in heat or stress (like drought or transplant shock). To prevent it, choose cool-season varieties, use shade cloth in hot climates, and keep soil consistently moist. If bolting occurs, focus on harvesting seeds—just avoid letting pods dry on the plant, as this can attract pests or spread disease.
Wrapping up and next steps
Collecting cabbage seeds is a rewarding way to ensure next year’s harvest thrives with heirloom varieties! By following these steps—selecting healthy plants, allowing flowers to mature, and properly drying and storing seeds—you’ll unlock a sustainable gardening cycle. Your patience today will pay off with fresh, homegrown cabbages tomorrow!
Ready to dive deeper? Explore our guide on growing cabbages from saved seeds—your garden’s next adventure starts here! 🌱