
Flowers
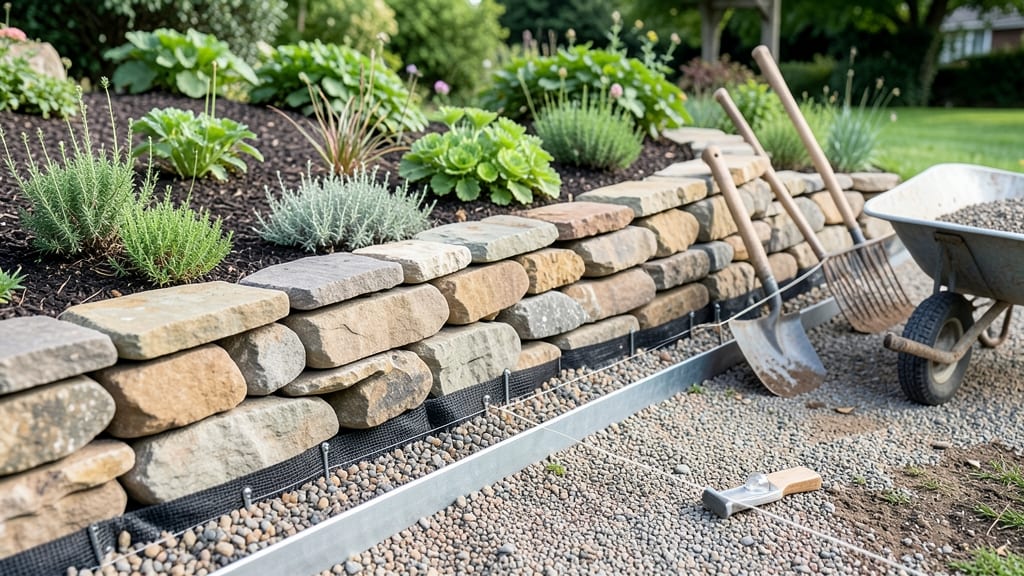
Building a stone flower bed on a slope turns a tricky space into your garden’s star feature. 🌿 The secret isn’t brute strength—it’s letting gravity work with you by layering stones, soil, and plants to create terraces that stay put and look intentional.
My first attempt nearly slid downhill, but I learned the right techniques to make it stable and stunning.
You’ll need flat stones for edges, gravel for drainage, and sturdy landscape fabric to keep soil in place. The key is working in short, wide sections—think of each layer as a step, not a wall.
This approach prevents erosion, controls water runoff, and gives plants room to thrive without washing away. Even a gentle slope benefits from this method, and the results are worth the effort.
By the end, you’ll have a terraced bed that stops soil from sliding, channels water where it belongs, and frames your plants like a living work of art.
The stones add texture, while the layered design creates built-in seating or pathways. Plus, you’ll avoid the heartbreak of watching your hard work slump mid-season.
This works for any slope—steep or gradual—and adapts to rocky or sandy soil. The same principles apply whether you’re dressing up a backyard hillside or taming a wild garden corner. Let’s get those stones stacked right!
📚 In This Guide
- What you need
- Instructions
- Tips and common mistakes
- Wrapping up and next steps
What you need
- ● Landscape fabric: 10–20 sq. ft. (depending on slope size) – water-permeable, weed-blocking
- ● Drainage rocks: 2–3 cubic feet of crushed gravel (¾"–1") or perlite
- ● Retaining stones: 50–100 lbs of flagstone, cobblestone, or river rock (2"–6" thick)
- ● Topsoil: 1–2 cubic feet of high-quality garden soil (mix with compost for nutrients)
- ● Mulch: 1–2 bags of wood chips or bark (for moisture retention)
- ○ Edging material (optional): brick, metal, or plastic edging (to define borders)
- ● Plants: Choose slope-friendly perennials, shrubs, or ground covers (e.g., lavender, sedum, or creeping thyme)
- ● Shovel & spade (for digging and leveling)
- ● Wheelbarrow (for hauling materials)
- ● Level & measuring tape (to ensure even layers)
- ● Rake & tamper (for smoothing soil and stones)
- ○ String line & stakes (optional) (for marking terraces)
- ● Safety gear: gloves, knee pads, and dust mask
- ● Slope assessment: Check for erosion risks or unstable soil.
- ● Permits (if needed): Check local regulations for slope modifications.
- ● Weather check: Avoid working in heavy rain or extreme heat.
Step-by-step instructions for building a stone flower bed on a slope
Terracing a slope with stones creates a stable, beautiful garden space that prevents erosion and showcases plants perfectly.
🪴 Step 1: Assess the Slope and Mark Terracing Levels
Start by walking the slope to visualize where each terrace will sit. Use a 4-foot level to mark horizontal lines where each stone layer will begin—this prevents water from pooling and ensures stability. I like to space terraces 2-3 feet apart vertically, depending on the slope's steepness. For a 4-foot slope, you'll likely need 2-3 terraces total.
Drive a wooden stake at each marked line and tie a string between them to create a straight guide. This ensures your stone edges stay level. If the slope is very steep, consider adding a 3rd stake in the middle for extra support. Check your work by walking along the string—if it feels uneven, adjust the stakes until it's perfectly horizontal.
💧 Step 2: Excavate and Build Retaining Walls
Dig a trench along your marked line, about 12 inches wide and 6-8 inches deep. The depth depends on your stone size—bigger stones need deeper trenches for stability. Place the largest, flattest stones at the bottom of the trench, butting them tightly together to form the base of your terrace. Use a rubber mallet to tap stones into place without cracking them.
As you build upward, stagger the stones like brickwork so they interlock. Leave a slight 1-inch gap between stones for drainage—this prevents water from pooling behind the wall. For extra strength, weave landscape fabric vertically behind the stones before backfilling with soil. This keeps roots from pushing the stones outward over time.
☀️ Step 3: Add Drainage and Backfill with Soil
Before adding soil, create a drainage layer of 1-2 inches of gravel behind the stone wall. This redirects water away from the terrace and prevents erosion. Fill the terrace with a mix of topsoil and compost (I use a 50/50 blend) to give plants the nutrients they need. For a 4-foot-wide terrace, you'll need about 2 cubic feet of soil per foot of length—measure your space beforehand.
Rake the soil smooth and slightly mound it in the center of the terrace. This encourages water to flow toward the edges, where drainage gaps exist. Press down lightly with your hands to remove air pockets, but don’t compact it too much—roots need room to grow. If your slope is prone to heavy rain, add a permeable weed barrier under the soil to keep weeds from choking your plants.
✂️ Step 4: Plant and Stabilize the Terrace
Choose deep-rooted, erosion-resistant plants like sedum, lavender, or ornamental grasses for the edges of each terrace. These anchor the soil and prevent stones from shifting. For a 4-foot terrace, plant 3-5 perennials spaced 12-18 inches apart, leaving room for annuals or smaller flowers in the center. Water deeply after planting to help roots establish.
Top the terrace with 2-3 inches of mulch to retain moisture and suppress weeds. Use wood chips or gravel—both work well, but wood chips break down over time and improve soil as they decompose. Avoid placing mulch directly against plant stems; keep it 2 inches away to prevent rot. After a week, check for any shifting stones and readjust if needed—this is especially important after the first rain.
🌿 Step 5: Maintain and Expand Over Time
Once your terraces are established, water deeply once a week (or more in dry spells) to encourage strong root growth. Use a soaker hose along the edges to direct water evenly without disturbing the stones. Fertilize in early spring with a slow-release granular fertilizer—this feeds plants all season without burning them. I like to top-dress with compost annually to replenish nutrients.
If any stones shift after heavy rain or freeze-thaw cycles, gently tap them back into place. Over time, you can expand your design by adding stepping stones or low borders between terraces for a polished look. The key is patience—let plants grow into the space before making major adjustments. With proper care, your stone flower bed will stay stunning for years.
Tips & tricks for building a stone flower bed on a slope
These simple strategies will help you create terraces that last through seasons and storms.
The Leveling Secret: If you don't have a 4-foot level, use a long board or even a straight piece of PVC pipe with a carpenter's level attached. Place it on your marked line and adjust until perfectly horizontal—this ensures your terraces won't develop water pooling issues. I've seen people try to eyeball it, but trust me, that's how water starts eroding your hard work after the first rain.
Stone Selection Strategy: Collect stones of varying sizes—larger ones for the base and smaller ones for the top layers. This creates a natural, cascading look while maintaining stability. I like to gather stones from my property first (like river rocks or field stones), but if you need to buy, look for "retaining wall stones" at garden centers—they're specifically shaped for interlocking.
Drainage Upgrade: For slopes prone to heavy rain, add a perforated drain pipe behind your stone walls before backfilling. Cut it to fit the length of each terrace and angle it slightly downward to direct water away from the garden. This is especially important if your slope faces north where water runoff is more intense. The extra effort prevents future erosion headaches.
Plant Placement Pro Tip: When planting your 3-5 perennials on the edges, position them slightly higher than the terrace center. This creates a natural waterfall effect and prevents soil from washing out during heavy rains. The deep-rooted plants will also help anchor the stones over time—just make sure to water them deeply after planting to encourage root establishment.
Pro Tips for Build A Stone Flower Bed On A Slope
- These simple strategies will help you create terraces that last through seasons and storms.
- The Leveling Secret: If you don't have a 4-foot level, use a long board or even a straight piece of PVC pipe with a c...
- Stone Selection Strategy: Collect stones of varying sizes—larger ones for the base and smaller ones for the top layer...
Frequently asked questions
Got questions?
Building a stone flower bed on a slope can feel tricky, but these answers will help you tackle common challenges with confidence! Whether you're worried about erosion, timing, or design tweaks, we’ve got you covered.
Can I build a stone flower bed on a steep slope?
The key is terracing—creating flat layers with retaining walls or stacked stones. For slopes over 30°, use rebar and concrete for stability, or opt for stepping stones to break the grade gently. Always check local erosion laws if your slope is extreme!
What’s the best time of year to build a stone flower bed?
Spring or early fall are ideal! Spring lets plants establish roots before summer heat, while fall avoids drought stress. Avoid winter (frost heave) and peak summer (watering challenges). Pro tip: Start with bare soil—wait until you’ve planted flowers to add mulch or stones.
Are there cheaper alternatives to heavy stone retaining walls?
Yes! Try these budget-friendly options:
- Cinder blocks or pavers (stacked with soil between layers).
- Logs or branches (natural, decomposable, but less permanent).
- Gabion baskets (wire cages filled with rocks—durable and stylish!).
- Native plants with deep roots (like shrubs) to stabilize soil naturally.
How do I prevent erosion after building my flower bed?
Erosion is the #1 enemy of sloped beds! Layer landscape fabric under stones, plant ground covers (like creeping thyme), and add swales (shallow trenches) to redirect water. For extra protection, use erosion-control blankets (biodegradable mats) until plants take root.
What flowers thrive in sloped stone beds with limited soil?
Choose drought-tolerant, shallow-rooted perennials like:
- Sedum (Stonecrop) – Thrives in crevices!
- Lavender – Loves well-draining slopes.
- Russian Sage – Drought-resistant and tall.
- Ice Plant (Delosperma) – Spills beautifully over edges.
My stones keep shifting—how do I secure them?
Use landscape adhesive or masonry pins for small stones. For larger rocks, backfill with gravel (not soil) to improve drainage and lock them in place. If using pavers, add edging restraints to prevent spreading. Weed barrier fabric under stones also helps stabilize the base.
Wrapping up and next steps
Building a stone flower bed on a slope doesn’t have to be daunting—with the right techniques, you can create a stunning, gravity-defying garden that enhances your outdoor space. 🌿 By layering stones strategically, reinforcing edges, and choosing the perfect plants, you’ve got everything you need to transform a tricky slope into a showstopping landscape feature.
Now that you’re armed with the know-how, it’s time to roll up your sleeves and get creative! Start by sketching your design, gathering your materials, and taking it step by step. Every stone and plant you place will contribute to a masterpiece—so enjoy the process and watch your garden flourish!