
Tools
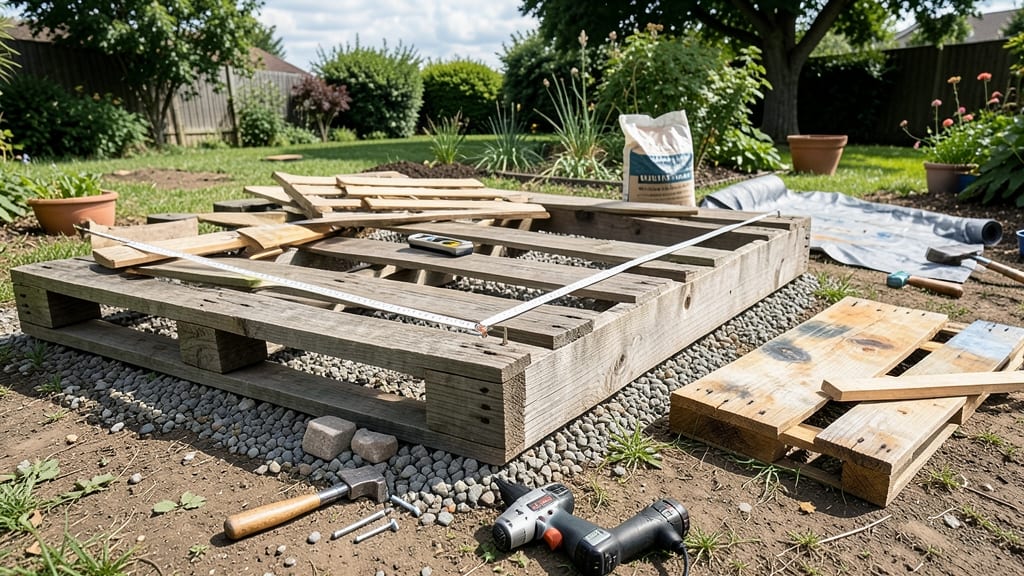
How to build a raised garden with pallets turns a pile of discarded wood into a sturdy, long-lasting planter in under an hour—no power tools needed. I built my first one in 45 minutes, and it’s still going strong after three growing seasons. The secret? Picking the right pallets and skipping the steps that slow beginners down. You’ll need four heat-treated pallets (HT stamped), a drill, outdoor screws, and a tape measure. Sanding isn’t mandatory—just scrub them clean first. The bed’s height (12-18 inches) controls drainage and accessibility, while the size depends on your space and what you’re growing. My 4x8-foot version fits perfectly in a corner. Assembly is simple: screw the pallets together at the corners, add corner braces for extra support, and line the bottom with landscape fabric to block weeds. The result? A durable planter that warms up faster in spring, drains well, and keeps soil contained—no more tilling or bending over. This setup works for vegetables, herbs, or flowers, and you can customize it with wood stain or paint if you want it to blend in. The real win? You’ll save money, reduce waste, and have a garden that’s easier on your back. Let’s get those pallets stacked!
📚 In This Guide
- What you need
- Instructions
- Tips and common mistakes
- Wrapping up and next steps
What you need
- ● Pallets: 4-6 heat-treated or chemically untreated wooden pallets (standard size: 40" x 48"). Check for sturdiness—avoid cracked or splintered wood.
- ● Screws: 2-2.5" deck screws or exterior-grade screws (100-150 screws total, depending on pallet size). Opt for stainless steel or galvanized for longevity.
- ○ Wooden boards (optional but recommended): 1x6 or 1x8 untreated lumber (4-6 boards, 8' long) for a cleaner finish or to reinforce edges.
- ● Landscape fabric: 1 roll (to line the bottom and block weeds).
- ○ Gravel or pavers (optional): 2-3 bags of crushed gravel (1/2" size) or pavers for drainage and stability.
- ○ Wood stain or sealant (optional): Non-toxic, exterior-grade stain to protect wood from weather (e.g., AFM Safecoat).
- ● Drill/driver with phillips and flathead bits.
- ● Measuring tape and pencil.
- ● Level (to ensure your garden is even).
- ● Hacksaw or circular saw (if cutting pallets or boards).
- ● Sandpaper (80-120 grit) or electric sander (to smooth rough edges).
- ● Work gloves and safety glasses.
- ● Staple gun (if attaching landscape fabric).
- ● Flat, level ground in a sunny spot (6+ hours of sunlight daily for most veggies).
- ● Access to water (hose or irrigation system nearby).
- ● Basic DIY skills (or a willing helper—teamwork makes the dream work! 😉).
- ● Pro tip: 💡 Test your pallets for chemical treatment by scratching the wood—if it’s stamped "HT" (heat-treated), it’s safe for gardening!
Step-by-step instructions for building a raised pallet garden
Here's how to create a sturdy, functional raised bed using just a few materials and basic tools.
Select and Prepare Your Pallets
Choose HT-treated pallets (marked with "HT" stamps) to avoid toxic chemicals. Look for pallets in good condition with minimal splintering or rot. I prefer 40-inch by 48-inch pallets because they fit most spaces and provide enough growing area for four plants. Remove any loose nails or screws with pliers to prevent injuries later.
Flip the pallets so the wooden slats face upward—this creates the planting surface. If the pallets are dirty, sweep off debris and wipe down with a damp cloth. You'll want clean wood to prevent introducing pests or diseases to your garden. Stack two pallets side by side to create a 4-foot by 4-foot bed—this width makes it easy to reach the center without stepping inside.
Assemble the Frame and Add Support
Place the two pallets parallel to each other, leaving a 2-inch gap between them. This gap allows roots to spread slightly between sections. Secure the pallets together by screwing 2x4 lumber across the top and bottom edges. Use 3-inch deck screws to attach the lumber, ensuring the frame stays square and sturdy.
For extra stability, add corner braces or additional 2x4 supports along the sides. This prevents the bed from wobbling or shifting over time. I like to pre-drill holes in the pallets before screwing to avoid splitting the wood. Test the frame by gently pushing down on the corners—if it feels solid, you're ready for the next step.
Line the Inside with Landscape Fabric
Cut a piece of landscape fabric to fit the interior of your pallet frame, leaving a 2-inch overhang on all sides. This fabric prevents weeds from growing up through the pallet slats while still allowing water and air to reach the soil. Staple the fabric to the inside edges of the pallets, pulling it taut to avoid wrinkles.
If you're concerned about the fabric blocking drainage, poke a few small holes in the bottom corners of the fabric with a utility knife. This ensures excess water can escape without clogging the pallet's natural gaps. The fabric will also help contain soil as you fill the bed, keeping it neat and tidy.
Fill the Bed with Soil and Planting Mix
Fill the pallet bed with a 6-inch layer of coarse material first—this could be cardboard, straw, or small branches—to improve drainage and aeration. Then, add a 4-inch layer of compost to enrich the soil. Top this with a 6-inch layer of high-quality potting mix or garden soil, blending it lightly with the compost to create a nutrient-rich growing medium.
Leave a 1-inch gap between the soil and the top of the pallet to prevent erosion during watering. Moisten the soil mixture thoroughly before planting to help it settle. You'll notice the soil compact slightly as you water it, so add a little more if needed to reach the ideal level. This layering ensures your plants have both drainage and nutrients from the start.
Plant and Maintain Your Raised Garden
Arrange your plants according to their sunlight and spacing needs. For example, place taller plants like tomatoes or peppers at the back and shorter herbs like basil or lettuce toward the front. Water the plants deeply right after planting to help them establish roots in the new soil. Raised beds dry out faster than ground-level gardens, so I water mine twice daily during hot weather.
Add a 1-inch layer of mulch on top of the soil to retain moisture and suppress weeds. Check the soil moisture daily by sticking your finger 1 inch deep—if it feels dry, it's time to water. Over time, the compost will break down, so top off the bed with fresh compost or mulch every season to keep the soil fertile and productive.
Tips & tricks for perfect raised pallet gardens
Building a raised garden with pallets is simpler than you think—here are the key details that make all the difference between a flimsy planter and one that lasts for years.
Pallet Selection: Always choose pallets marked "HT" for heat-treated wood, which means they're free from harmful chemicals. I've learned the hard way that skipping this step can introduce toxins to your soil—your plants will thank you for the extra effort. Pay special attention to the wood's condition: avoid pallets with visible rot, mold, or excessive splintering. A quick test is to press on the wood—if it feels soft or spongy, it's not sturdy enough for your garden.
Frame Stability: The 2-inch gap between pallets isn't just for looks—it allows roots to spread slightly between sections while preventing soil from spilling through. When securing your frame with 2x4 lumber, pre-drilling holes is a game-changer. It prevents the pallets from splitting when you drive in the 3-inch deck screws. I like to use a power drill set to a low speed for cleaner, more precise holes. Test your frame's stability by pressing down on each corner—it should feel rock-solid, not wobbly.
Soil Layering: The 6-inch layer of coarse material at the bottom isn't just for drainage—it's also where beneficial microbes will thrive. I recommend using a mix of cardboard (for structure) and straw (for aeration). When adding the 6-inch layer of potting mix, blend it gently with the 4-inch compost layer to create a uniform growing medium. This layering prevents compaction and gives your plants the perfect balance of nutrients and airflow. The 1-inch gap at the top is crucial too—it prevents erosion when you water.
Maintenance Wins: That 1-inch layer of mulch isn't just decorative—it's your secret weapon against weeds and moisture loss. I've found that straw mulch works best because it breaks down slowly, adding organic matter to your soil over time. For watering, stick your finger 1 inch deep into the soil daily. If it feels dry, that's your cue to water. Raised beds dry out faster than ground-level gardens, so don't be afraid to water twice daily during hot weather—your plants will reward you with healthier growth.
Pro Tips for Build A Raised Garden With Pallets
- Building a raised garden with pallets is simpler than you think—here are the key details that make all the difference...
- Pallet Selection: Always choose pallets marked "HT" for heat-treated wood, which means they're free from harmful chem...
- Frame Stability: The 2-inch gap between pallets isn't just for looks—it allows roots to spread slightly between secti...
Frequently asked questions
Got questions about building your pallet raised garden? You’re not alone! Here are answers to the most common concerns—so you can get growing with confidence.
Can I use any pallets for a raised garden?
Not all pallets are safe for gardening! Look for the HT (Heat Treated) stamp—avoid chemically treated pallets (marked MB or CH). Sand rough edges and line the bottom with landscape fabric to prevent soil leakage. Pro tip: Check for splinters or cracks before assembly!
How long will this project really take?
With pre-cut pallets and basic tools, most DIYers finish in 45–60 minutes. Break it into steps: assembly (20 mins), lining (10 mins), and filling soil (15 mins). Rush jobs? Skip decorative touches like paint—focus on function first!
What’s the best soil mix for pallet gardens?
Use a 50/50 blend of topsoil and compost (or coconut coir for moisture retention). Avoid pure garden soil—it compacts easily. Add perlite or vermiculite for drainage if your area gets heavy rain. Test soil pH (aim for 6.0–7.0) for veggies like tomatoes or herbs.
Will pests invade my pallet garden?
Pallets can attract termites or rodents if not sealed properly. Prevent issues by:
- Elevating pallets 6+ inches off the ground (use bricks or cinder blocks).
- Treating wood with food-safe sealant (like linseed oil).
- Avoiding mulch directly against pallet sides.
Monitor for chewed leaves or sawdust—early action saves your harvest!
When’s the best time to plant in a pallet garden?
Timing depends on your climate! Spring (after last frost) is ideal for most veggies, but pallets warm up faster than ground soil—so you can start seeds 2–3 weeks earlier. In hot zones, plant heat-tolerant crops (like okra or Swiss chard) in late summer. Check your frost dates for precision!
Can I reuse pallets for multiple growing seasons?
Yes! With care, pallet gardens last 3–5 years. After each season:
- Remove old soil (don’t compost it—it may harbor diseases).
- Sand down rough spots and reapply sealant.
- Rotate crops to prevent soil depletion.
When pallets degrade, repurpose them as compost bins or mulch barriers!
Wrapping up and next steps
Building a raised garden with pallets is a budget-friendly, eco-conscious way to grow your own fresh produce—without breaking the bank or the back! 🌱 With just a few tools, some sturdy pallets, and a little elbow grease, you’ve got a durable planter ready for action in under an hour.
Whether you’re a seasoned gardener or a newbie with green thumbs (literally!), this project proves that great things grow from simple ideas.
Now that you’re armed with the know-how, roll up your sleeves and start building! Once your garden is up and running, consider adding a layer of mulch or companion plants to maximize your harvest. Happy gardening—your future salads (and Instagram-worthy greens) will thank you! 🥬✨