
Tools
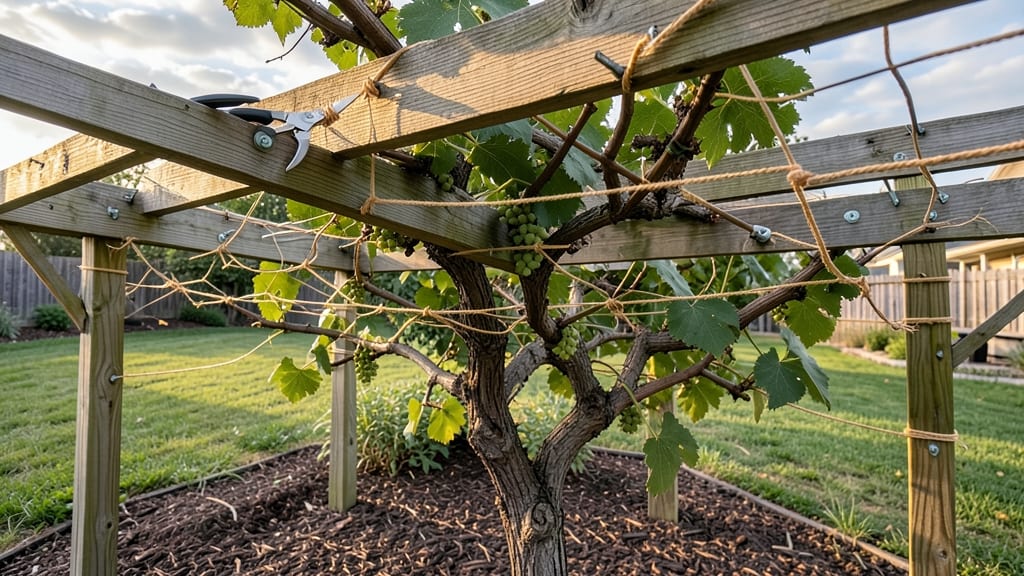
Building a muscadine grape trellis changed how I grow these heavy vines. 🌱 The right support transforms wild, tangled growth into orderly rows that produce more grapes with less disease. My first attempt collapsed under the weight—until I learned the key spacing and material tricks.
You’ll need 4×4 posts buried 2 feet deep, 2×4 rails spaced 3 feet apart, and either wood, metal, or PVC for the trellis frame. Muscadine vines need stronger support than table grapes—they can weigh 10+ pounds per cluster when ripe.
I use cedar for rot resistance, but galvanized metal lasts even longer in wet climates. By the end of summer, your vines will climb 12-15 feet with proper training, and you’ll harvest cleaner, sun-ripened fruit that stores better.
The trellis also improves airflow, cutting down on mildew—the bane of muscadine growers. Avoid these mistakes: too-narrow spacing (vines strangle each other) or flimsy materials (they’ll sag under fruit weight). With the right setup, your trellis will last 10+ years with minimal maintenance.
📚 In This Guide
- What you need
- Instructions
- Tips and common mistakes
- Wrapping up and next steps
What you need
- ● T-posts or concrete anchors: 8–12 (5/8" diameter, 6–8 ft long) for stability.
- ● Trellis wire: 16–20 gauge, galvanized or vinyl-coated (100–150 ft total).
- ○ Wooden posts (optional but recommended): 4x4 pressure-treated lumber (6–8 ft tall, 4–6 posts total).
- ● Crossbars or horizontal supports: 2x4 or 4x4 lumber (cut to trellis width).
- ● Concrete (if using anchors): 40-lb bag per anchor (or quick-setting mix).
- ○ Post caps (optional): Metal or plastic caps to protect tops of posts.
- ● Post hole digger or auger (for digging 12–18" deep holes).
- ● Level (to ensure trellis is straight).
- ● Hammer or mallet (for driving T-posts or stakes).
- ● Wire cutters or bolt cutters (for trimming trellis wire).
- ● Drill/driver (for securing crossbars or hardware).
- ● Measuring tape and pencil (for precise cuts).
- ● Gloves and safety glasses (protection is key!).
- ● Clear the trellis area of debris and rocks (muscadines hate competition!).
- ● Check local frost dates—build before planting season (early spring).
- ● Know your muscadine variety’s mature spread (some need 12+ ft of width!).
- ● Plan for drainage—avoid low-lying or soggy spots.
Step-by-Step instructions for building a muscadine grape trellis
Here's how to create a sturdy, long-lasting frame that handles muscadine vines' weight and sprawl.
🪴 Step 1: Plan and Mark Your Trellis Layout
Muscadine grapes need a 10-12 foot tall trellis for full growth, with 5-6 foot wide spacing between vines. Use a measuring tape to mark your layout—dig a 4x4 post hole digger into the ground at each corner and along the center line every 6 feet. I like to sketch a simple diagram first to visualize how the vines will spread.
Check local frost lines and prevailing wind directions—place the trellis where it won’t be exposed to harsh winter winds. The posts should go at least 2 feet deep to prevent leaning. If your soil is rocky, dig holes 6 inches wider than the post diameter to ensure stability.
☀️ Step 2: Install Posts and Attach Horizontal Rails
Set your 4x4 pressure-treated posts into the holes, using a level to keep them perfectly vertical. Fill each hole with concrete mix up to 6 inches below ground level—this prevents rot and keeps posts secure. Let the concrete cure for 24 hours before proceeding.
Once posts are set, attach 2x4 horizontal rails at 3-foot intervals vertically, using galvanized deck screws (at least 3 inches long). The top rail should be 1 foot below the trellis peak to allow vine growth upward. I reinforce each connection with metal corner brackets—muscadine vines get heavy, and you don’t want rails sagging mid-season.
✂️ Step 3: Add Cross Supports and Vine Training Wires
Install diagonal cross supports (cut from 2x4 lumber) between posts at 4-foot intervals to create a grid. These prevent the trellis from bowing under the weight of ripening grapes. Use stainless steel lag bolts to secure them—rust is the last thing you want near grapevines.
Stretch 12-gauge galvanized wire horizontally across the trellis at 18-inch intervals, securing it with wire staples every 12 inches. The top wire should be 6 inches below the peak, with subsequent wires spaced evenly downward. This gives vines multiple layers to climb and prevents overcrowding. I like to leave 6 inches of slack between wires to allow for natural vine expansion.
🌿 Step 4: Reinforce and Finish for Longevity
Apply a wood preservative to all lumber to protect against rot and insects. I use a linseed oil blend—it penetrates deep and lasts years. Seal the concrete bases with a waterproof membrane to prevent moisture wicking into the wood.
Finally, add grapevine trellis netting or twine between wires for extra support. Muscadine grapes can weigh up to 2 pounds per cluster, so the more support, the better. Test the trellis by gently pulling on each wire—it should hold firm without bending. If it wobbles, add more cross braces or deeper post anchors.
Tips & tricks for building a sturdy muscadine trellis frame
Between us, a few small adjustments can turn a good trellis into one that lasts a decade. Here's what I've learned the hard way—and how to avoid my mistakes.
Post Placement Precision: In Step 1, when marking your layout, I can't stress enough how critical those 2-foot deep post holes are. Use a level at every stage—even a slight lean will cause problems when vines mature. If your ground is uneven, dig deeper on the low side to maintain that perfect vertical. For rocky soil, I've found that widening holes by 6 inches beyond the post diameter makes all the difference in stability—trust me, you'll thank yourself when winter winds hit.
Concrete Curing Strategy: That 24-hour cure time for concrete is non-negotiable, but here's the pro move: mix in a concrete additive designed for frost resistance if you're in a cold climate. I also like to dampen the concrete slightly before pouring—it helps prevent cracking as it sets. Pro tip: Cover the concrete with plastic for the first 24 hours to keep moisture in and speed up curing.
Wire Tension Technique: When stretching your 12-gauge galvanized wire in Step 3, leave that 6 inches of slack between staples—but don't just eyeball it. Use a measuring tape to verify each section. I've seen trellises sag because wires were pulled too tight, restricting vine growth. The slack allows for natural expansion while still providing support. For extra durability, I use stainless steel staples instead of regular ones—they won't corrode near the vines.
Seasonal Maintenance: After completing your trellis, schedule a quick inspection every 6 months. Check for loose screws, rust on metal components, and any signs of wood rot. I like to apply a fresh coat of linseed oil blend in early spring and late fall—it keeps the wood protected without sealing out moisture. For the concrete bases, reapply the waterproof membrane every 2-3 years to prevent moisture wicking into the wood posts.
Pro Tips for Build A Muscadine Grape Trellis
- Between us, a few small adjustments can turn a good trellis into one that lasts a decade.
- Post Placement Precision: In Step 1, when marking your layout, I can't stress enough how critical those 2-foot deep post holes are.
- Concrete Curing Strategy: That 24-hour cure time for concrete is non-negotiable, but here's the pro move: mix in a concrete additive designed for frost resistance if you're in a cold climate.
Frequently asked questions
Got questions about building a muscadine grape trellis?
Here are answers to the most common concerns—from timing to troubleshooting—to help you get it right the first time.
When is the best time to build a muscadine grape trellis?
The ideal time is late winter or early spring, before new growth begins. This gives vines time to establish roots and climb the trellis by summer. If you’re in a warm climate, fall works too—just avoid extreme heat or frost.
How tall should my muscadine grape trellis be?
Aim for 6 to 8 feet tall for standard varieties, with 4 to 6 feet of horizontal wire or slats for vine support. Muscadines are heavy, so taller trellises (up to 10 feet) may need extra bracing for wind or fruit load.
Can I use a trellis for muscadines if I already have a fence?
Attach horizontal wires or wooden slats to your fence (spaced 12–18 inches apart) to create a trellis. Just ensure the fence is sturdy—muscadines can weigh 10+ pounds per vine when laden with fruit!
What should I do if my muscadine vines aren’t climbing the trellis?
Try tying vines gently to the trellis with soft twine or clips in early summer. If growth is slow, check for nutrient deficiencies (add compost) or overcrowding (prune competing vines). Muscadines grow fast—patience pays off!
Are there low-maintenance trellis alternatives for muscadines?
Yes! A permanent wooden arbor or metal T-post trellis with vertical wires requires minimal upkeep. For budget-friendly options, try bamboo stakes (replace every few years) or repurposed lattice panels attached to a sturdy post.
Wrapping up and next steps
Building a sturdy muscadine grape trellis is a rewarding project that ensures your vines thrive year after year! With the right materials—like T-posts, galvanized wire, or wooden frames—and a little elbow grease, you’ll create a durable system that supports heavy vines and even winter protection.
Whether you’re a seasoned gardener or a beginner, this DIY guide makes it simple and satisfying.
Now that you’ve got the blueprint, roll up your sleeves and start building! 🌱 Next, grab your tools and follow the steps to transform your vineyard into a well-supported, high-yielding haven. Happy growing!